First Flood — June 2023
The beginning. The full extent was not discovered until six weeks after the initial flood.
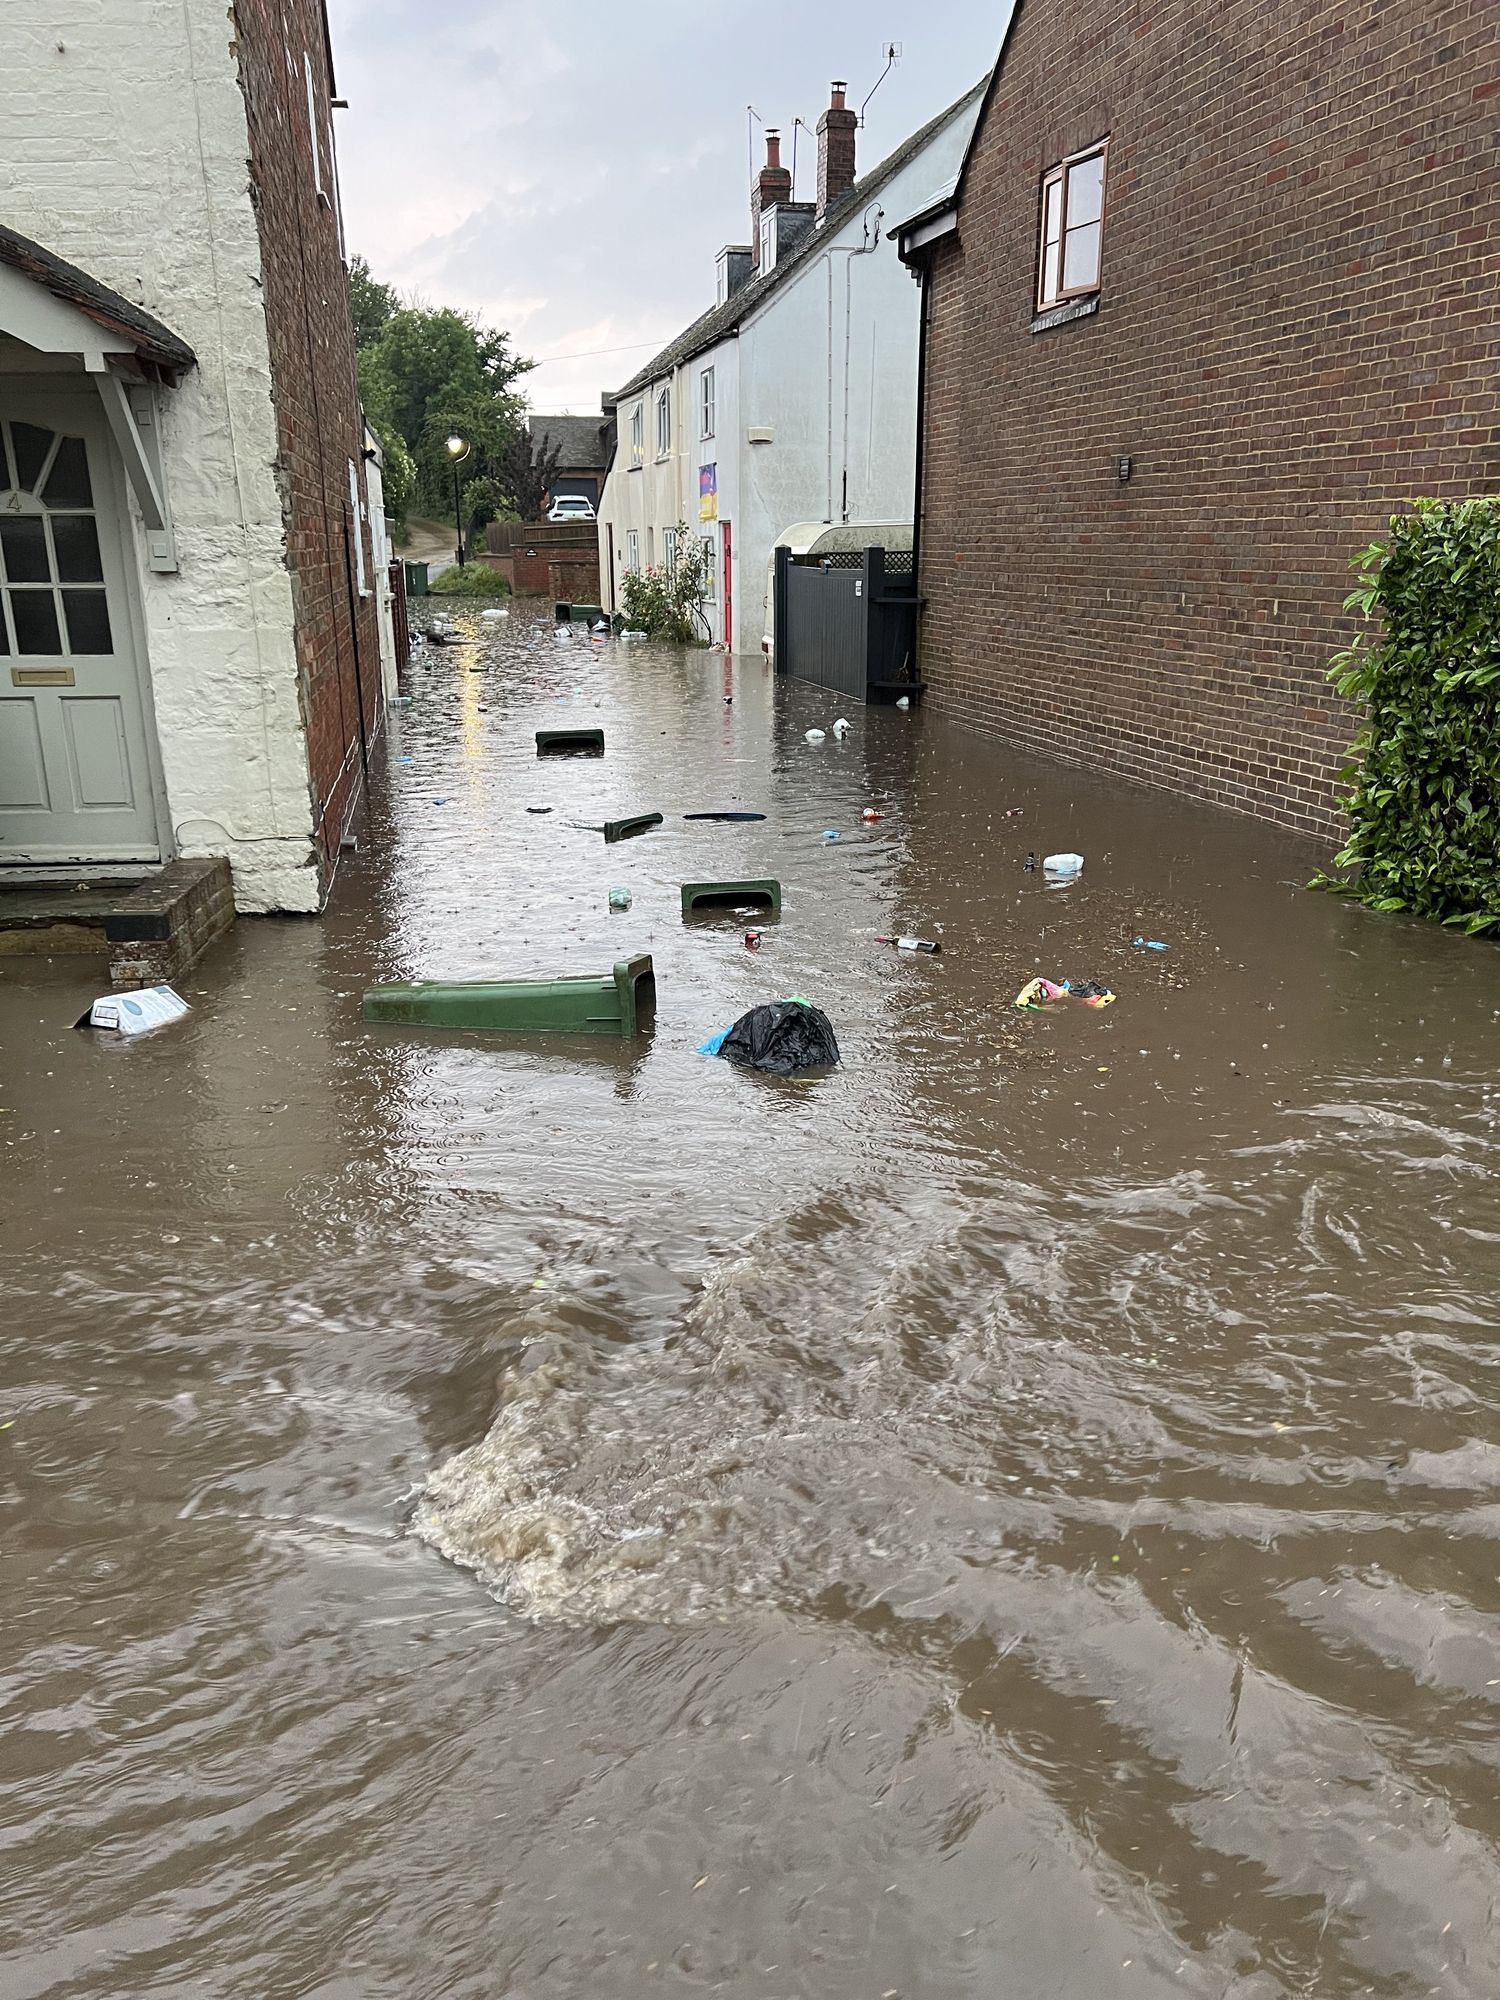
The scale of the flood — June 2023, Buckinghamshire
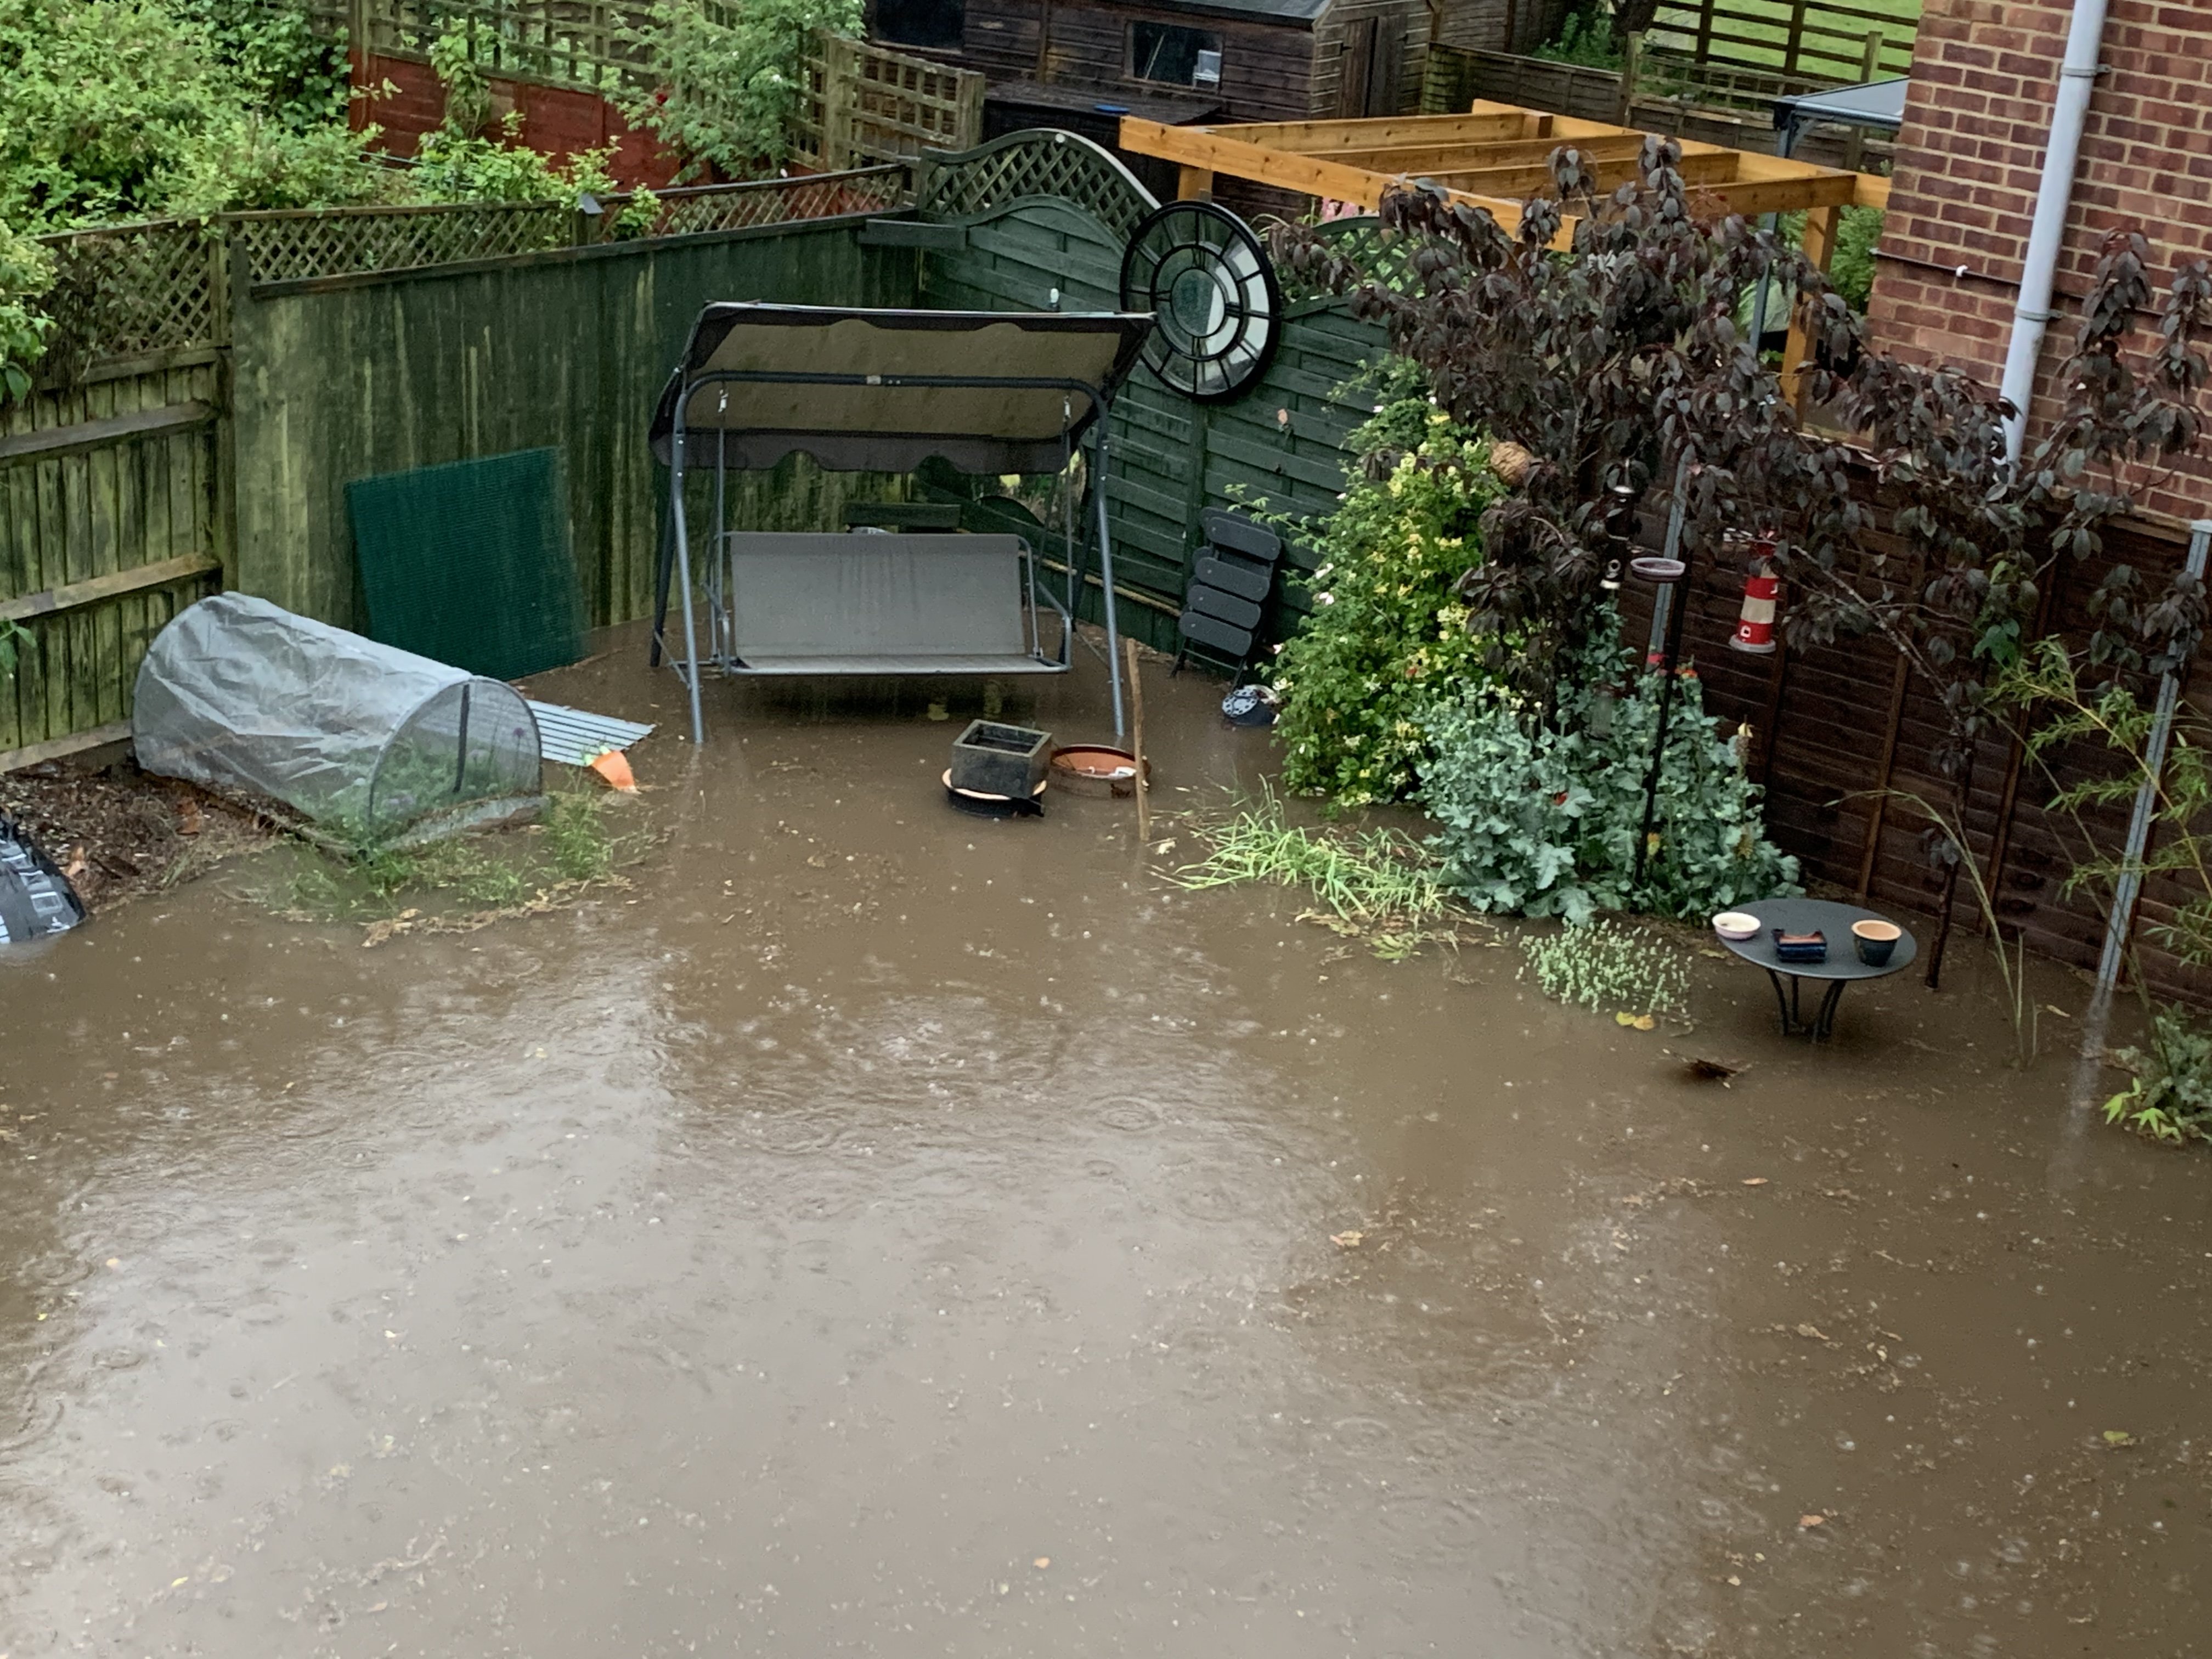
The garden — nowhere was untouched

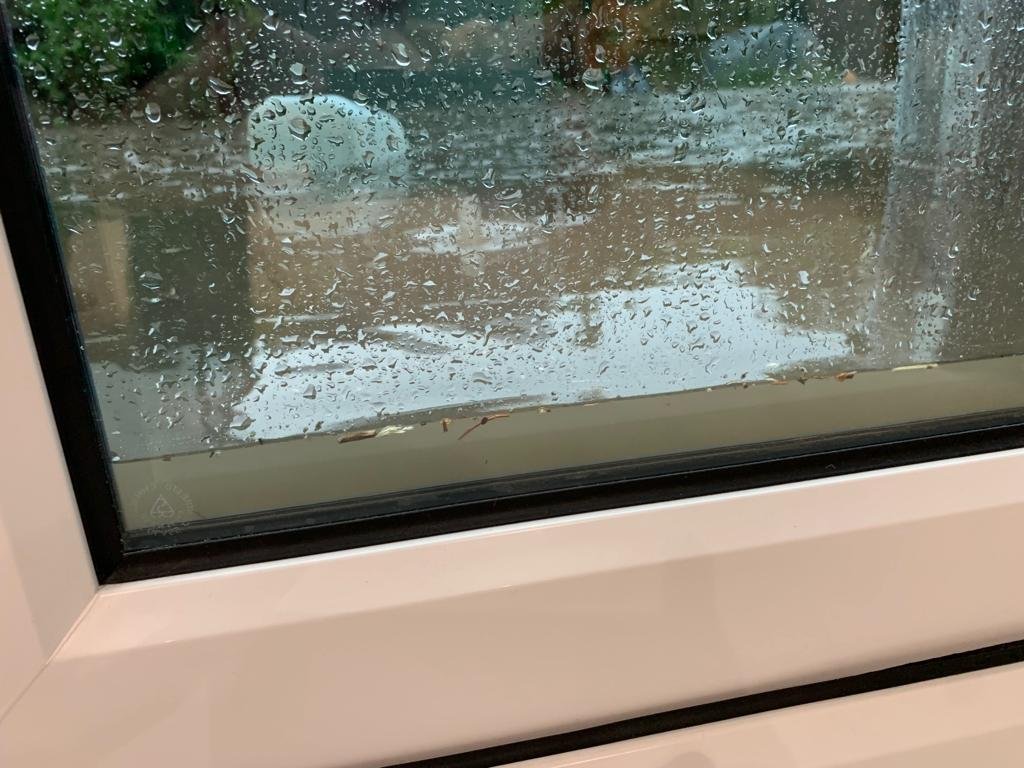
Water at the door — the moment it comes in
First flood water level — the extent only became clear in the days that followed
The Hidden Damage
Two months after the flood — the damage the insurer never properly assessed.
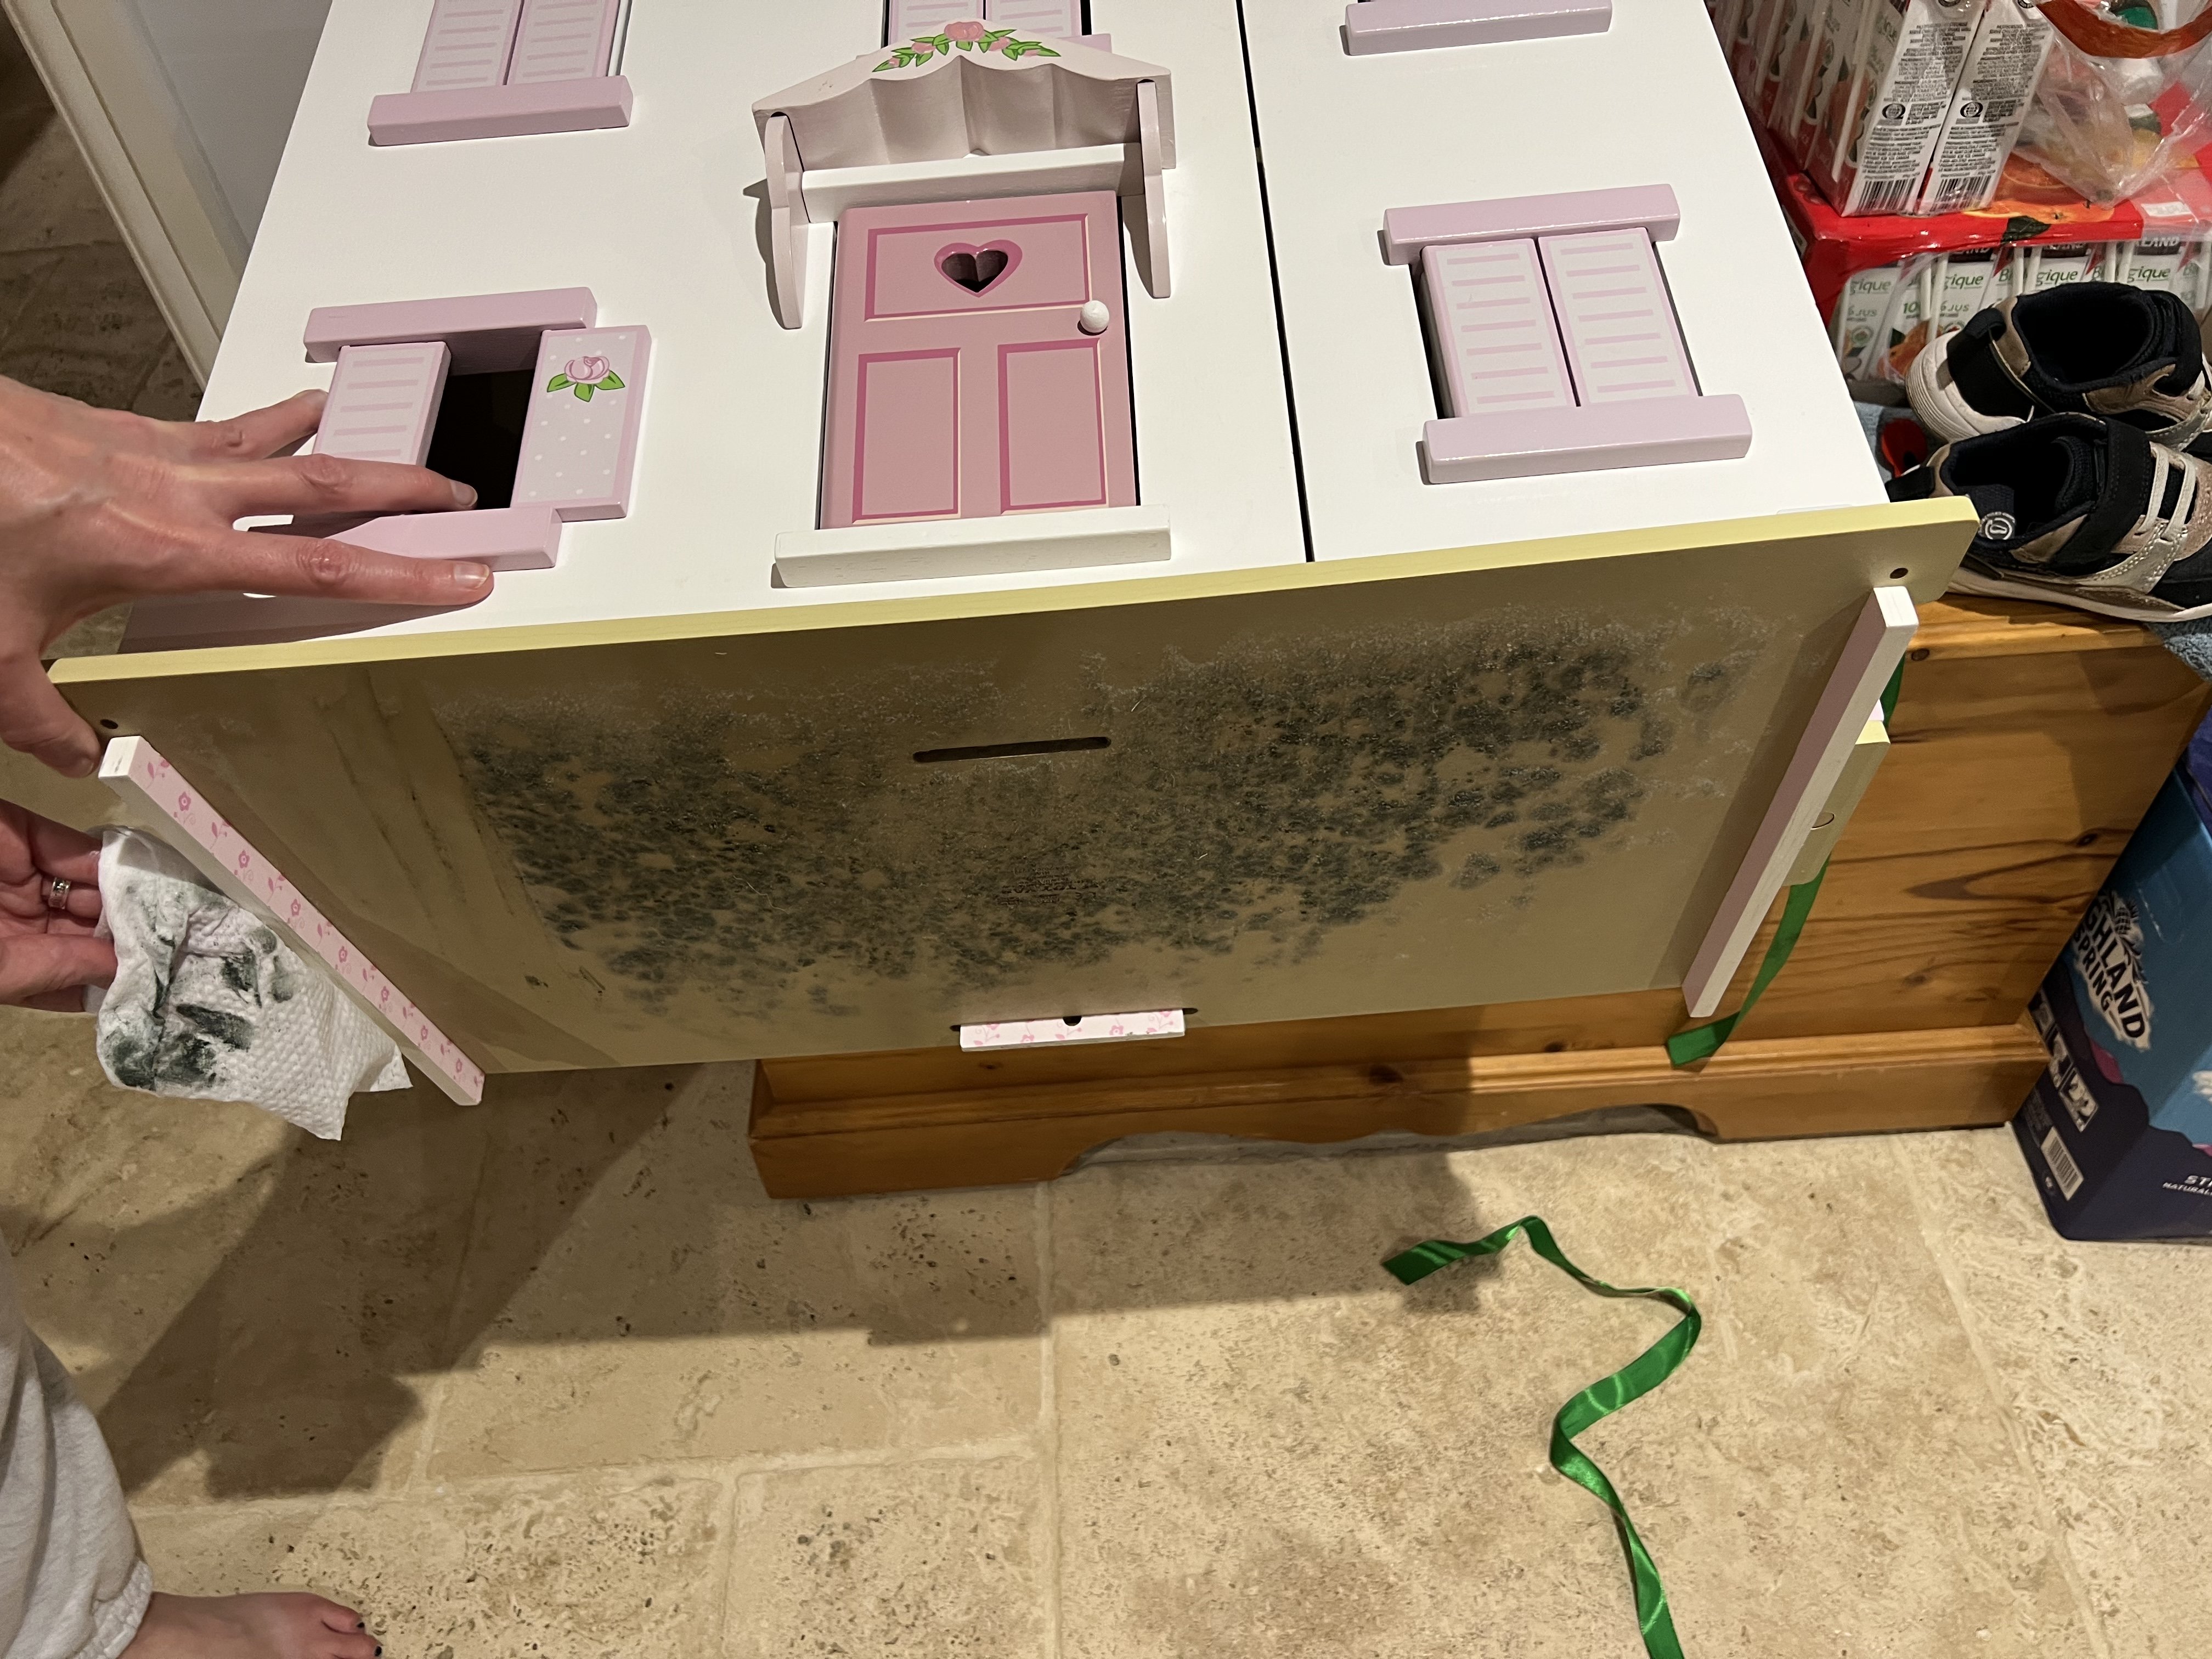
The hidden damage — mould on a child's dollhouse, discovered six weeks after the flood
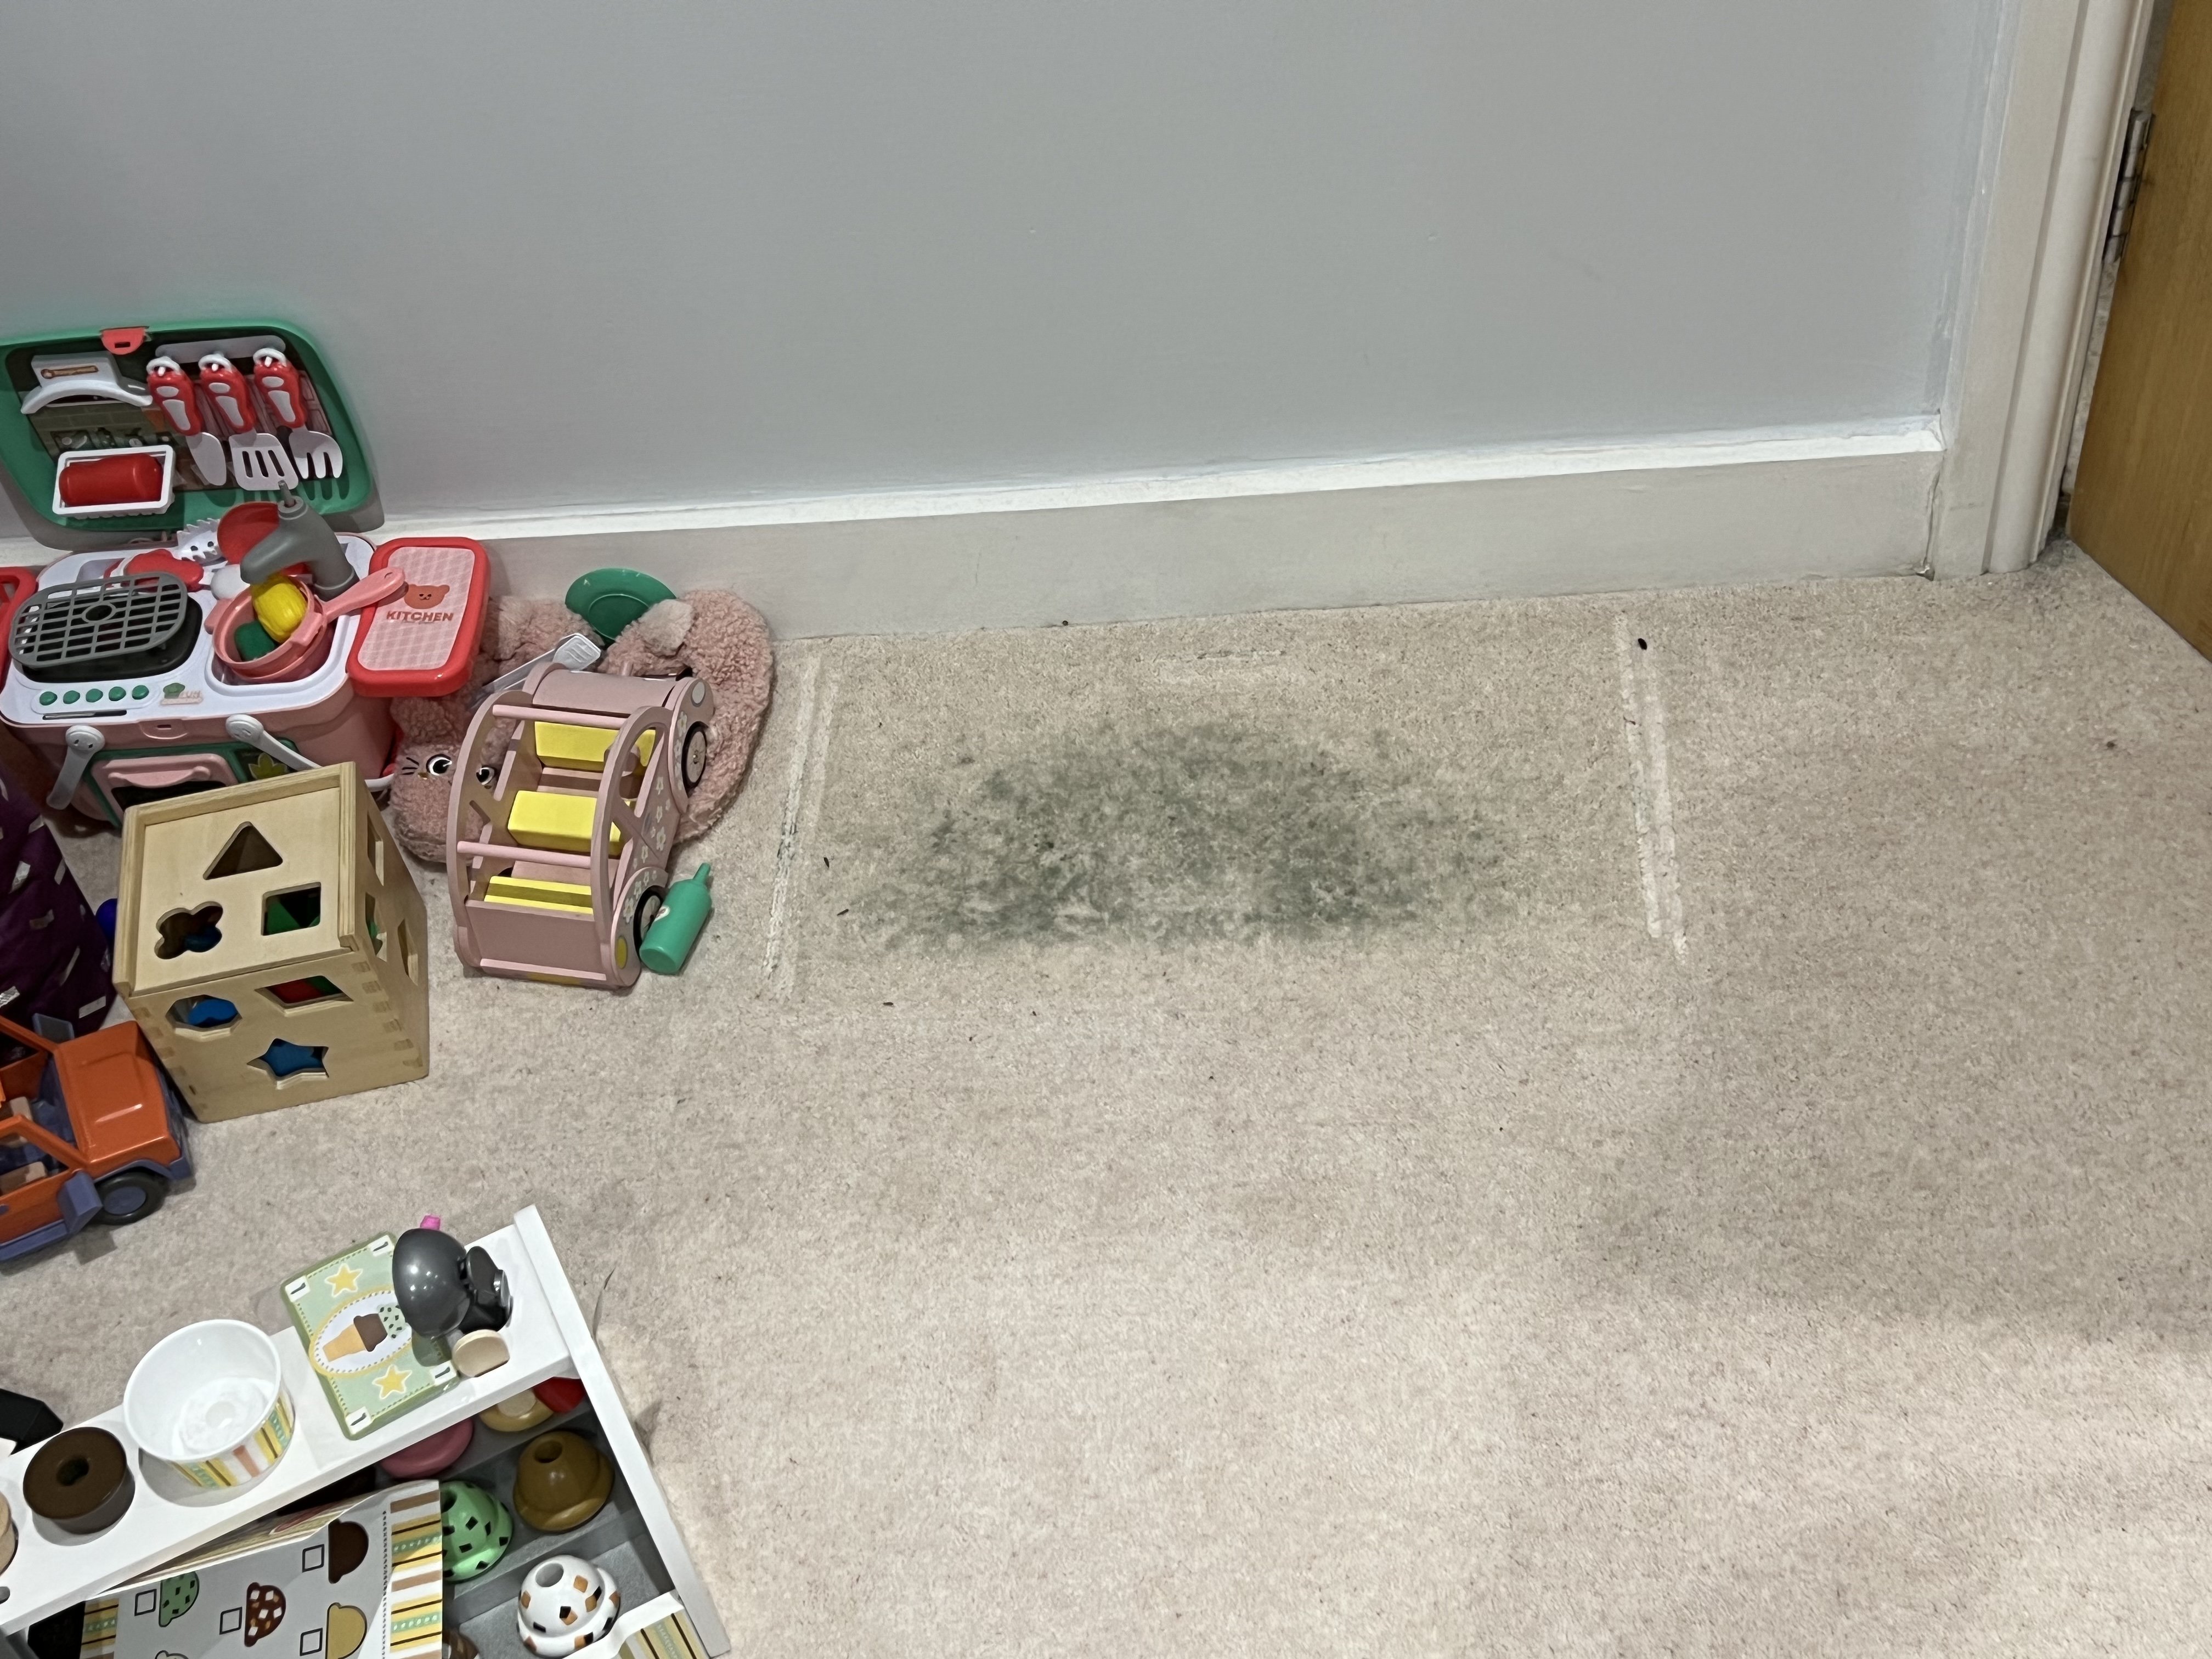
Mould spreading through the living room carpet — the damage the insurer didn't see for six weeks
Reinstatement After the First Flood
The insurer's contractor reinstated the property. Five weeks later it flooded again.
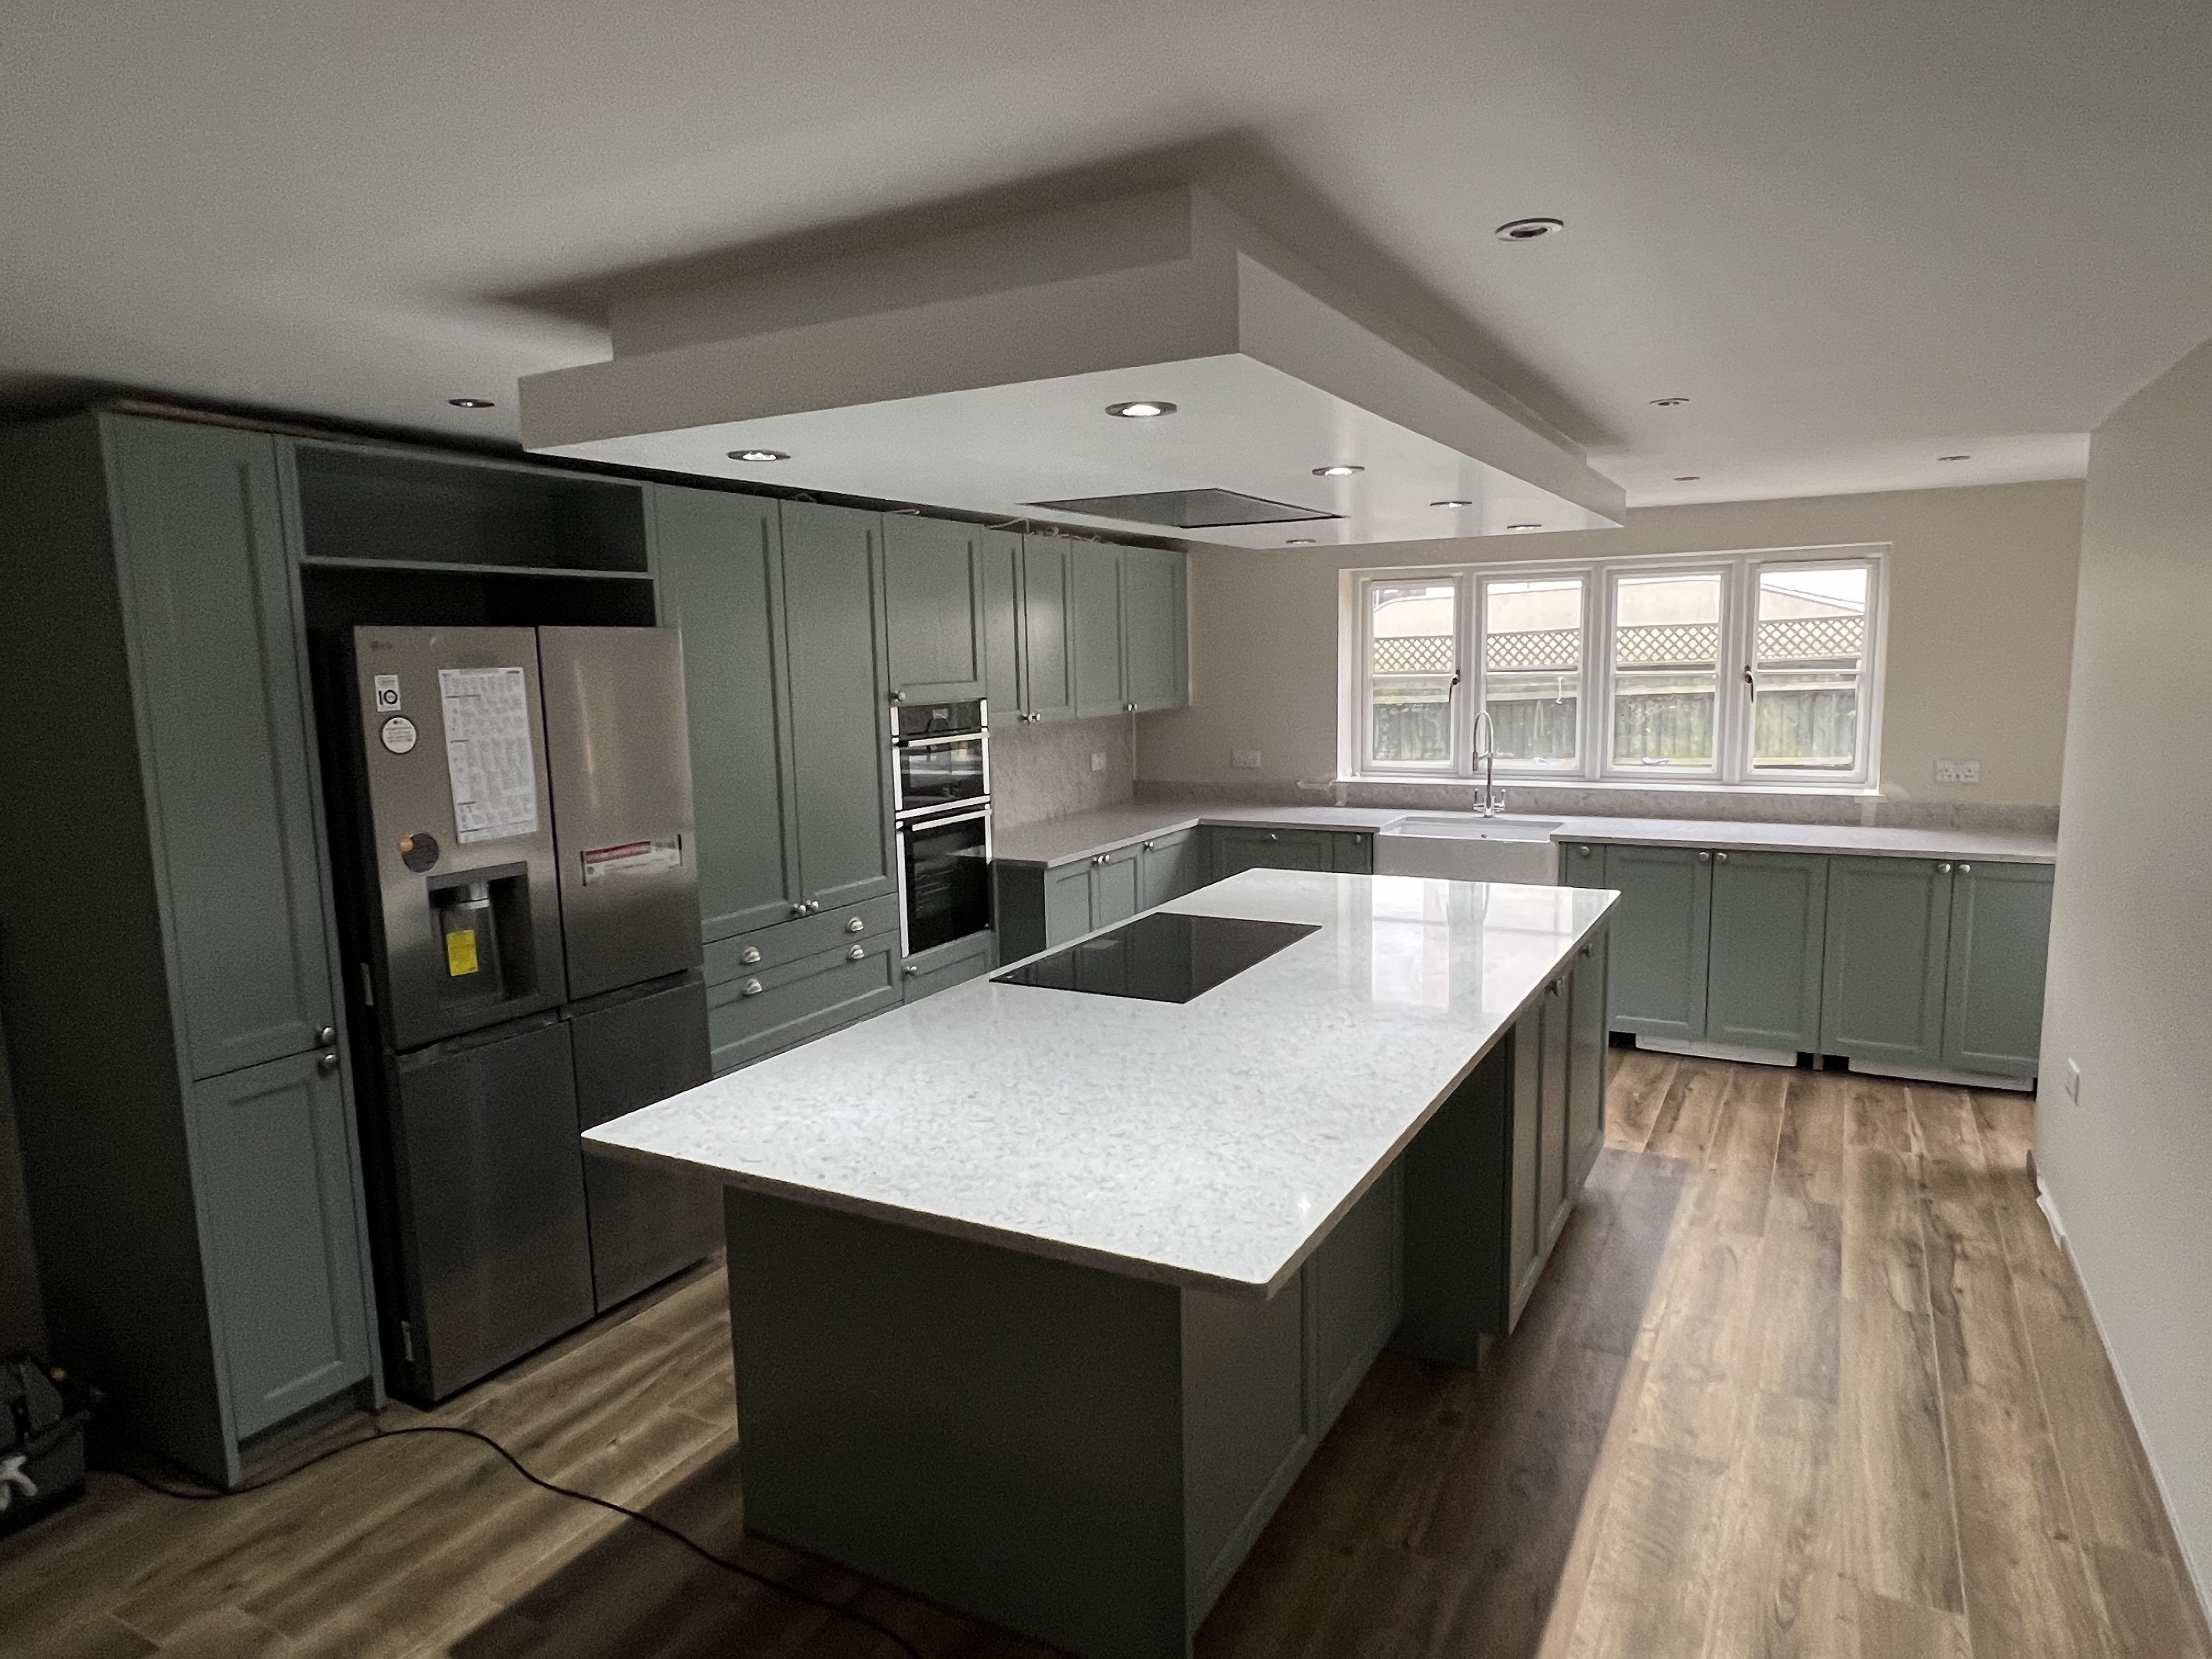
The completed kitchen — reinstated after the first flood, five weeks before the second
Second Flood — September 2024
Five weeks after moving back in. The insurer's contractor had cut the DPM during the first reinstatement.
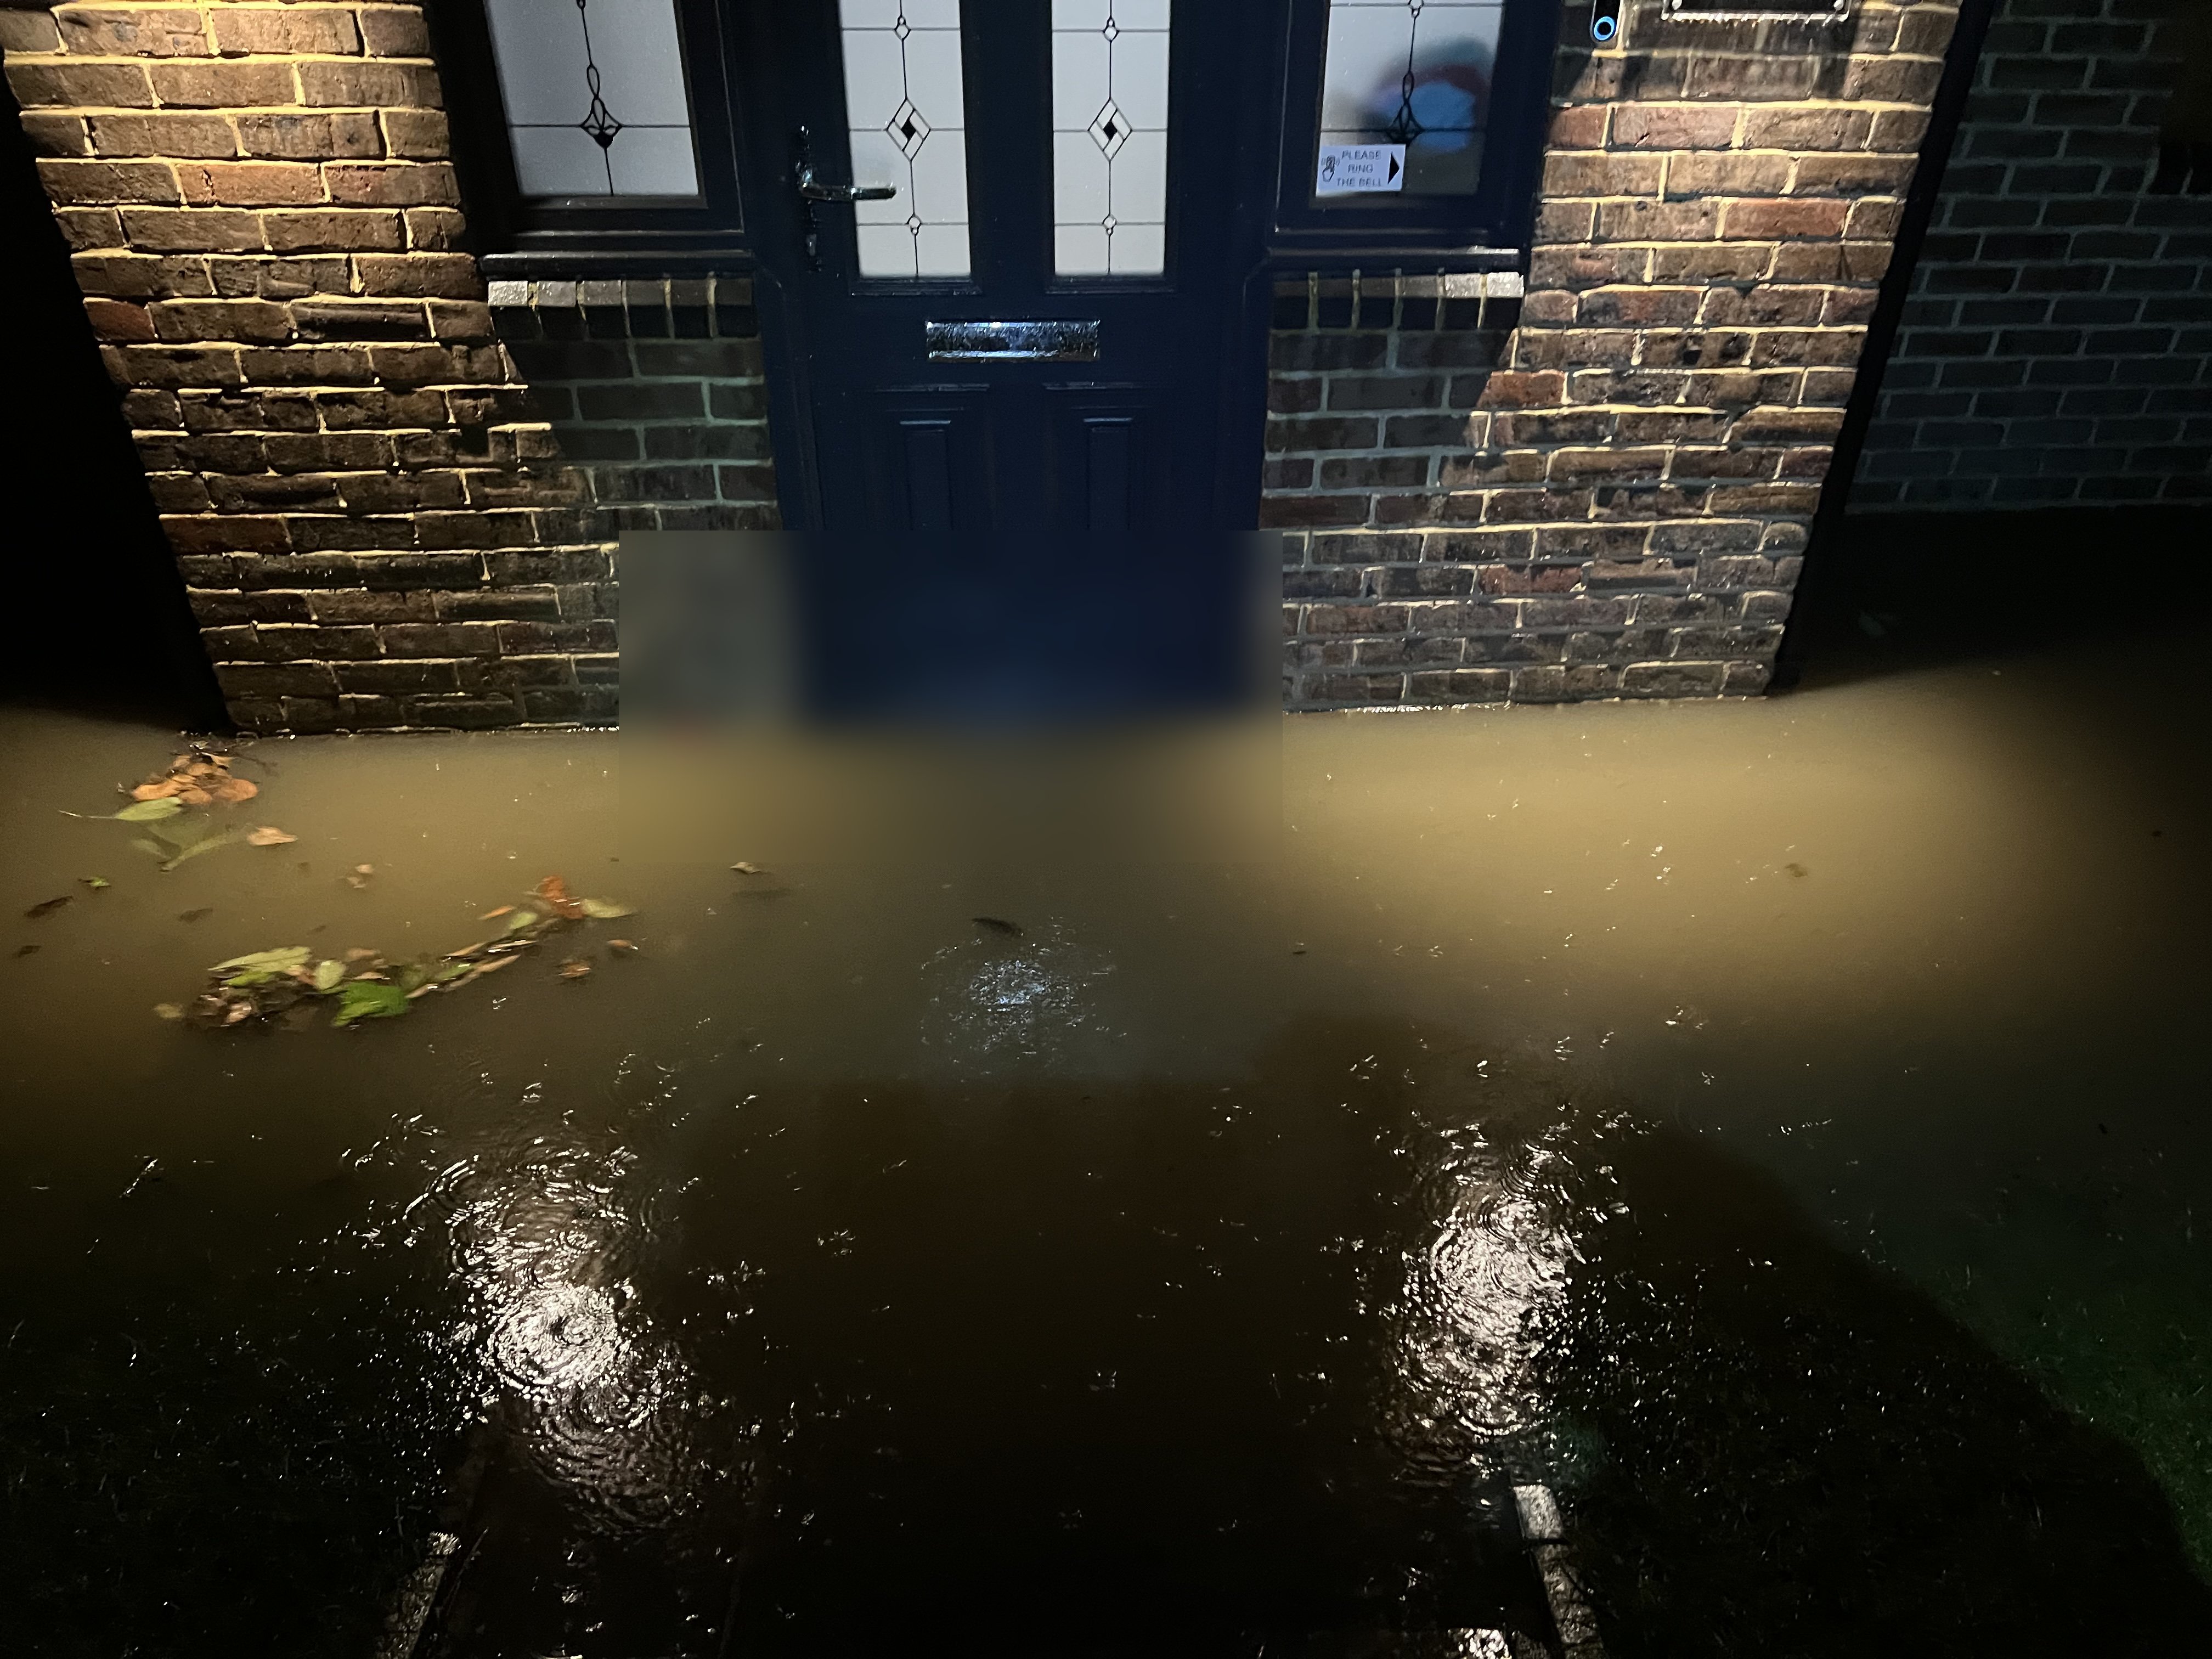
September 2024, 3am — floodwater at the front door again. The insurer's contractor had cut the DPM during the first rebuild
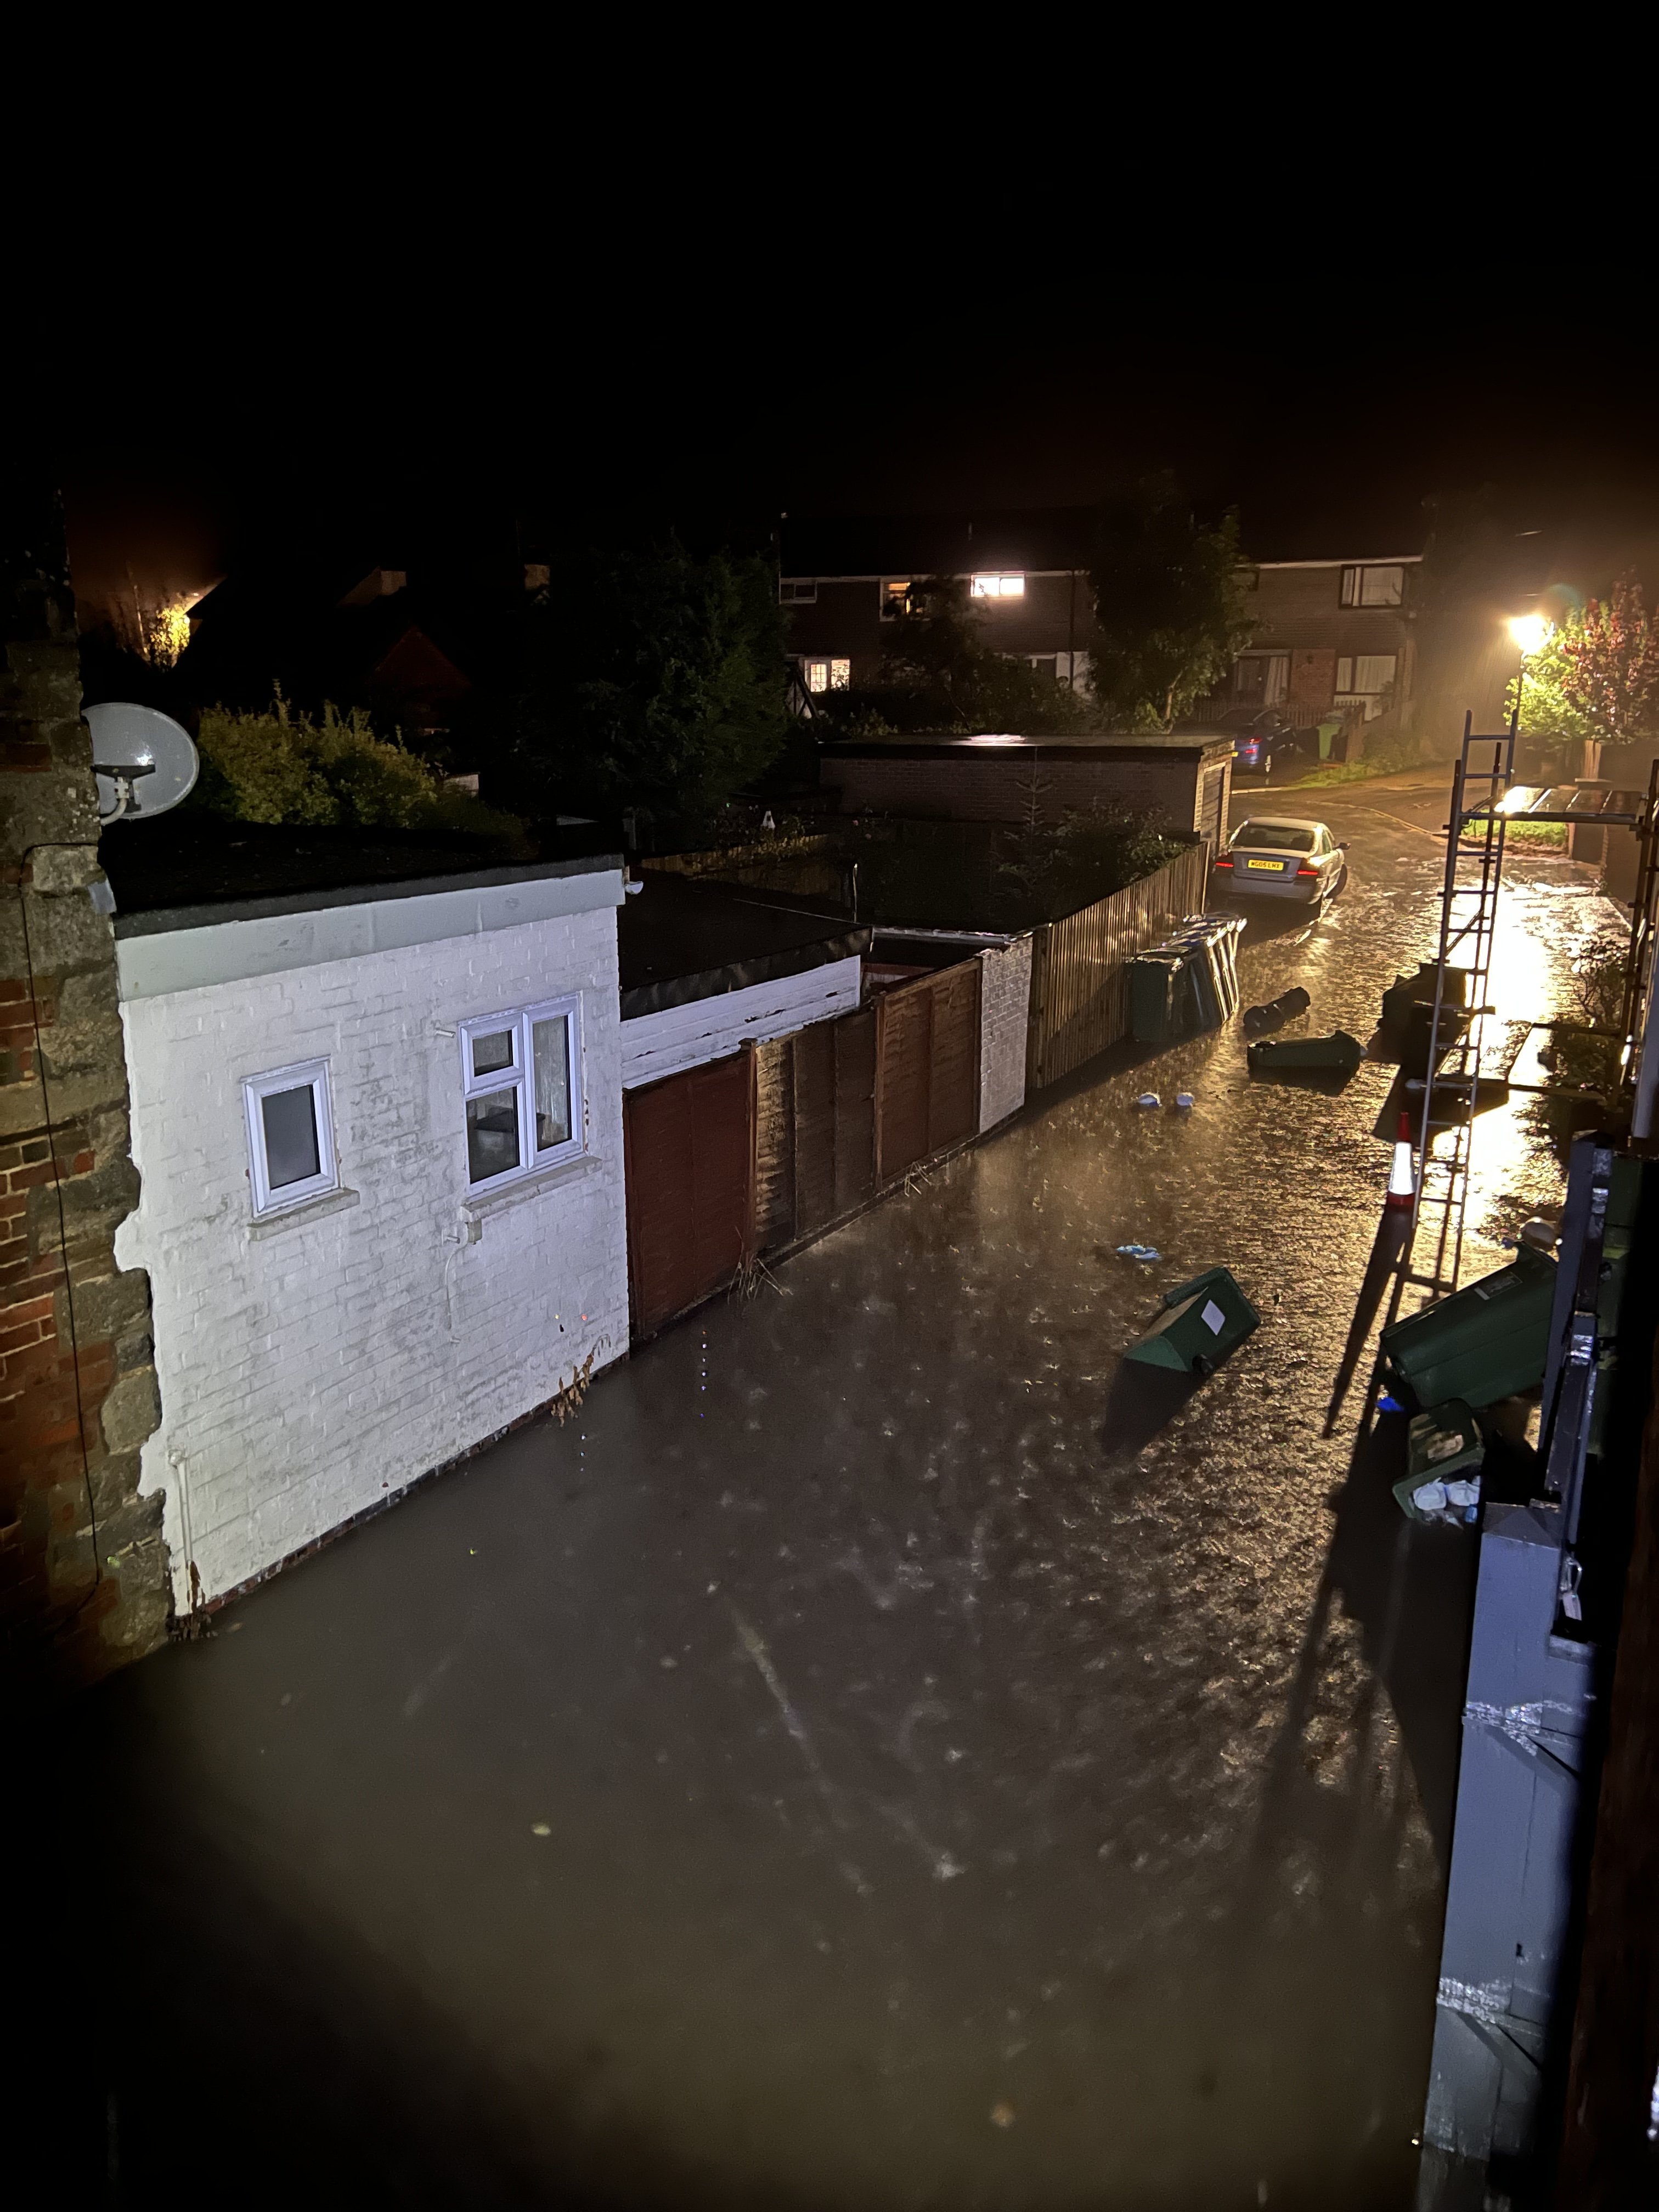
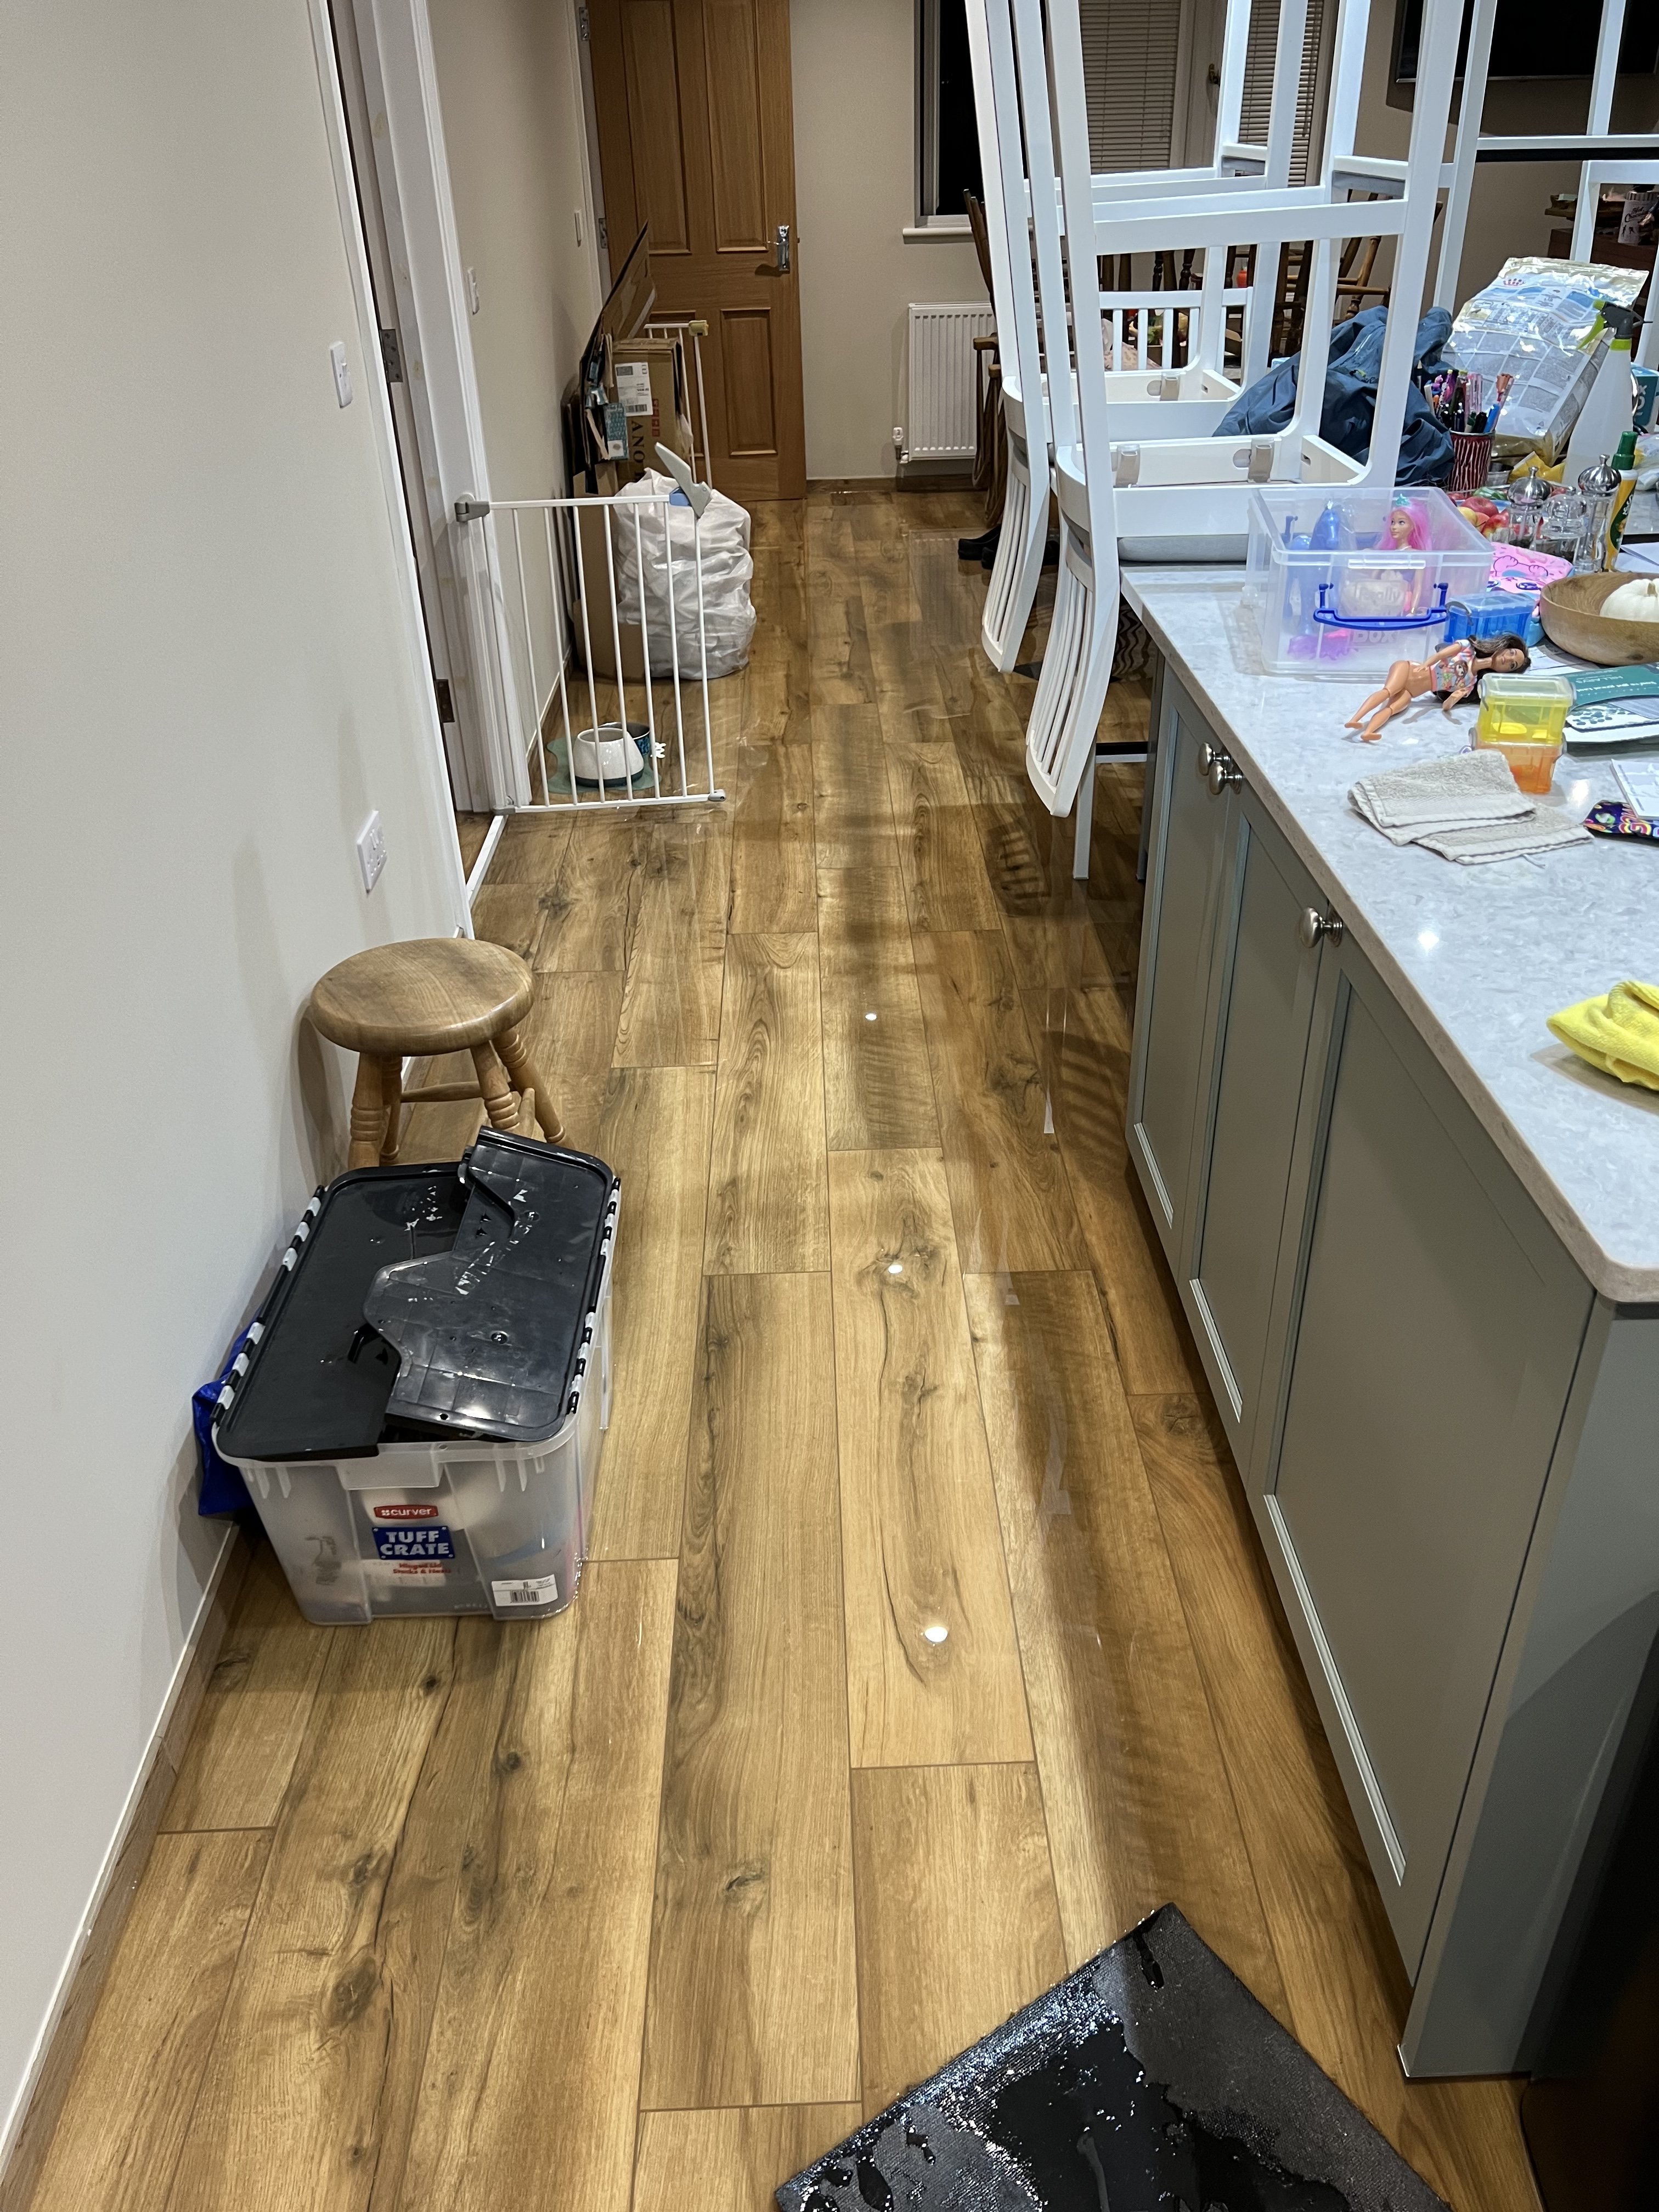
External floodwater — the second flood, September 2024
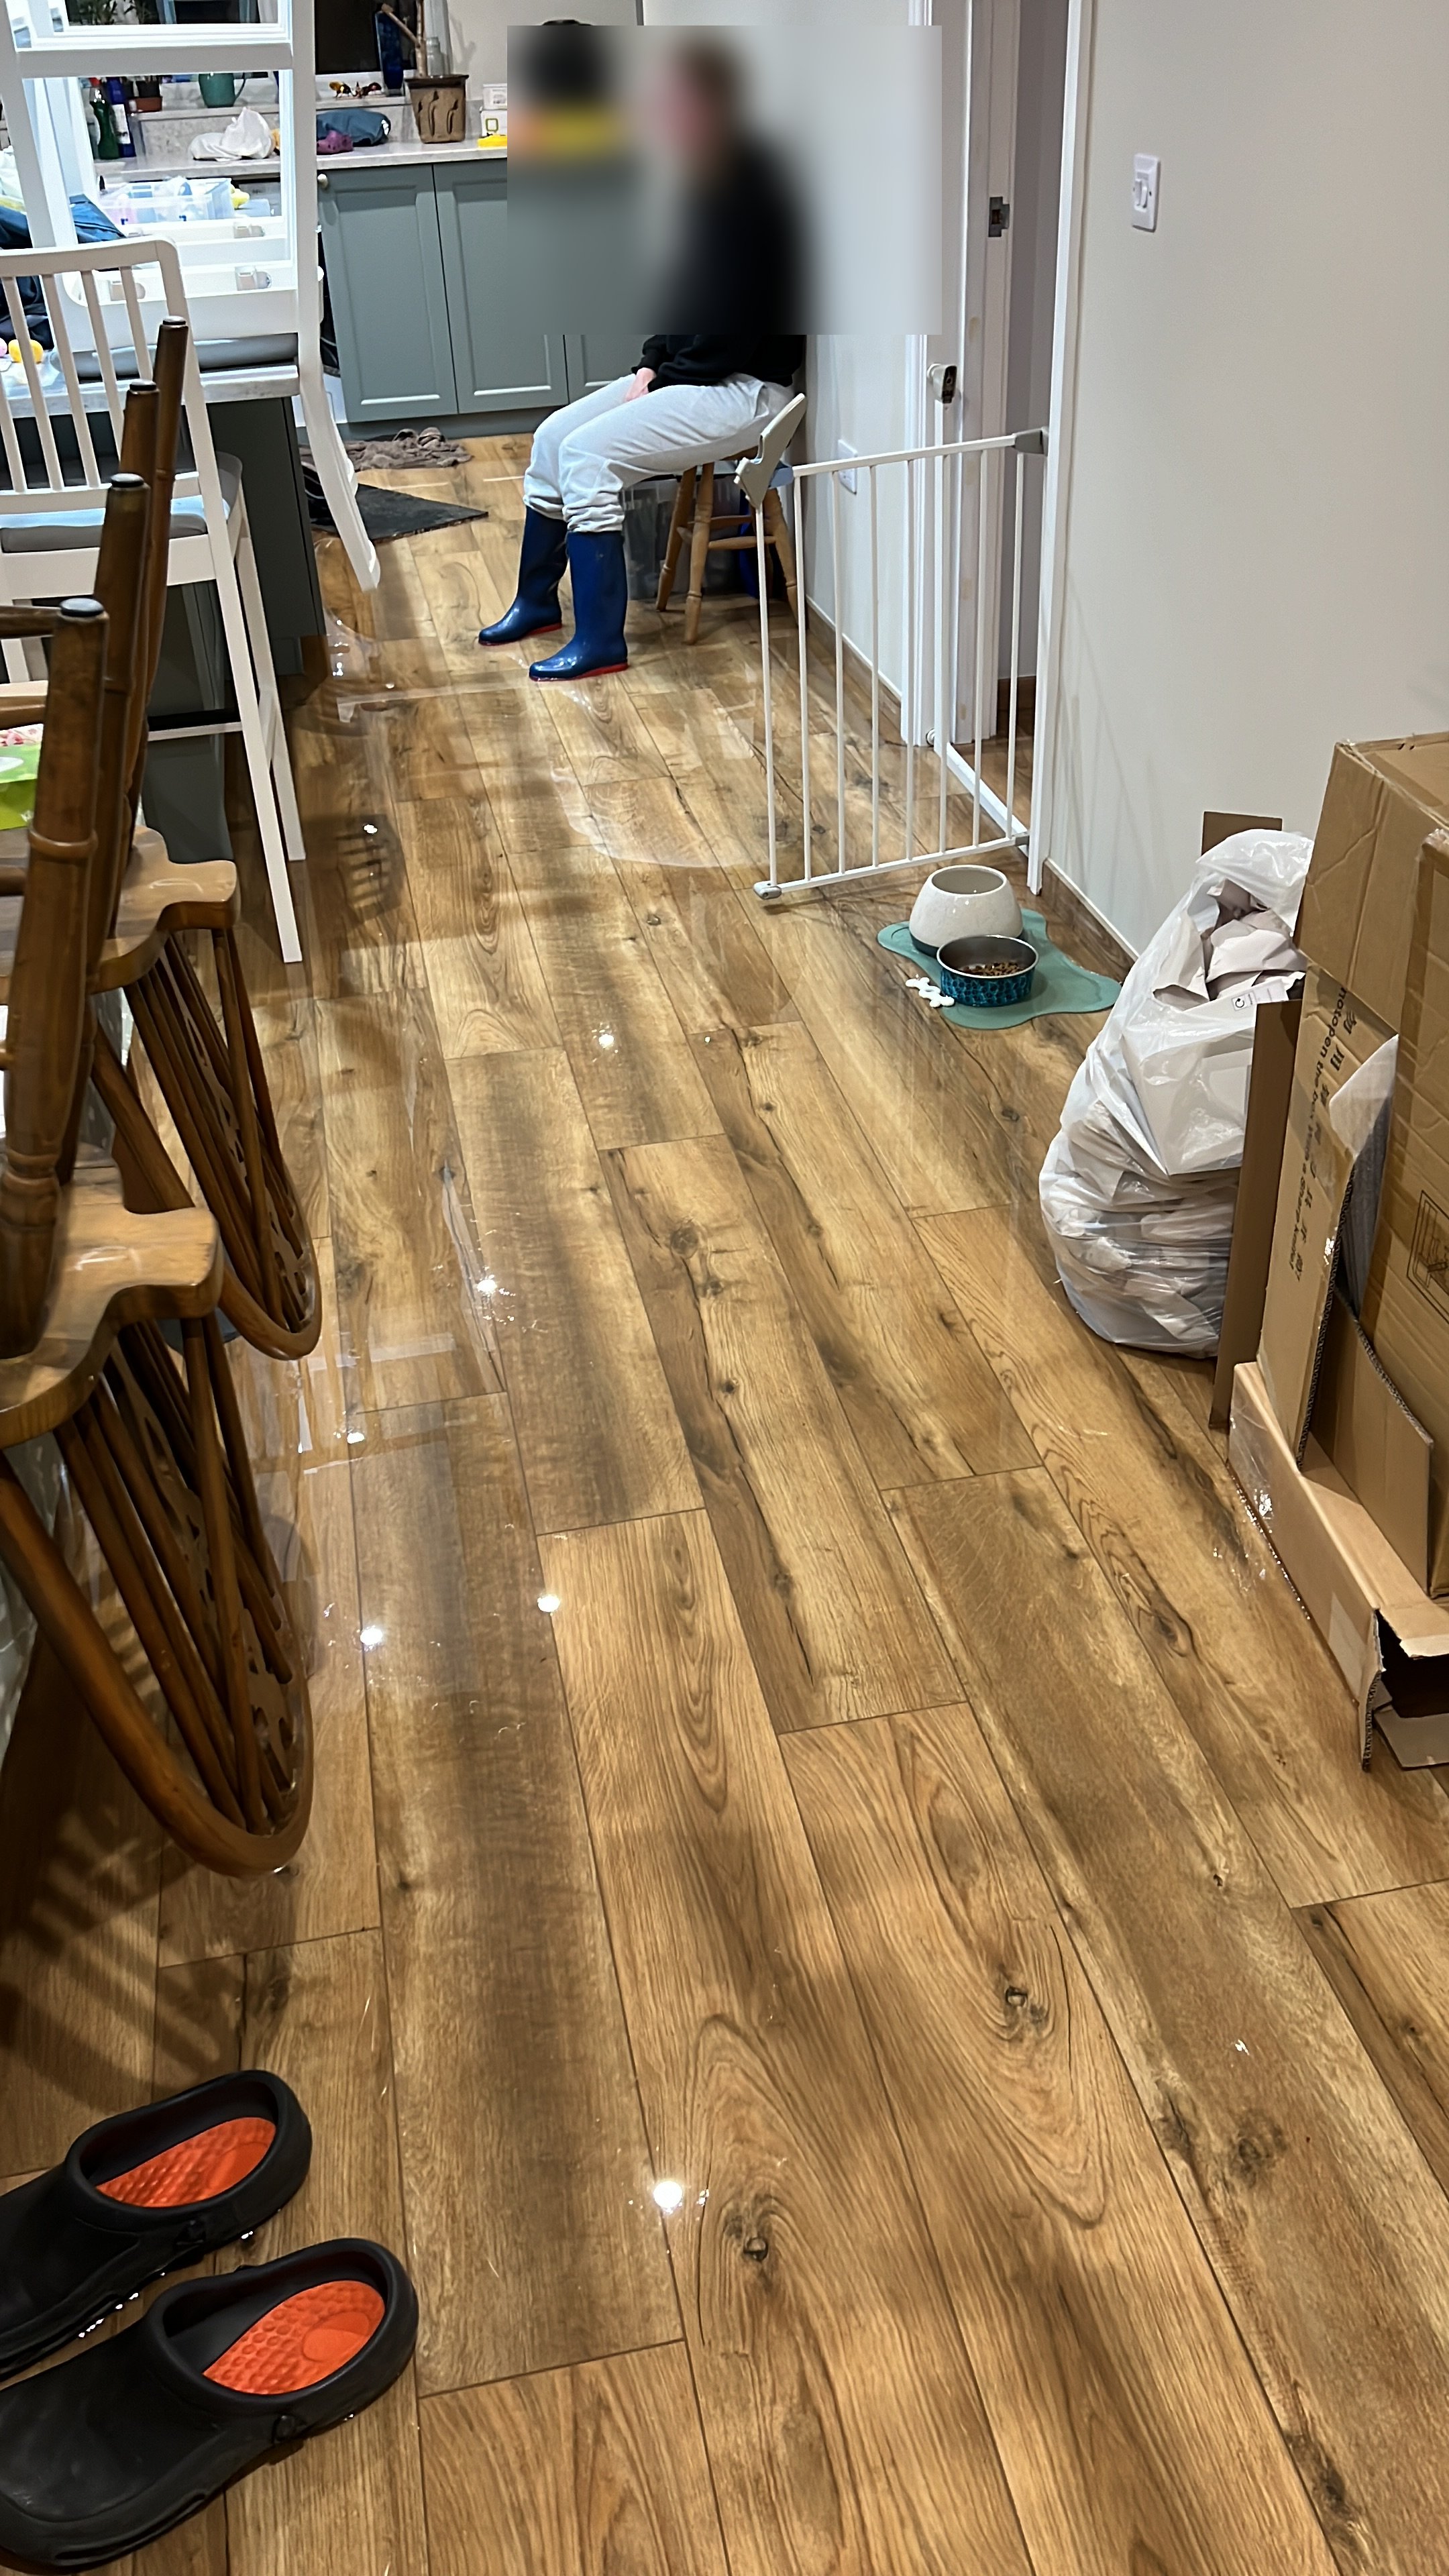
Water through the kitchen corridor — the consequence of a first rebuild done without independent oversight
The kitchen after the second flood — five weeks after moving back in
The Culvert — £2 Million of Council Infrastructure Works
The cause was not bad luck. It was infrastructure failure accumulating for decades beneath the village.
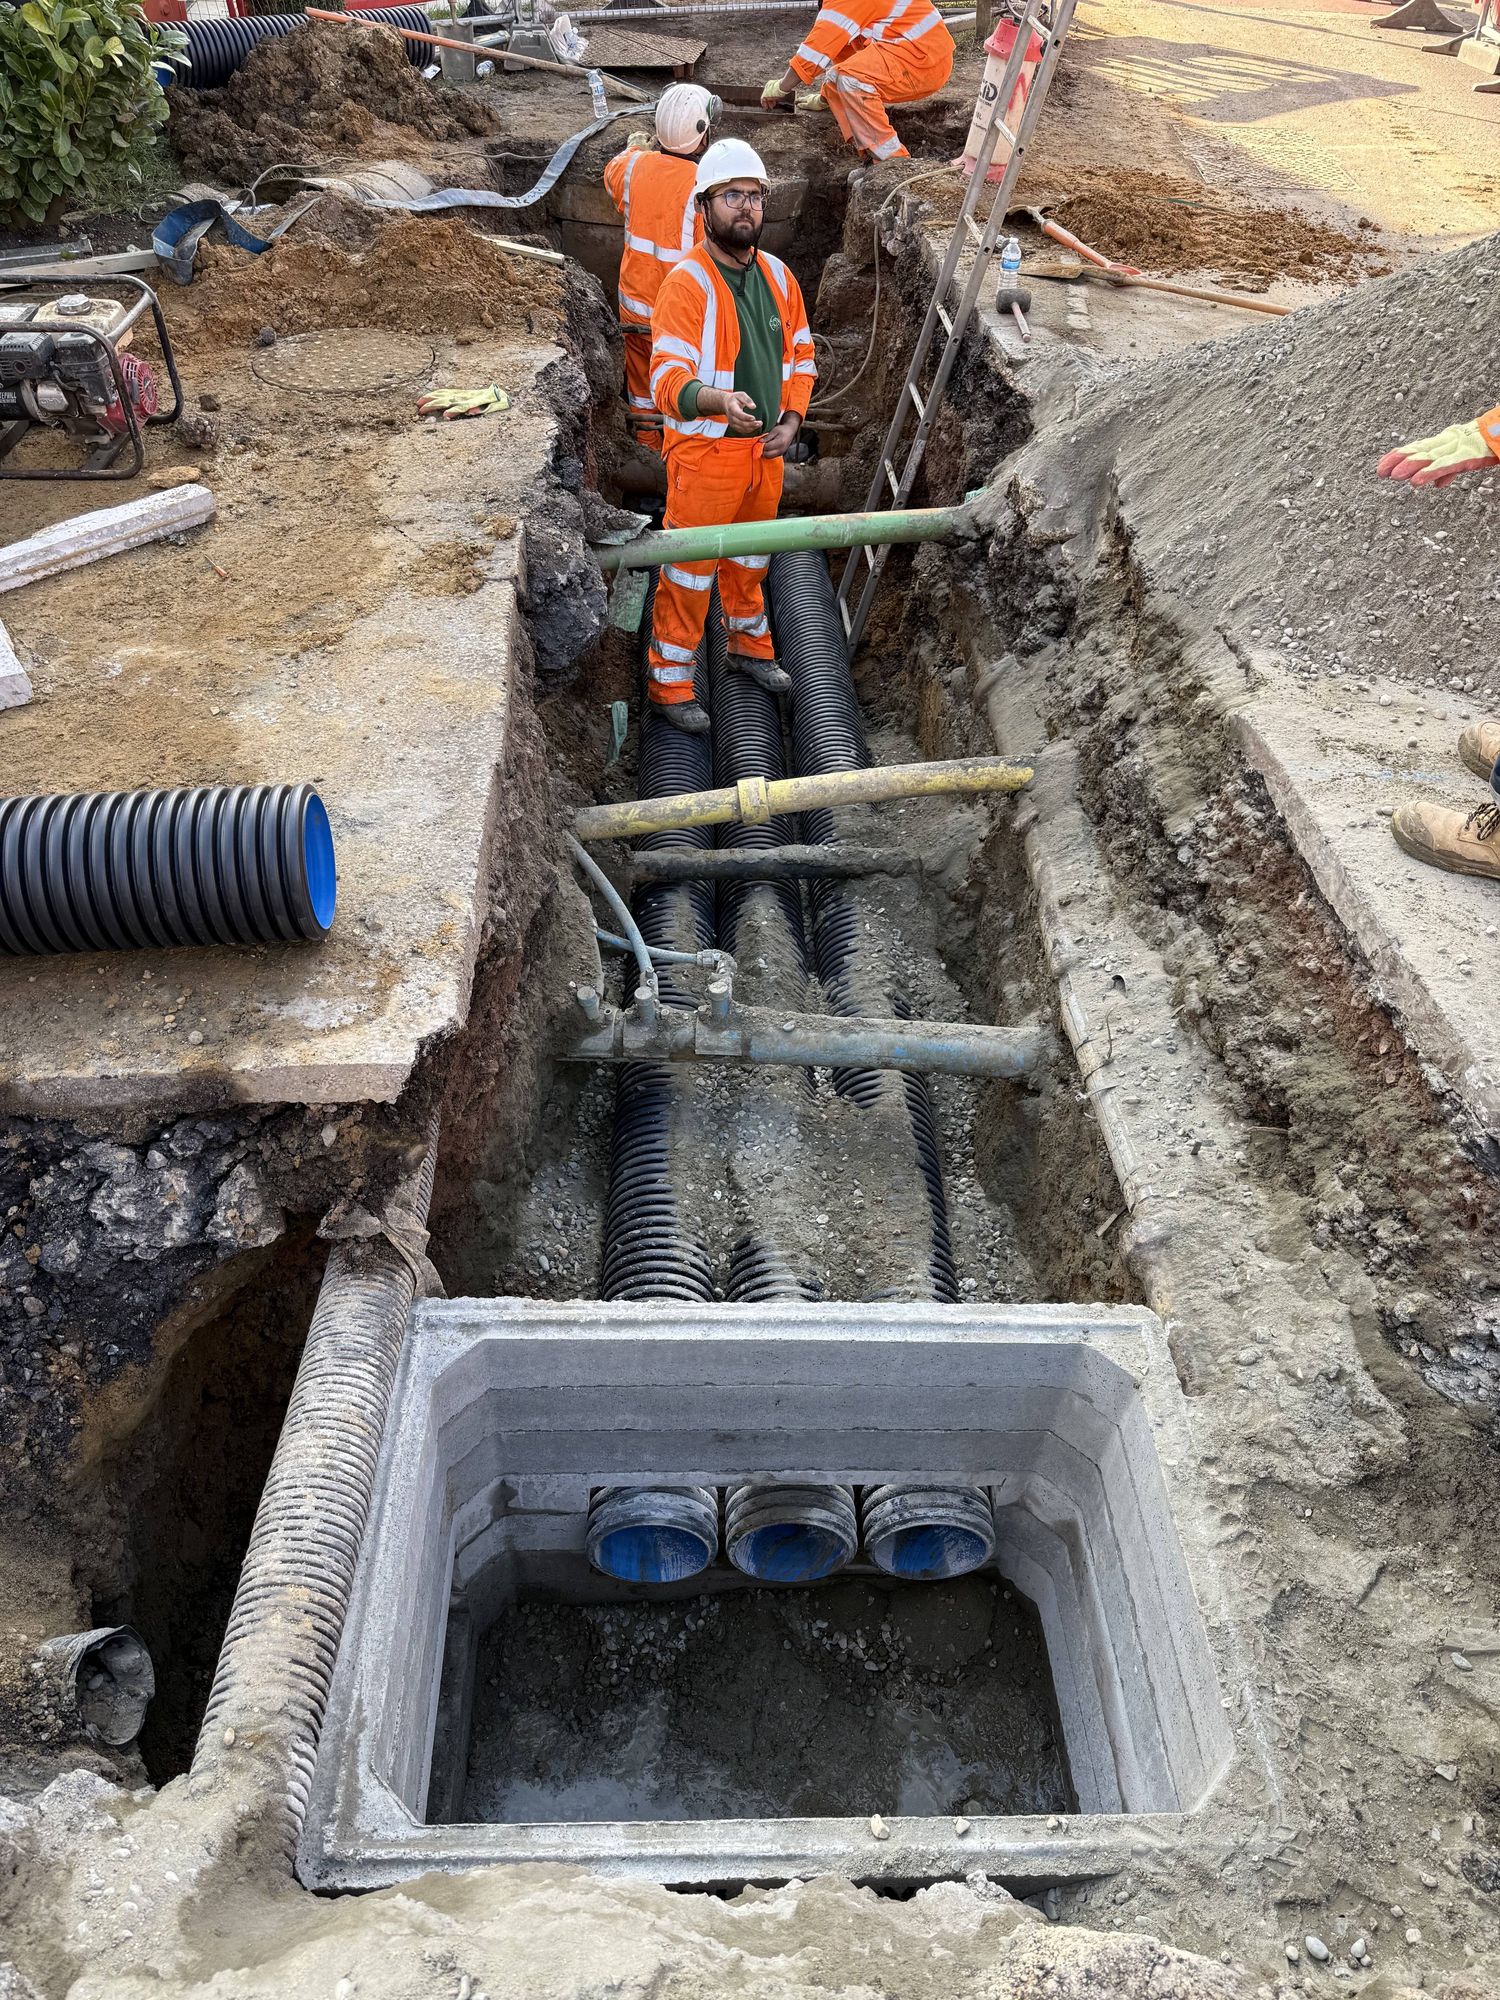
Council contractors installing new twinwall drainage pipes — over £2 million of public infrastructure works
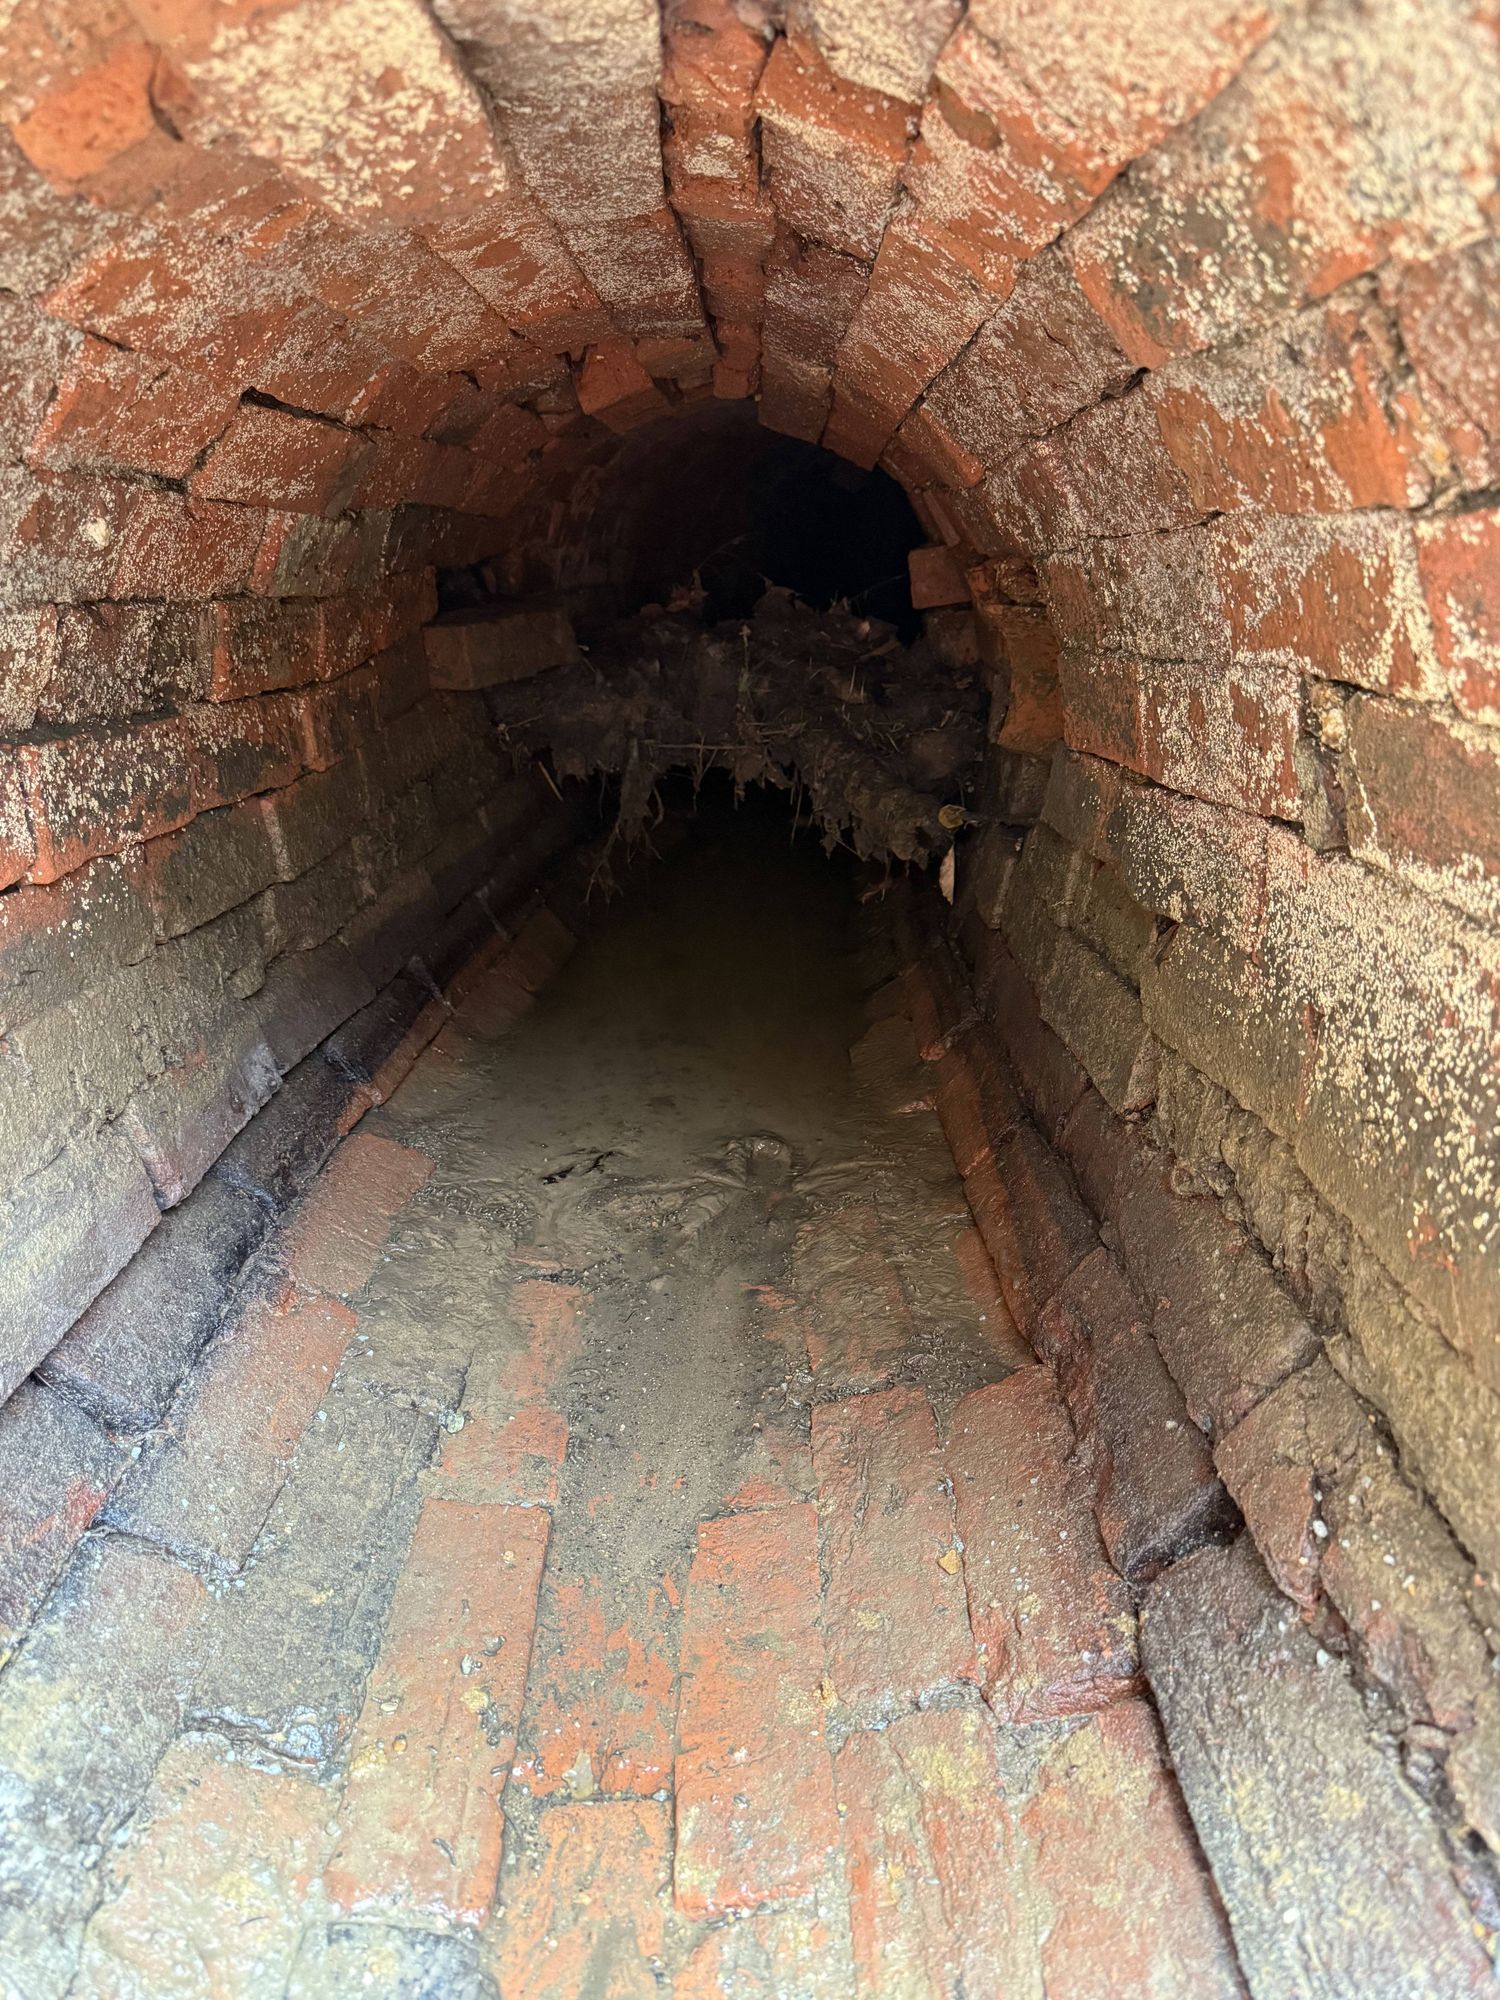
The Victorian brick culvert beneath the village — built in the 1800s and never upgraded
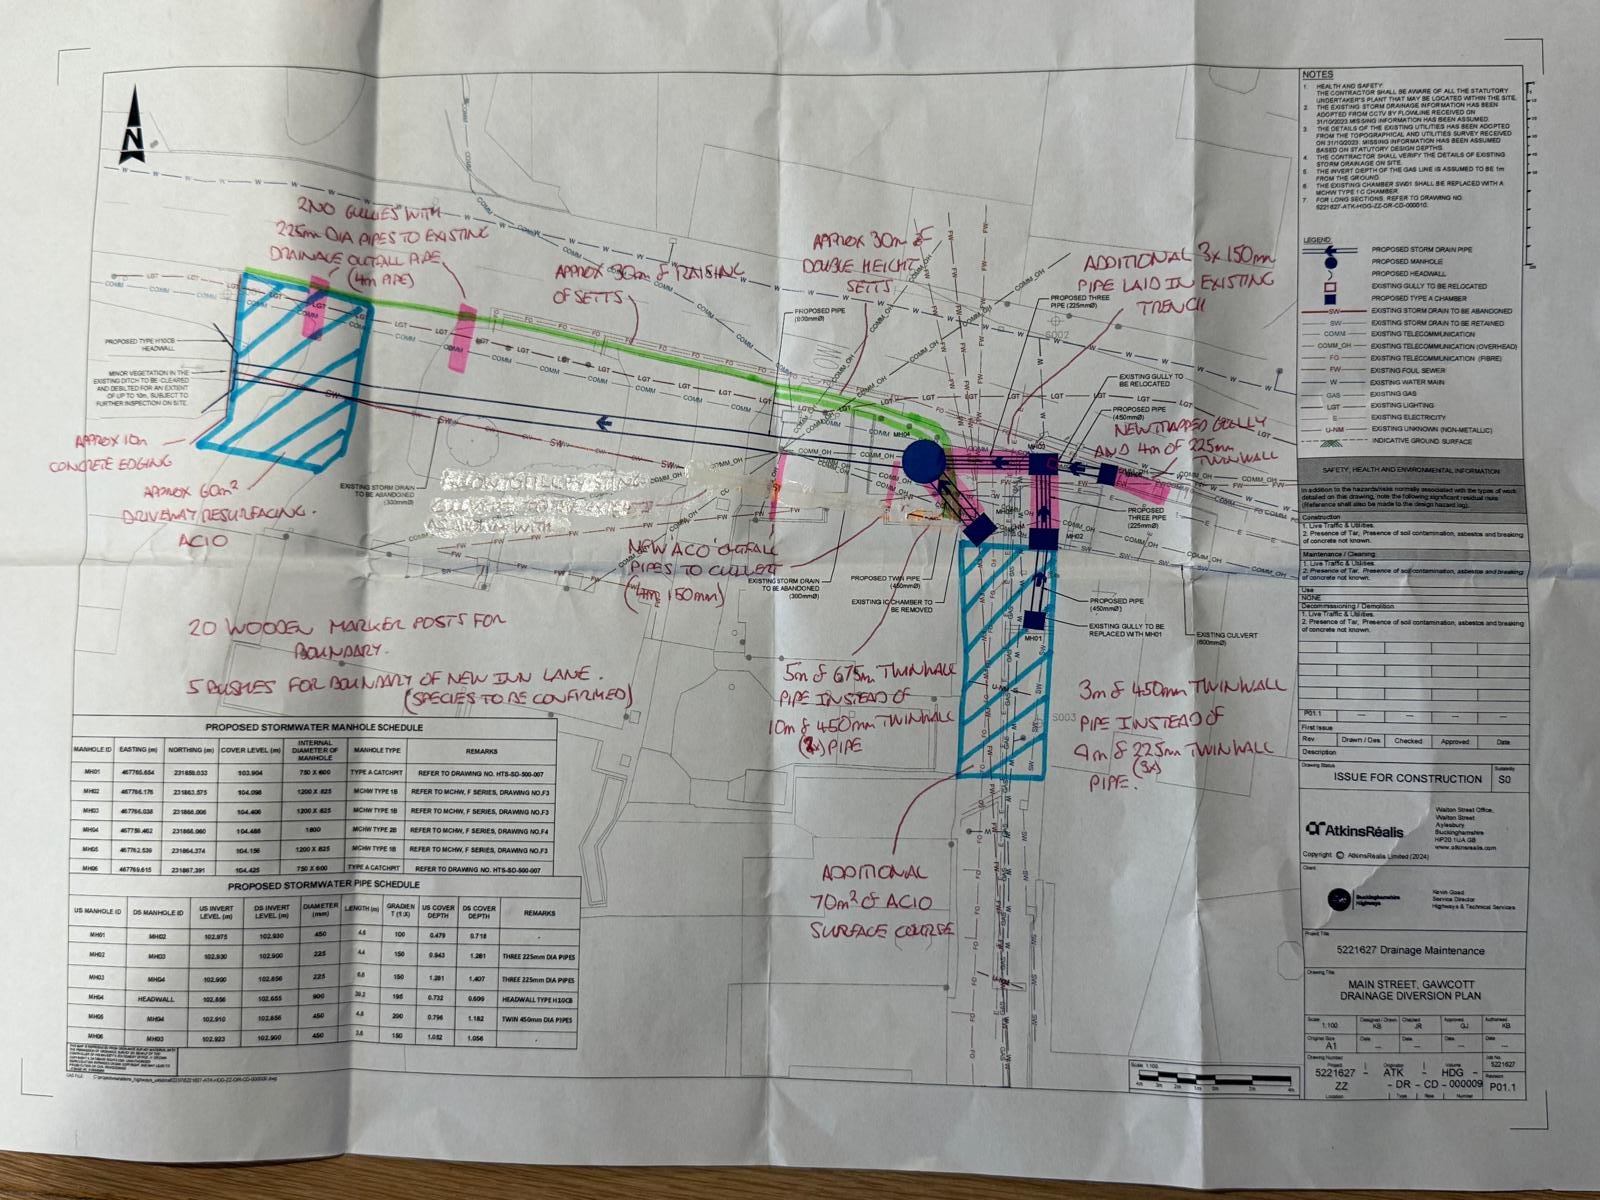
The Atkins Realis drainage diversion plan — Main Street Gawcott, issued for construction
The Rebuild — BS 85500:2015 and Ciria C790
Every stage photographed. Every decision documented. Managed entirely independently of the insurer.
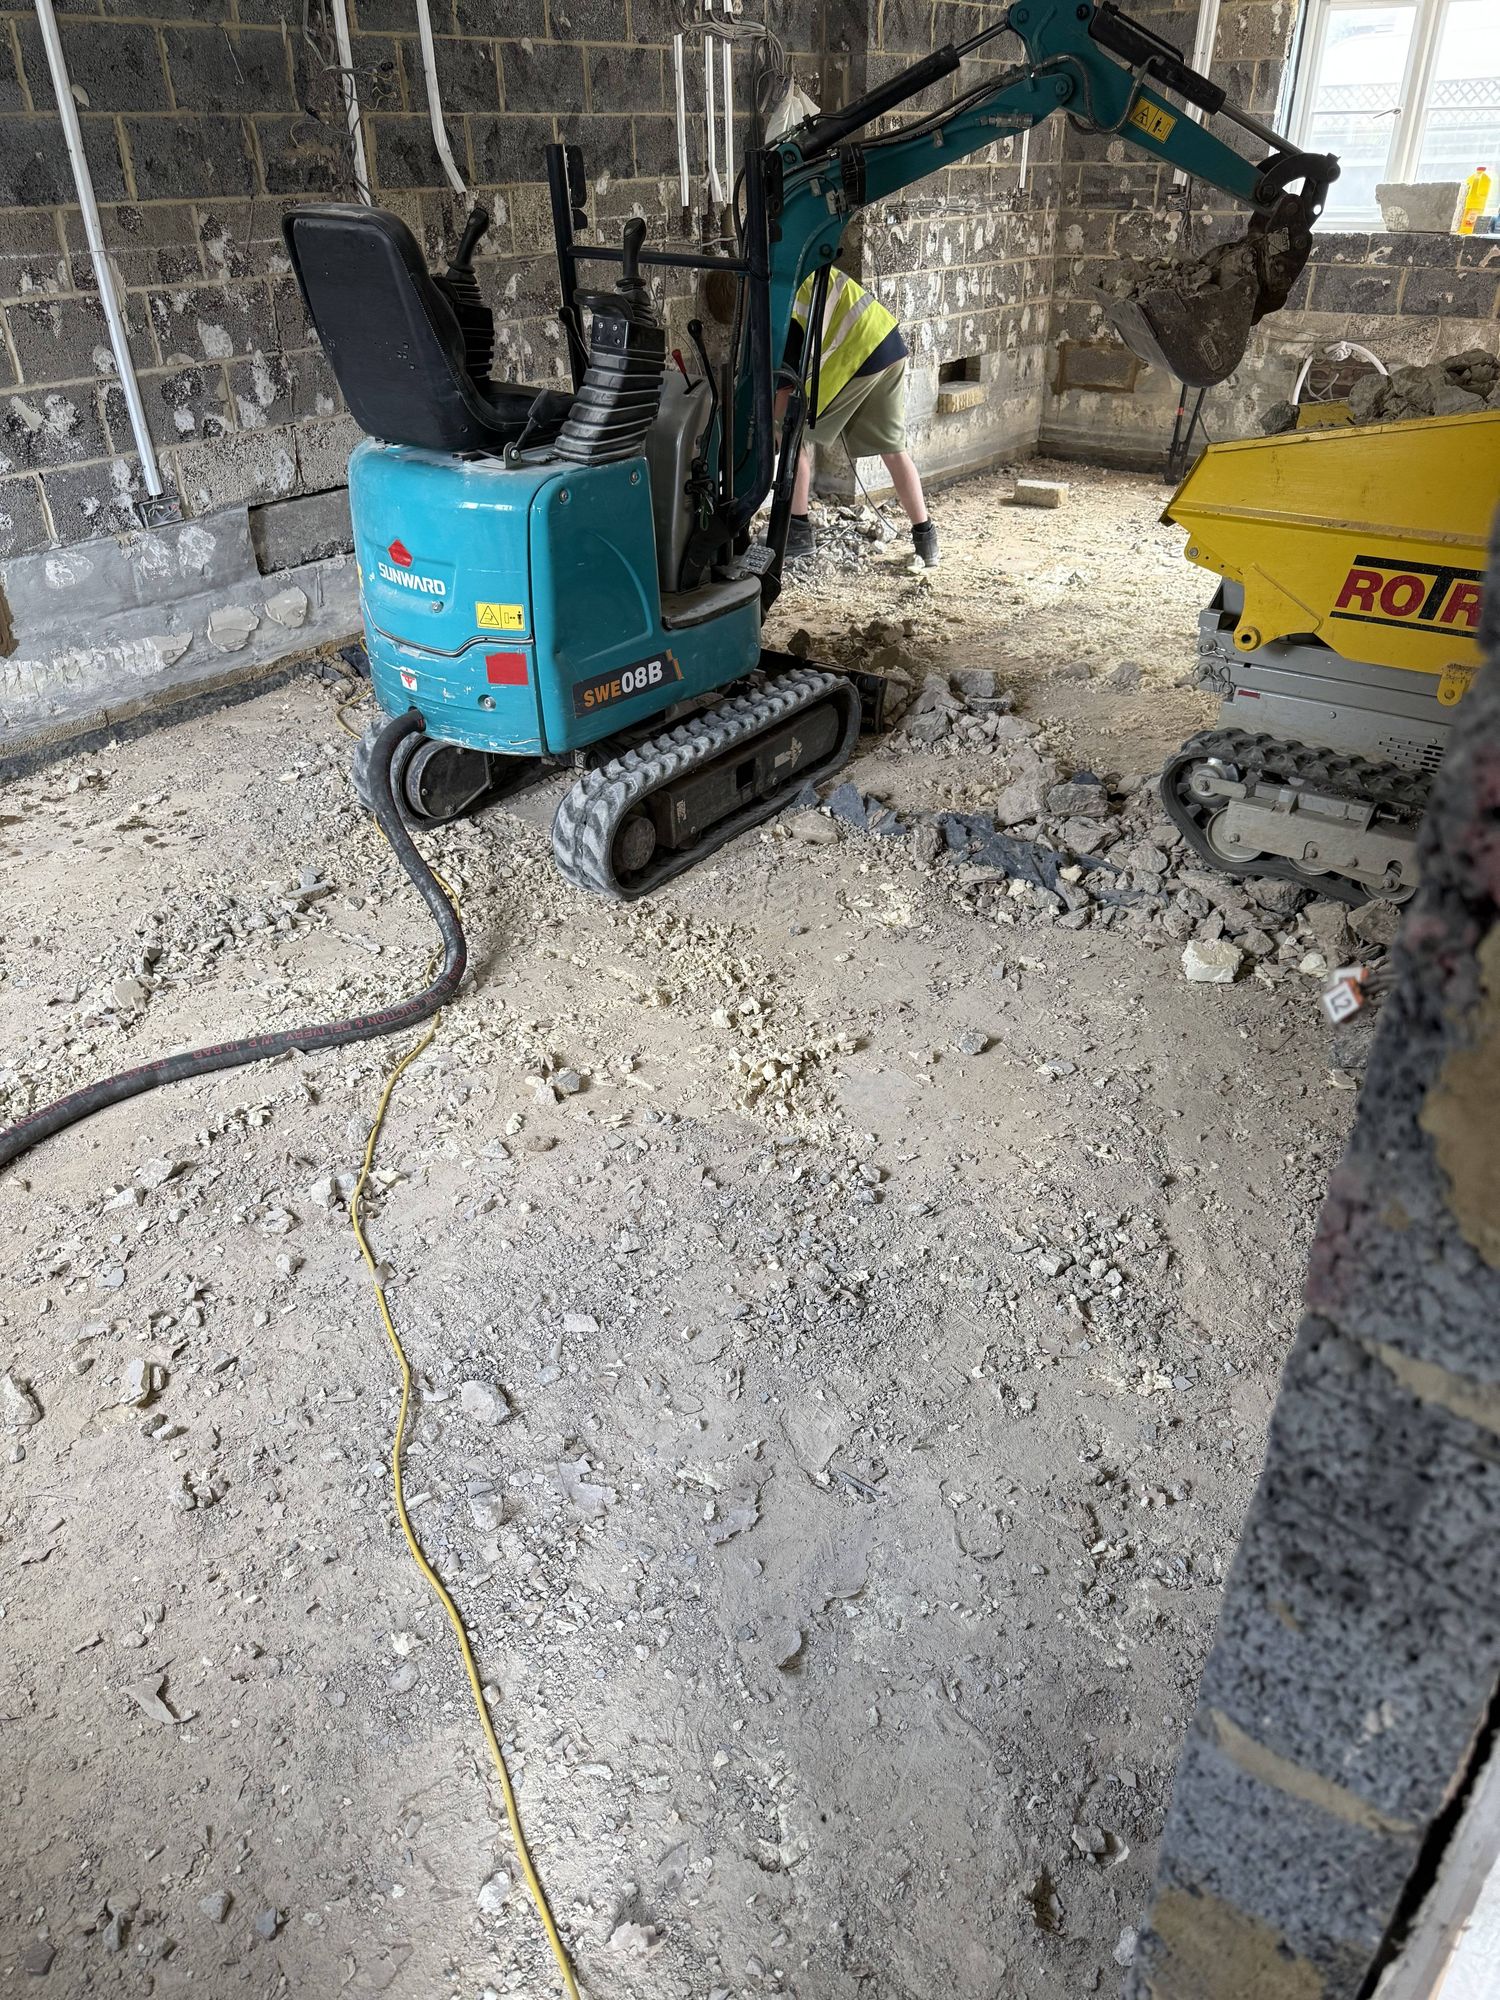
Floor slab broken out — a Sunward SWE08B mini excavator brought indoors to start from scratch
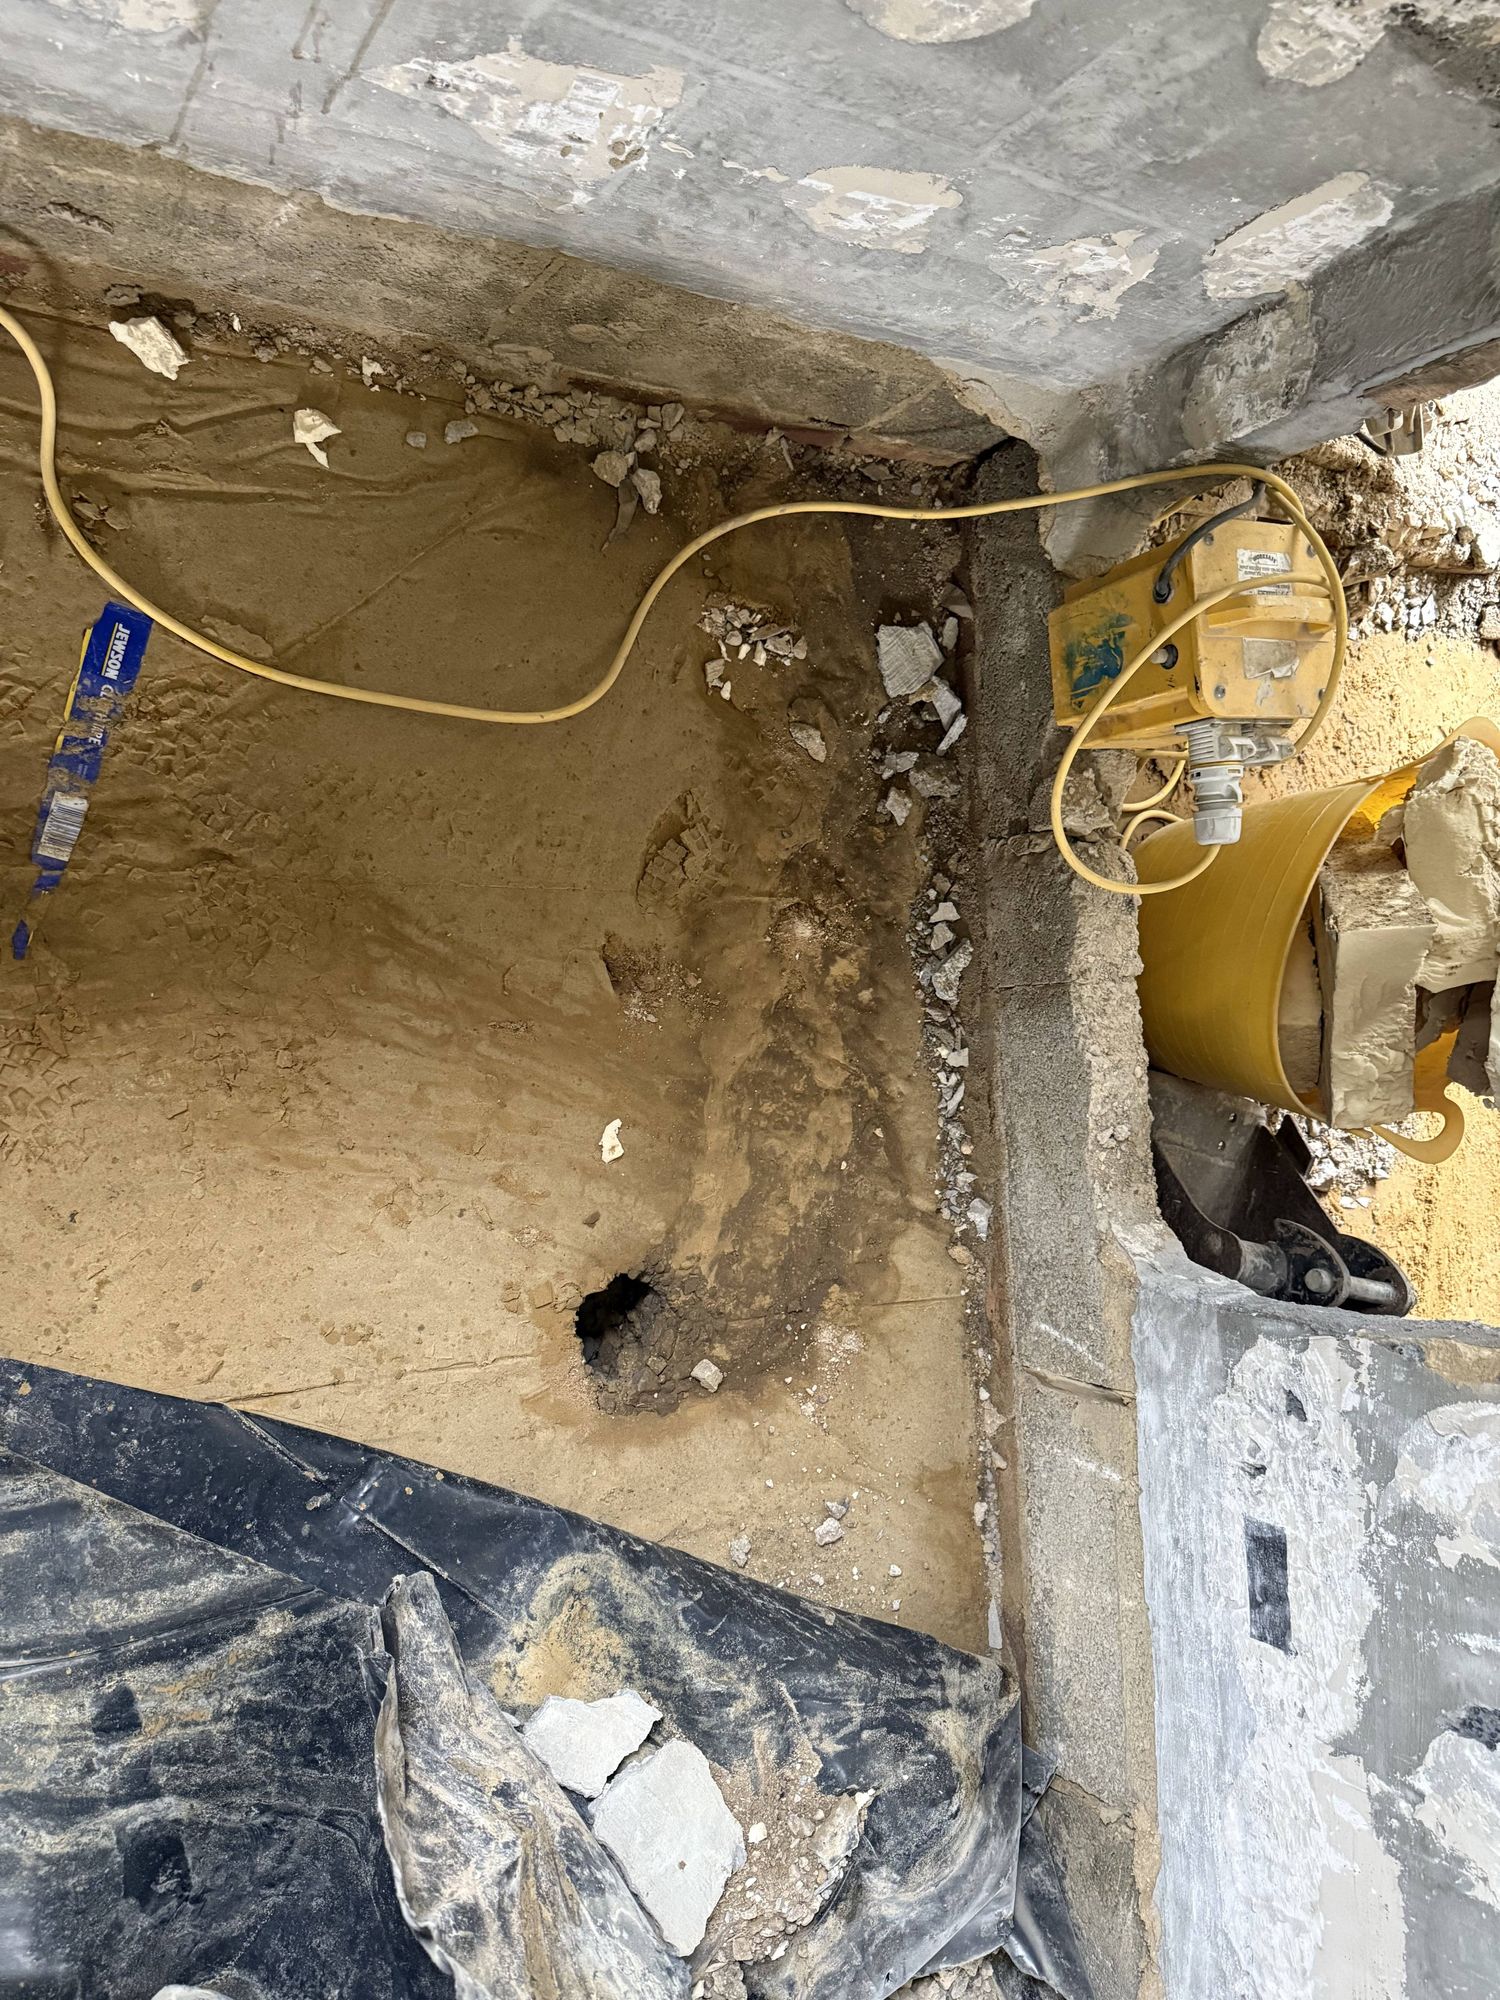
The point of entry — where the culvert forced water up through the original concrete slab. When the DPM was cut during the first rebuild, water pushed through this void and flooded the entire ground floor
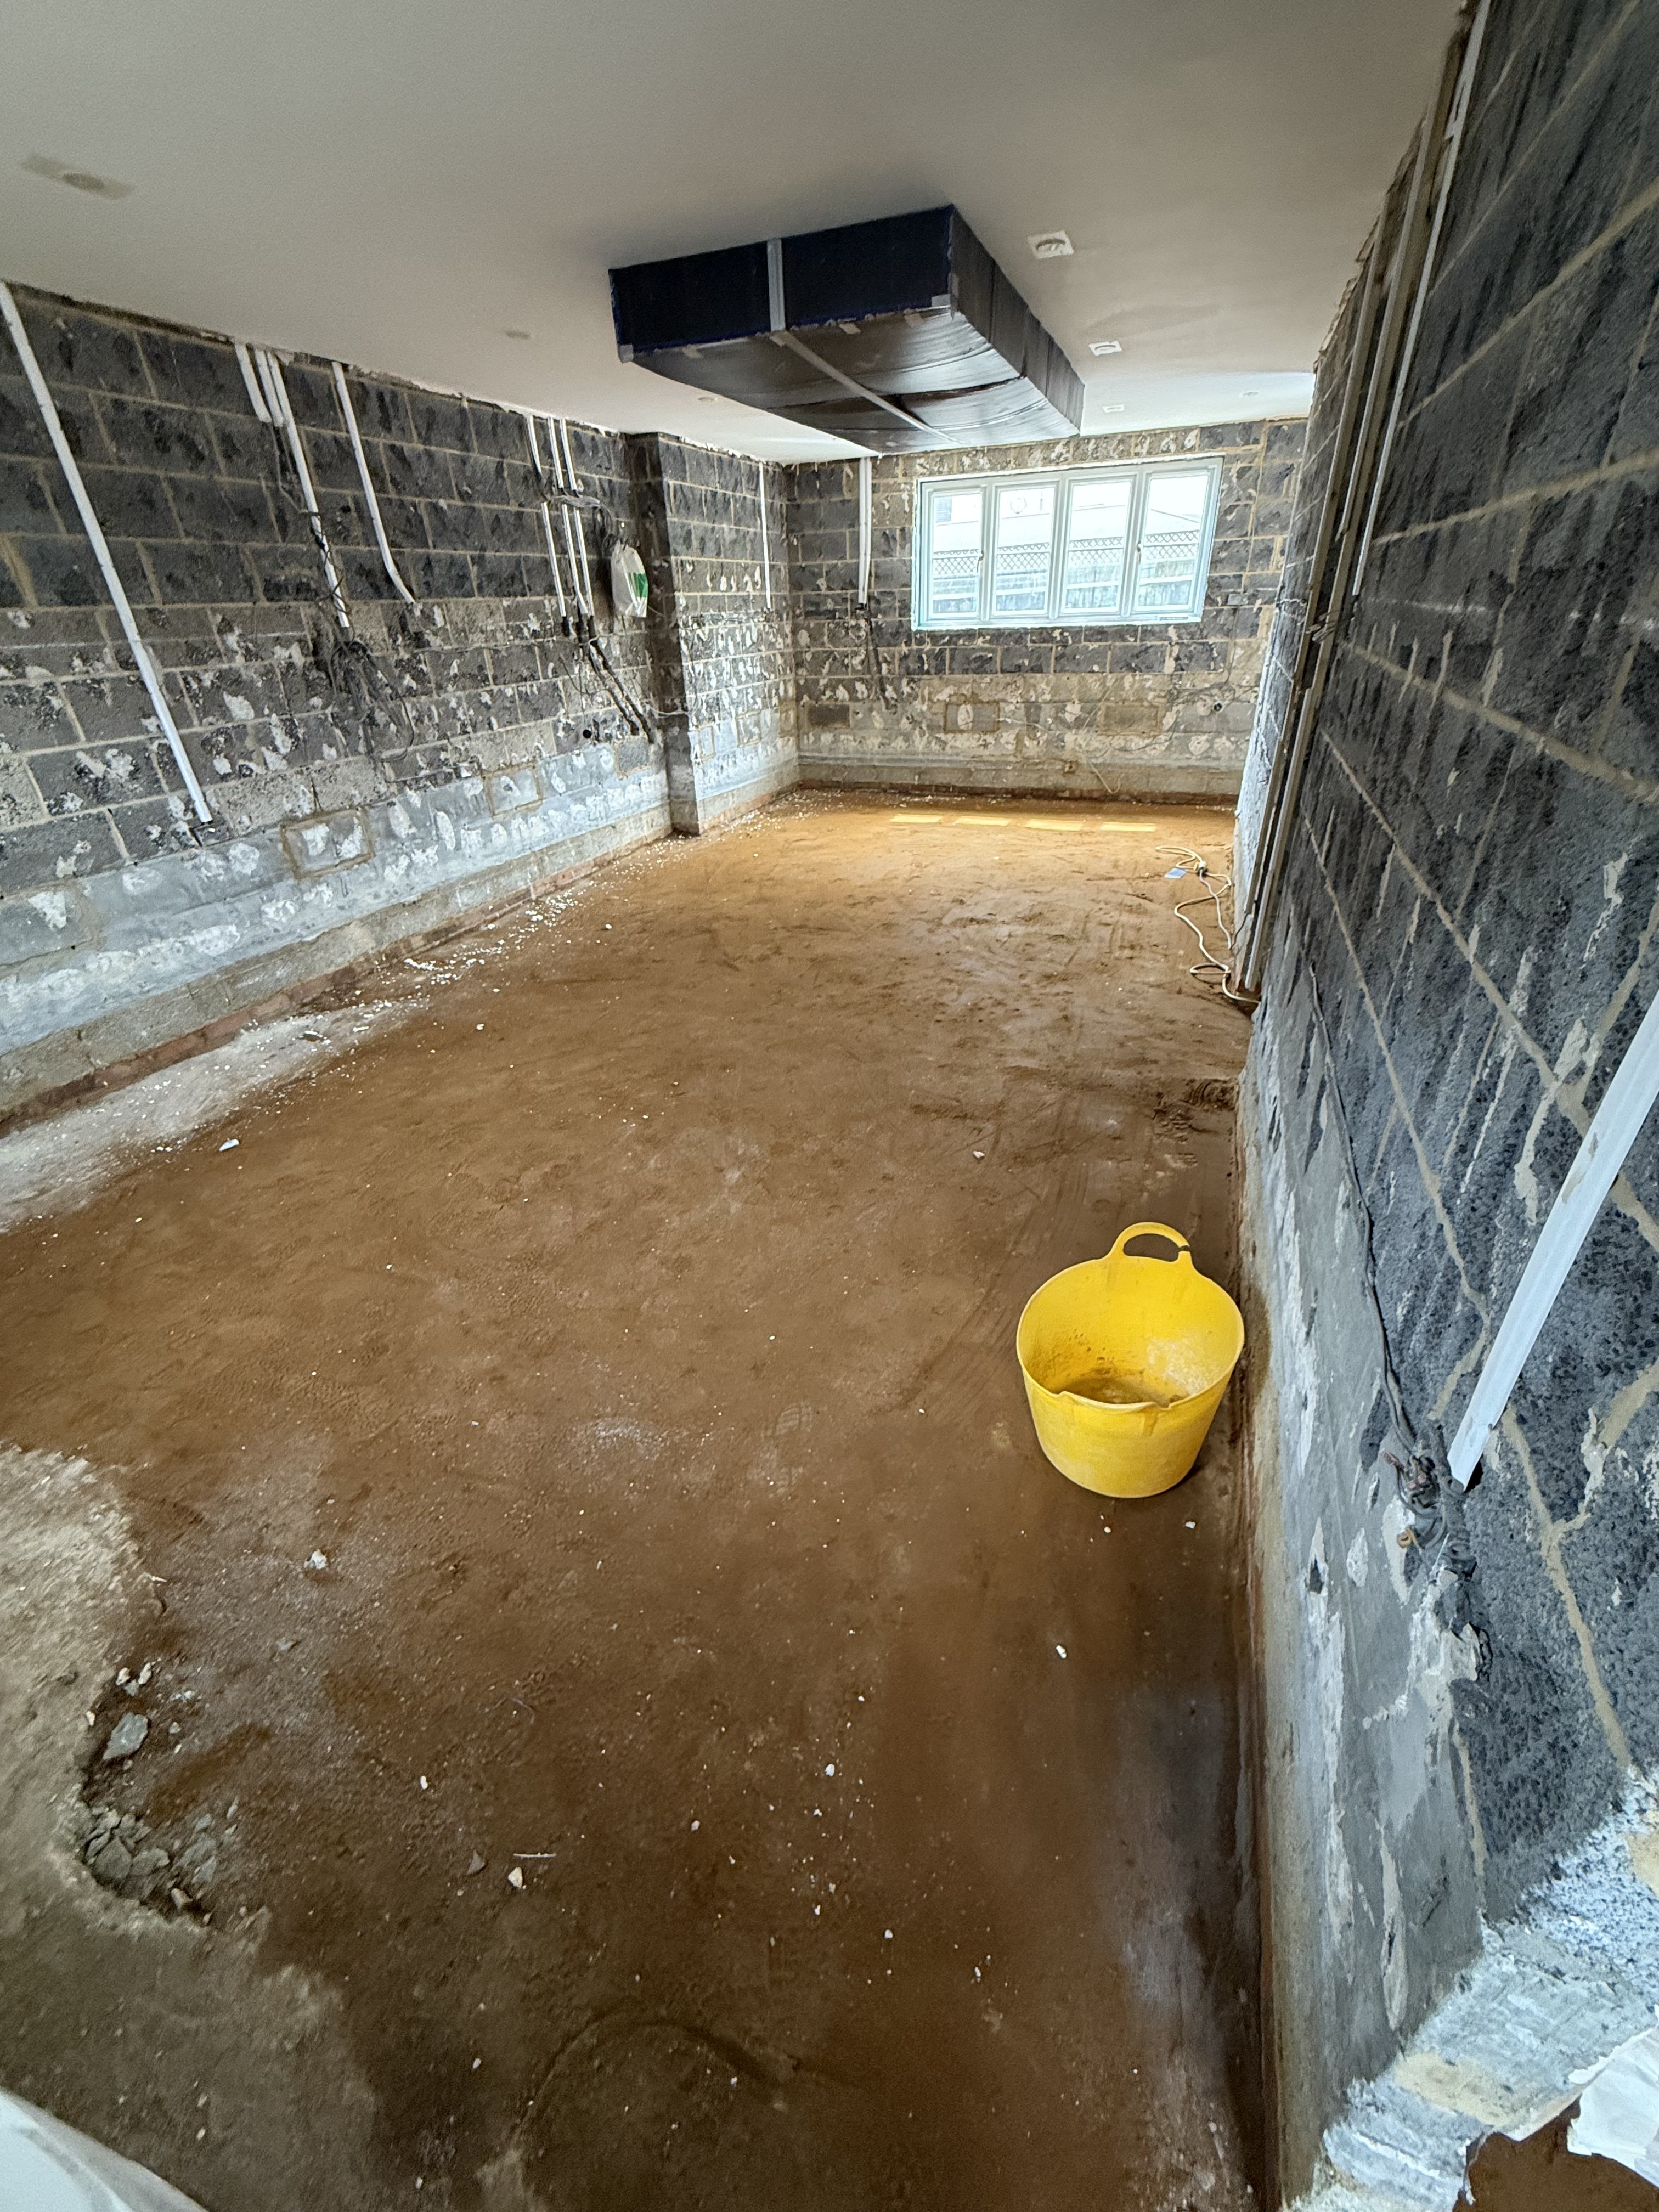
Stripped back to blinding sand — ready to receive the waterproof tanking mat
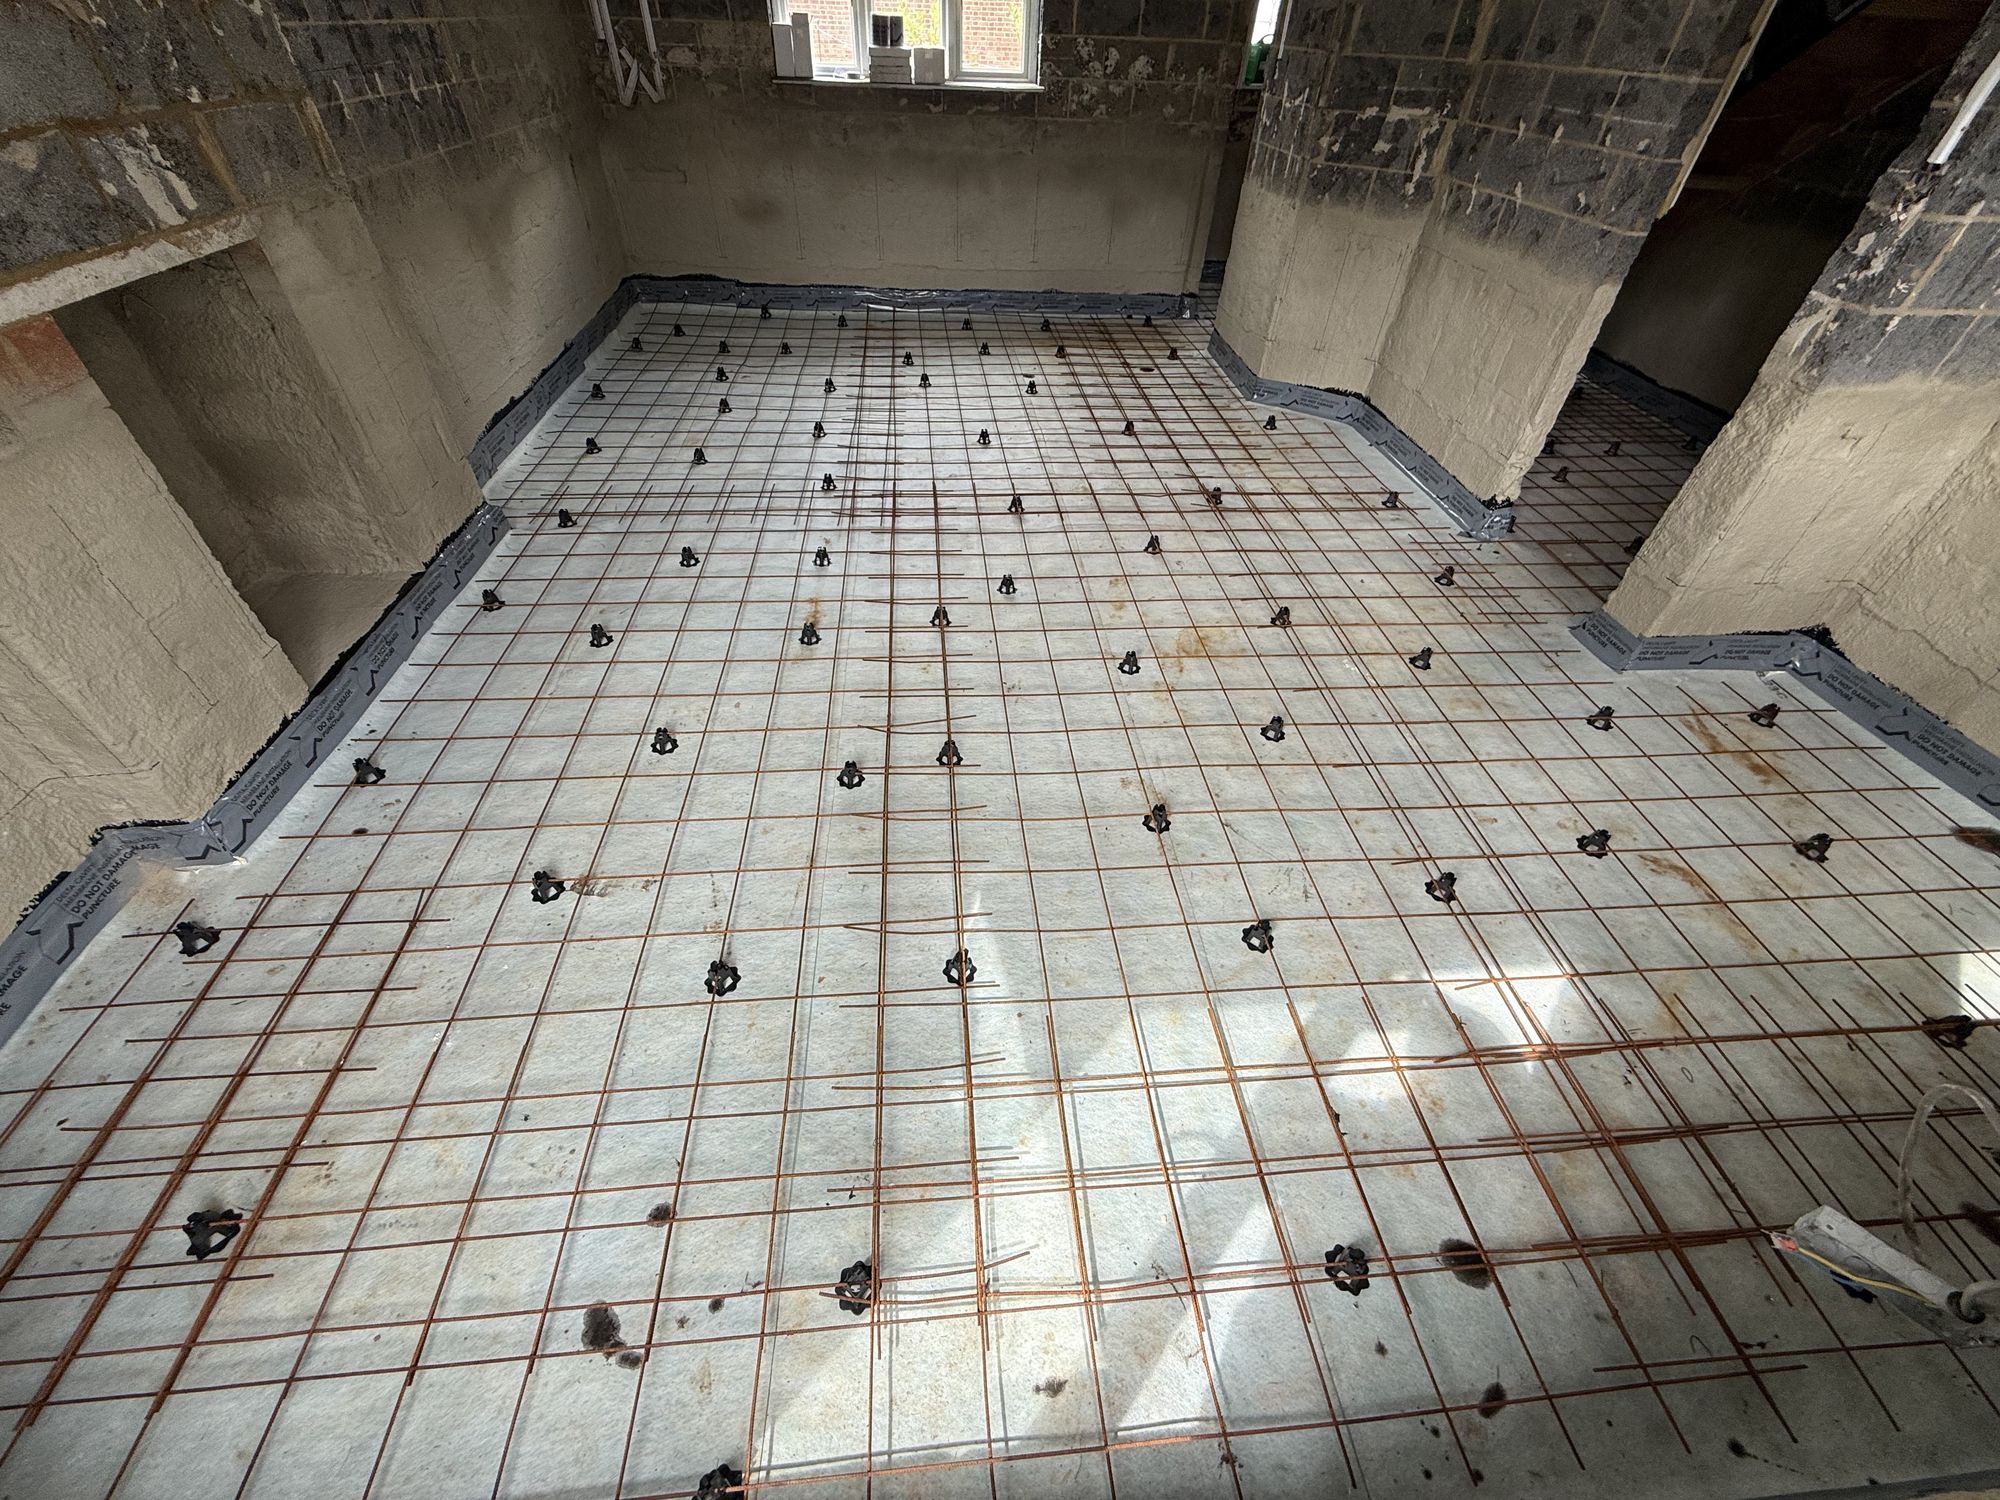
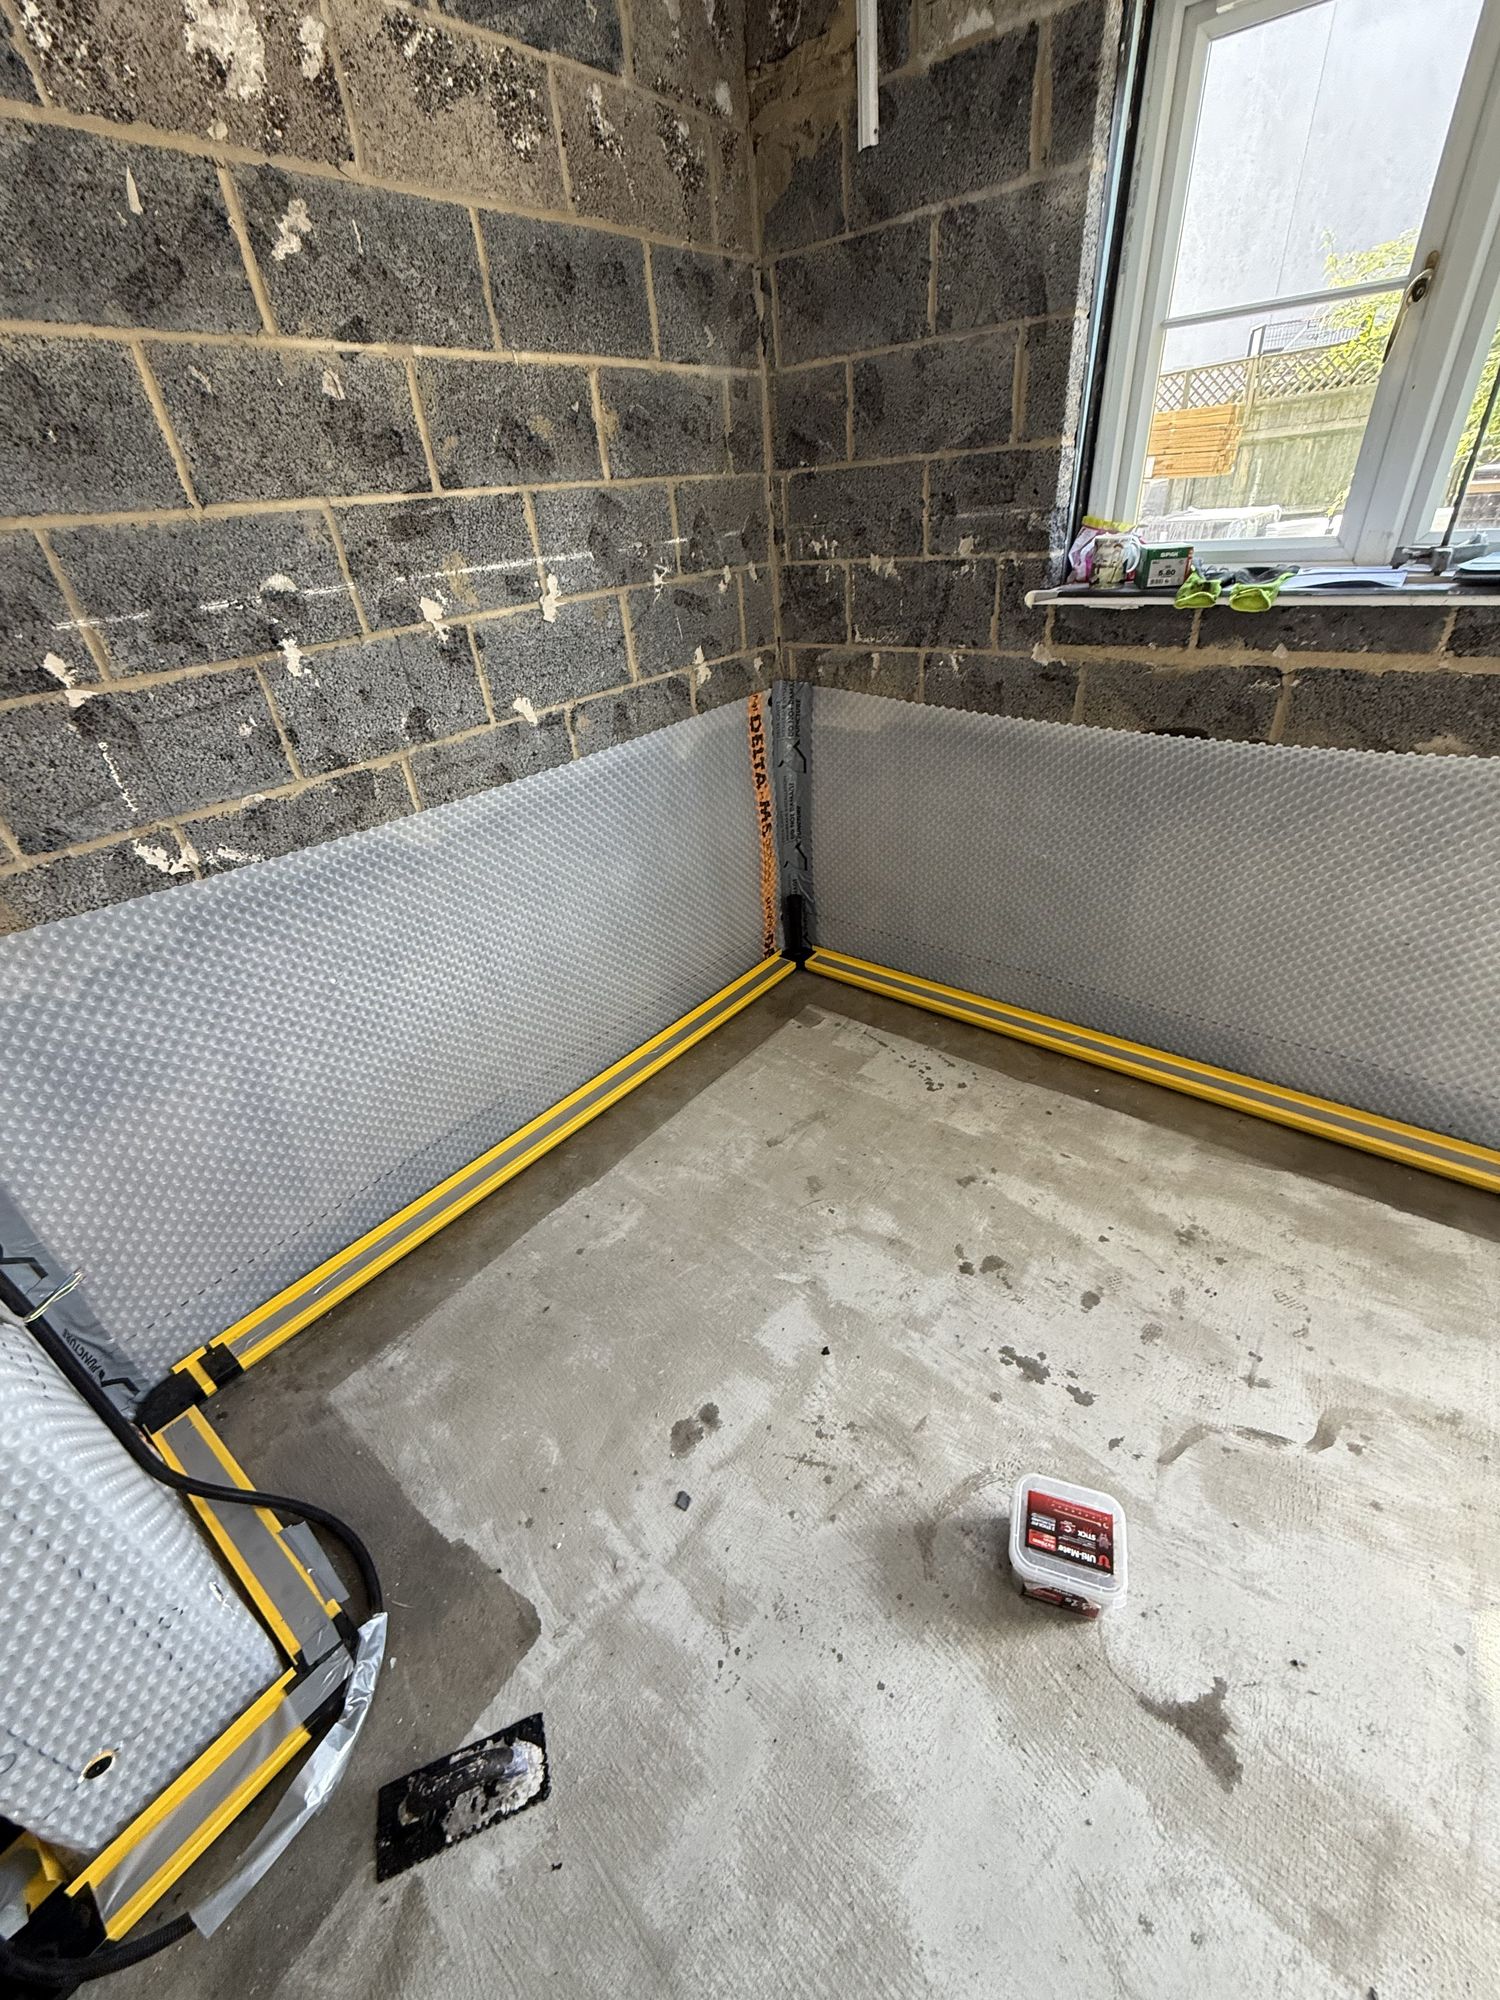
Felt-backed rubber waterproof tanking mat laid over the blinding sand, taped and sealed to the walls — steel mesh and chair spacers in position ready for the concrete slab pour
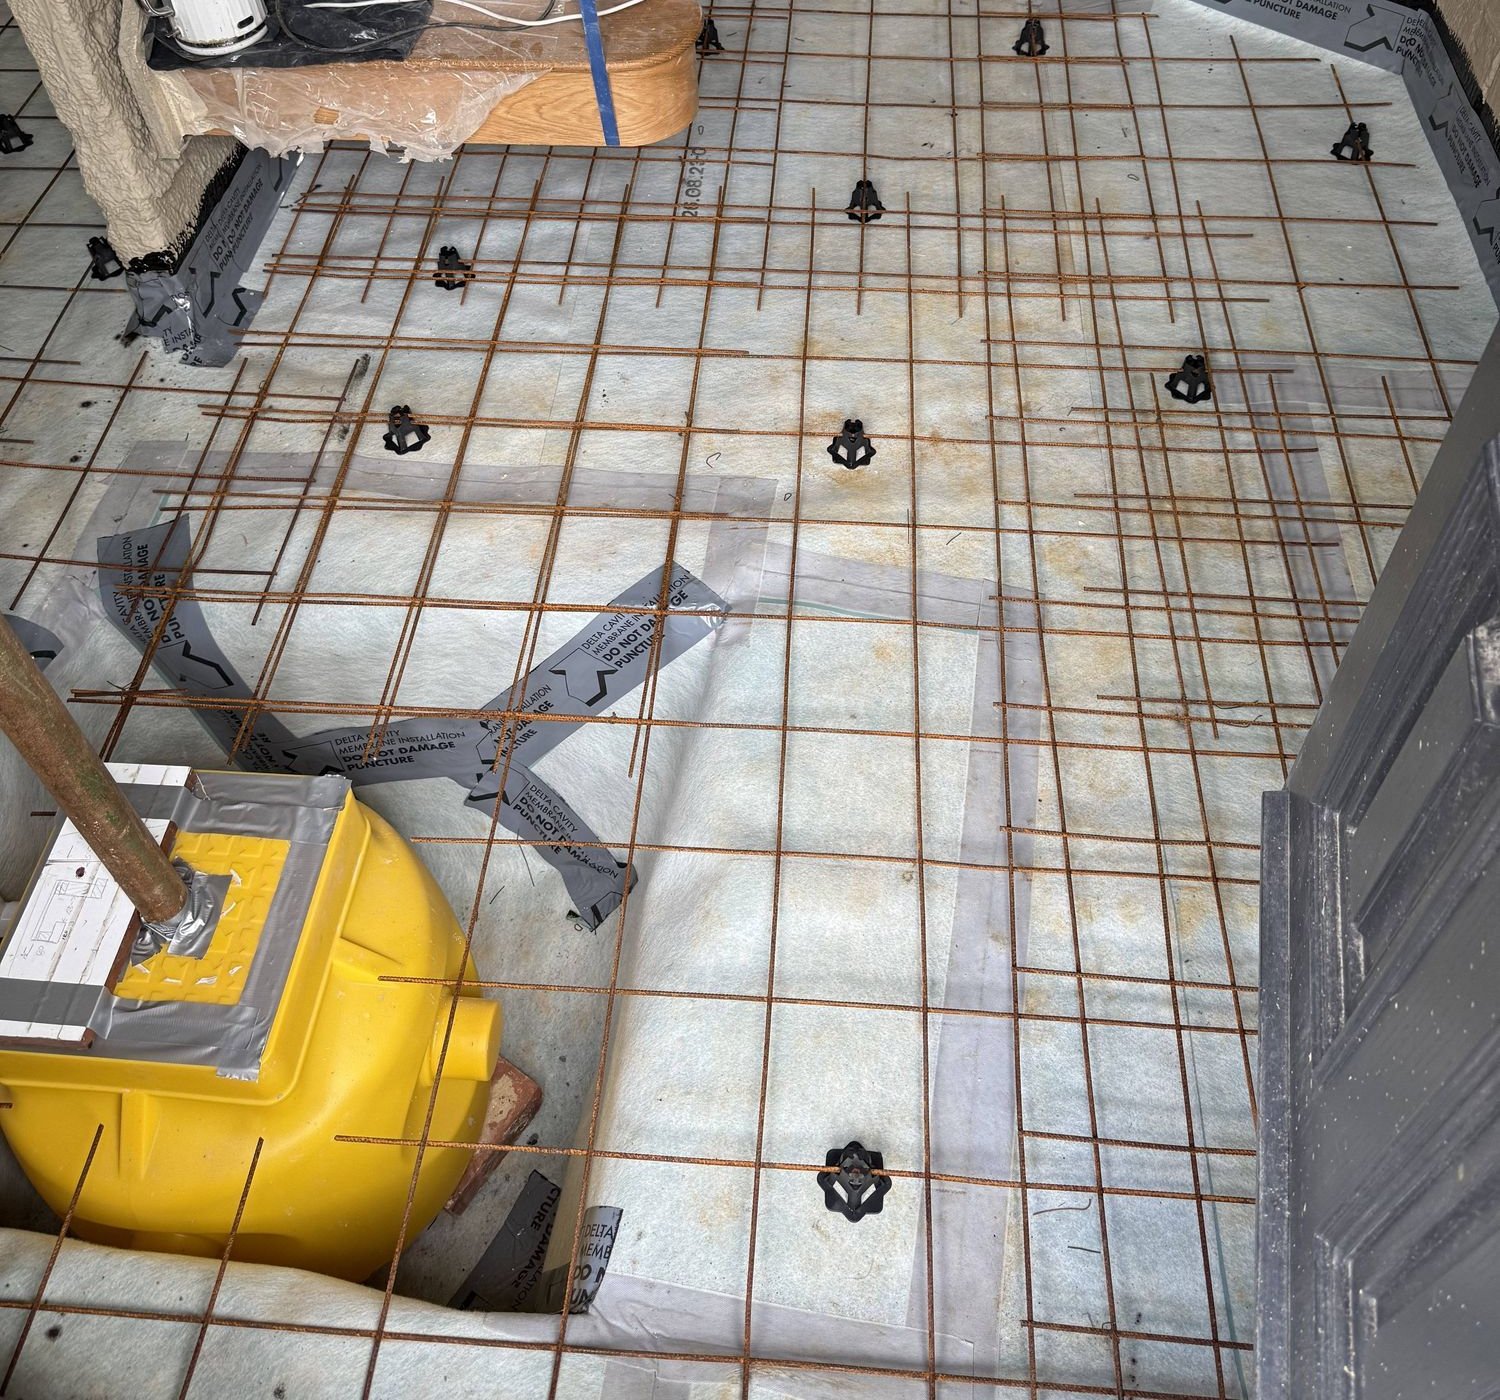
Felt-backed rubber waterproof tanking mat with steel mesh in position — yellow sump basket visible in the lower left corner
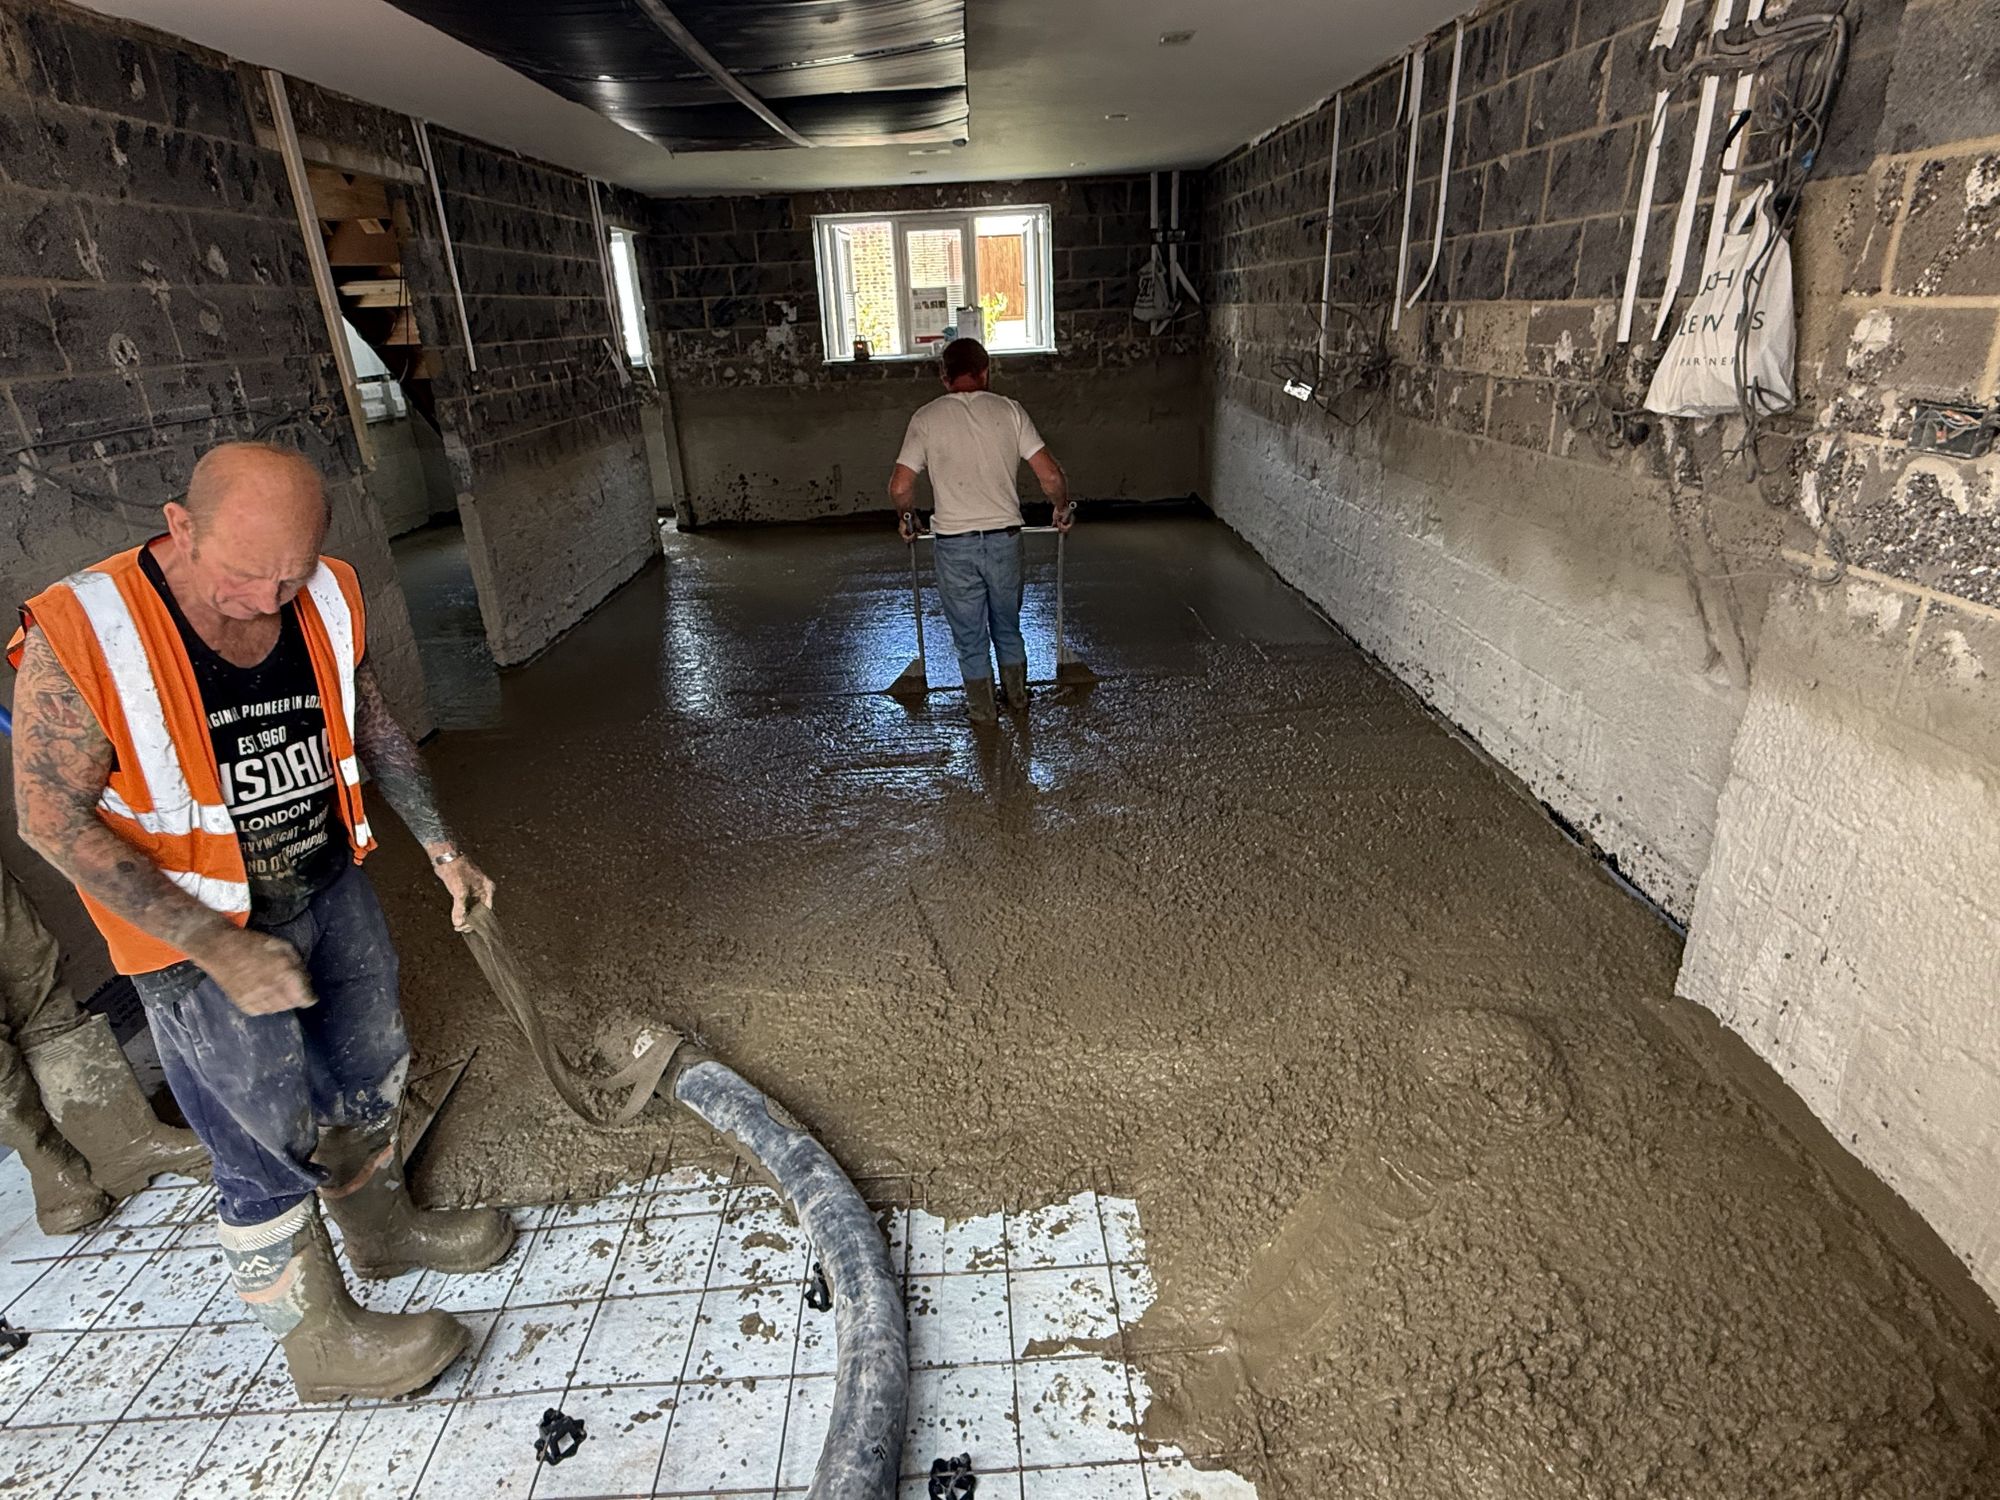
Concrete slab being poured and hand levelled, ready to be machine floated
Living room at early stage — cement tanking sprayed onto walls, concrete slab waiting for its resin coat before Foamglas insulation and sump pump channelling
Finished concrete slab with two coats of waterproof resin applied — yellow drain pipes running to the sump visible, Delta-MS membrane fixed to walls
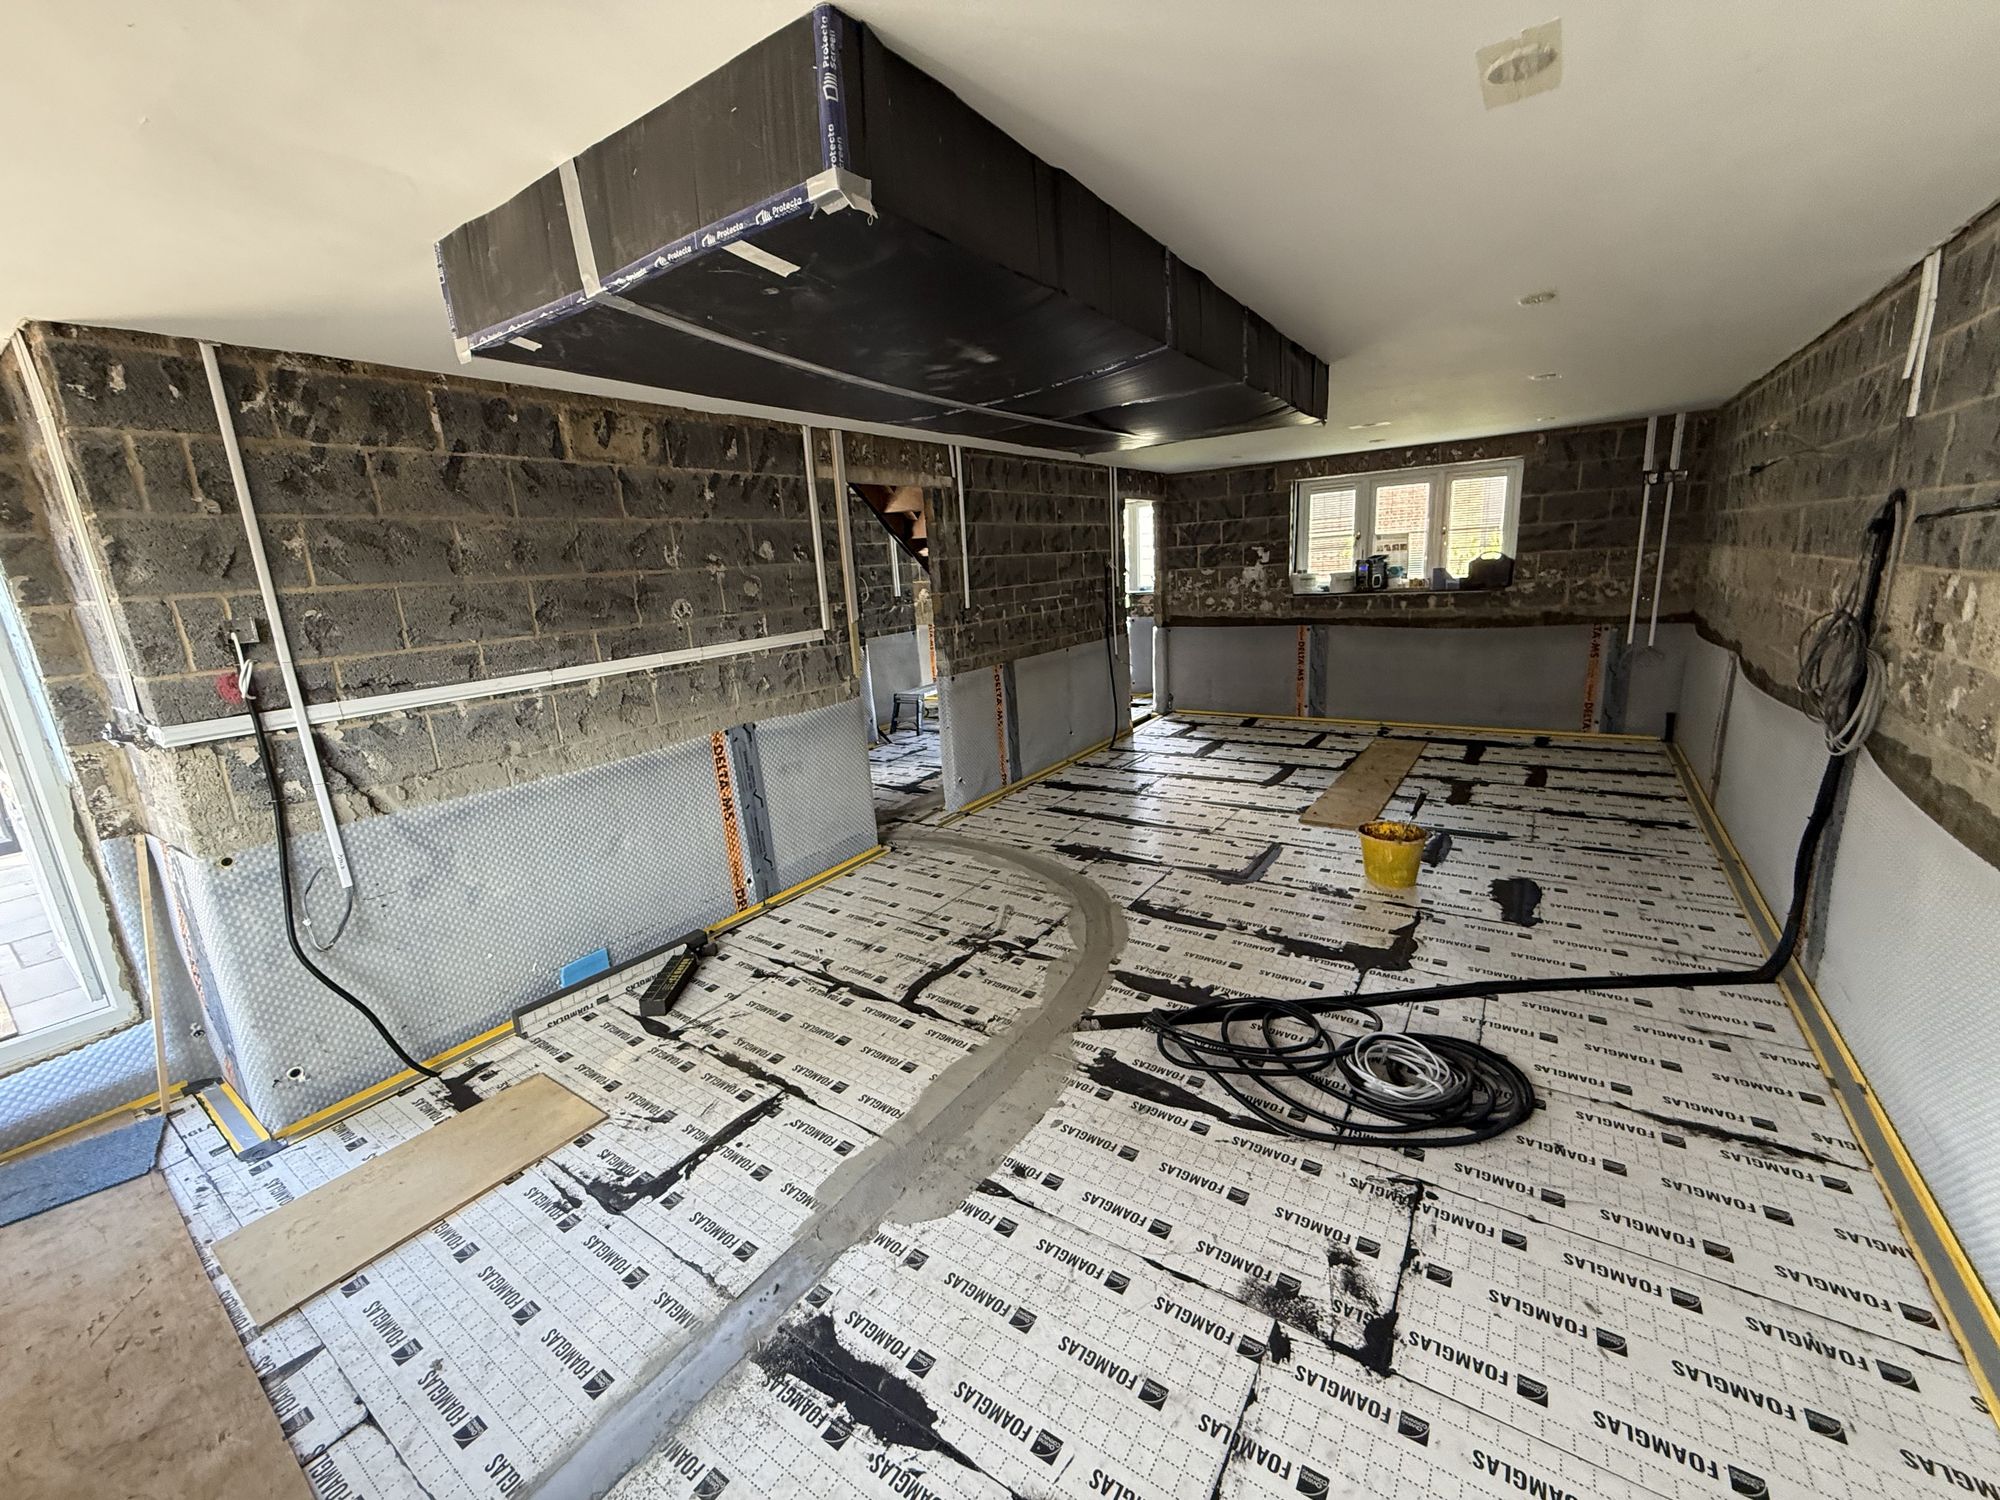
First layer of 50mm Foamglas insulation complete — water and electrical services encased within, pipework runs and conduit visible beneath the surface
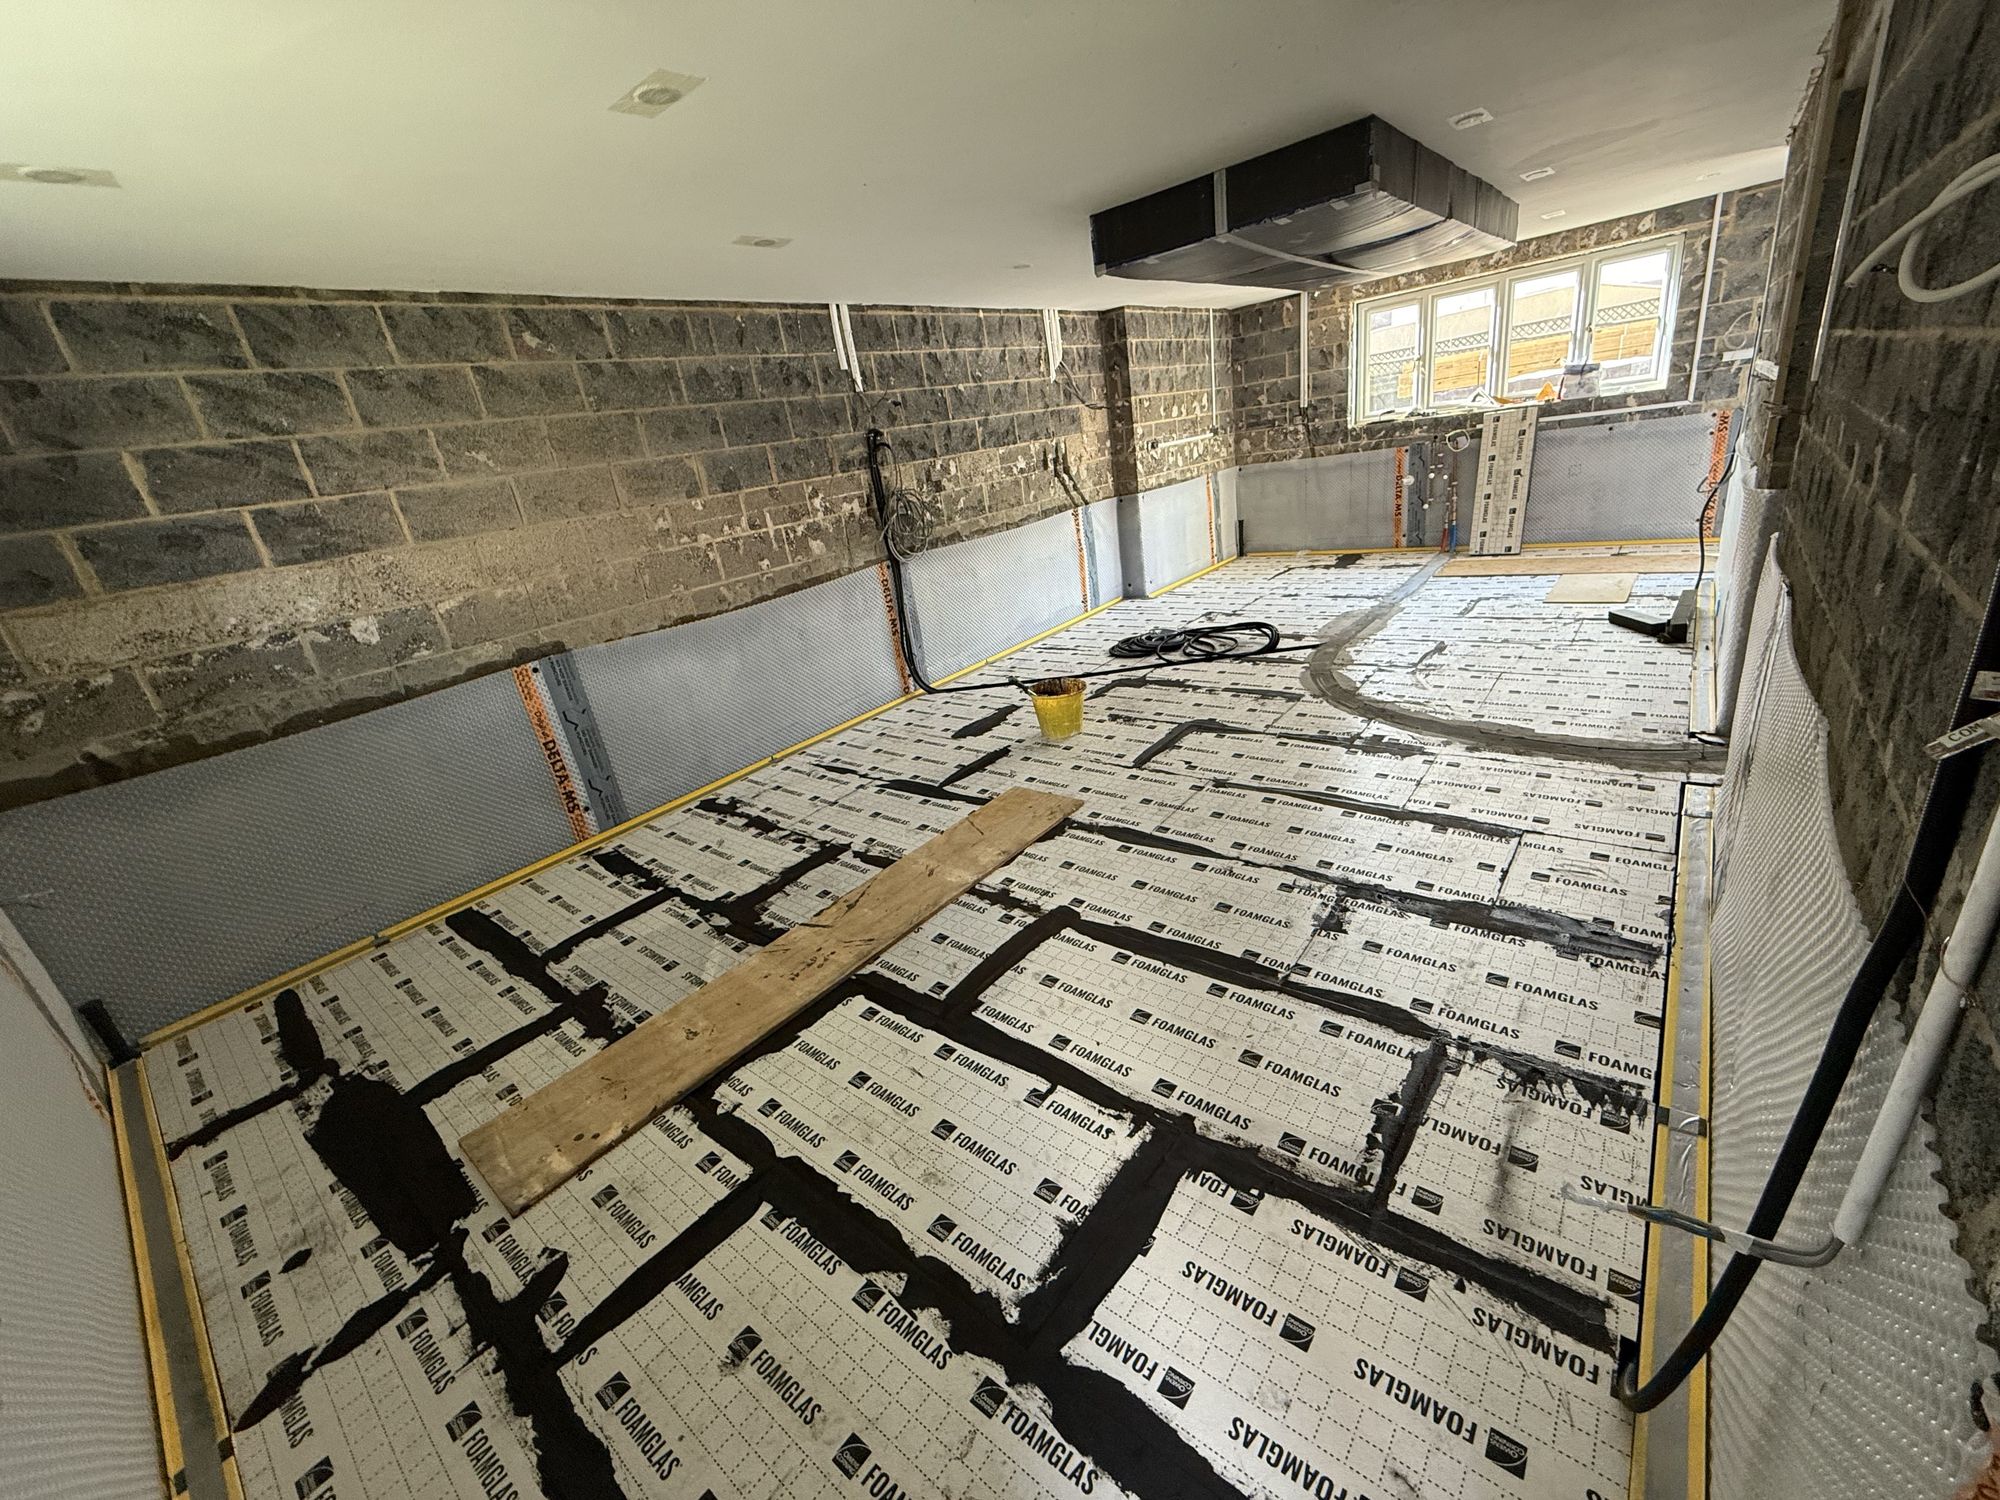
Second layer of 70mm Foamglas insulation bedded crossways over the first layer — giving a total of 120mm of insulation, impermeable and rot-proof, specified to Ciria C790
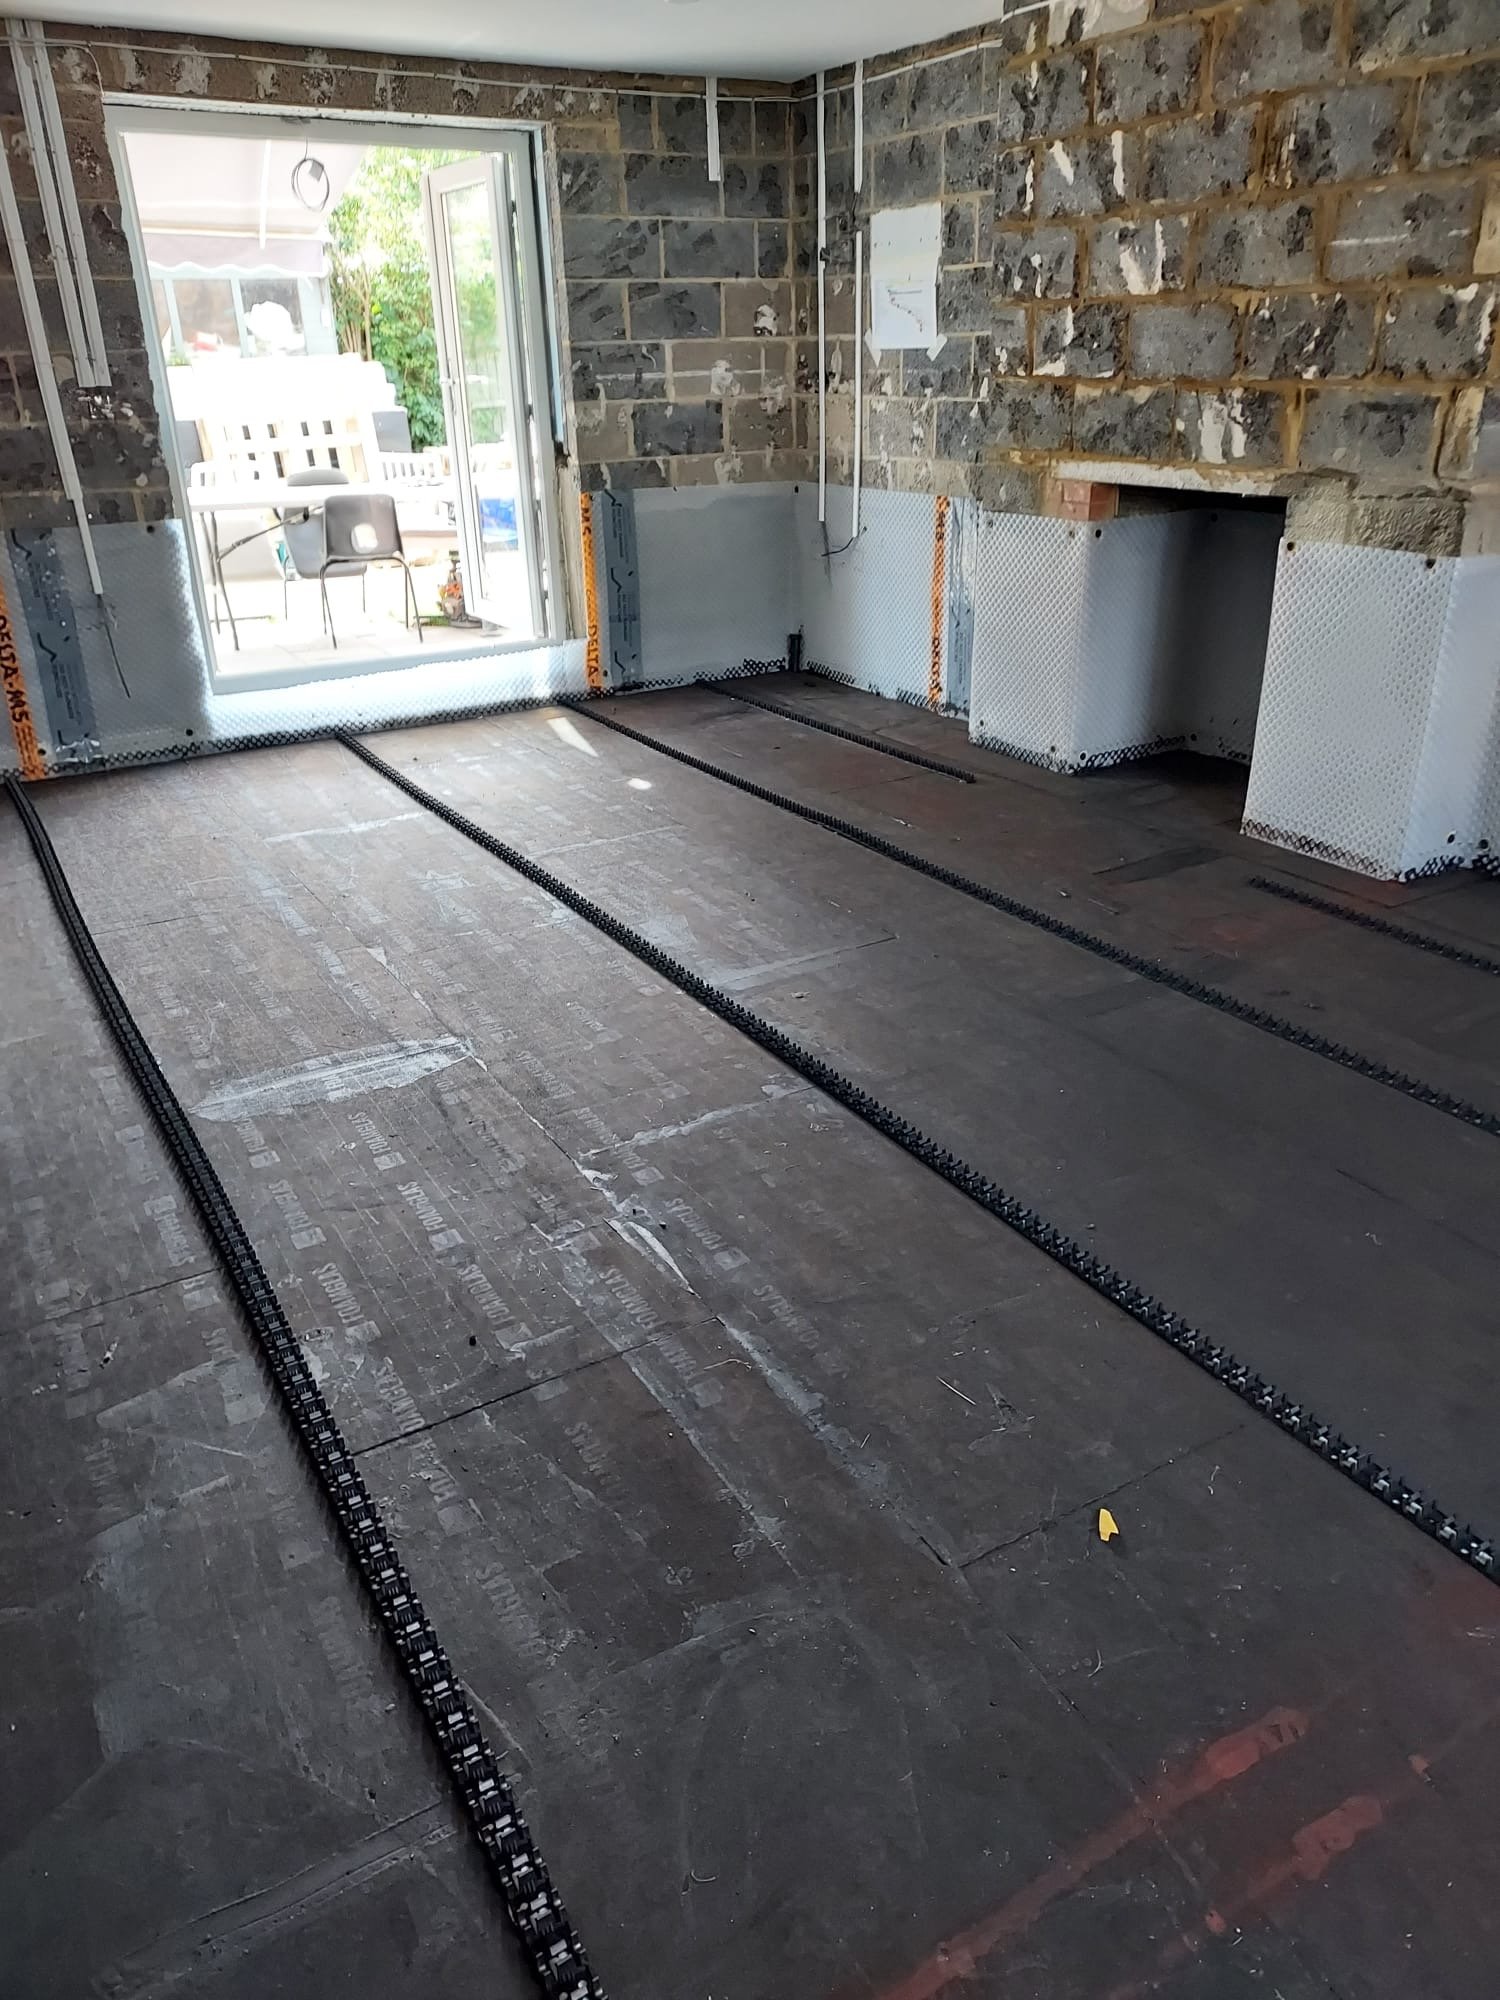
Living room — Foamglas insulation complete, sealed with waterproof bitumen sealant, UFH pipe clips laid ready for the underfloor heating pipes
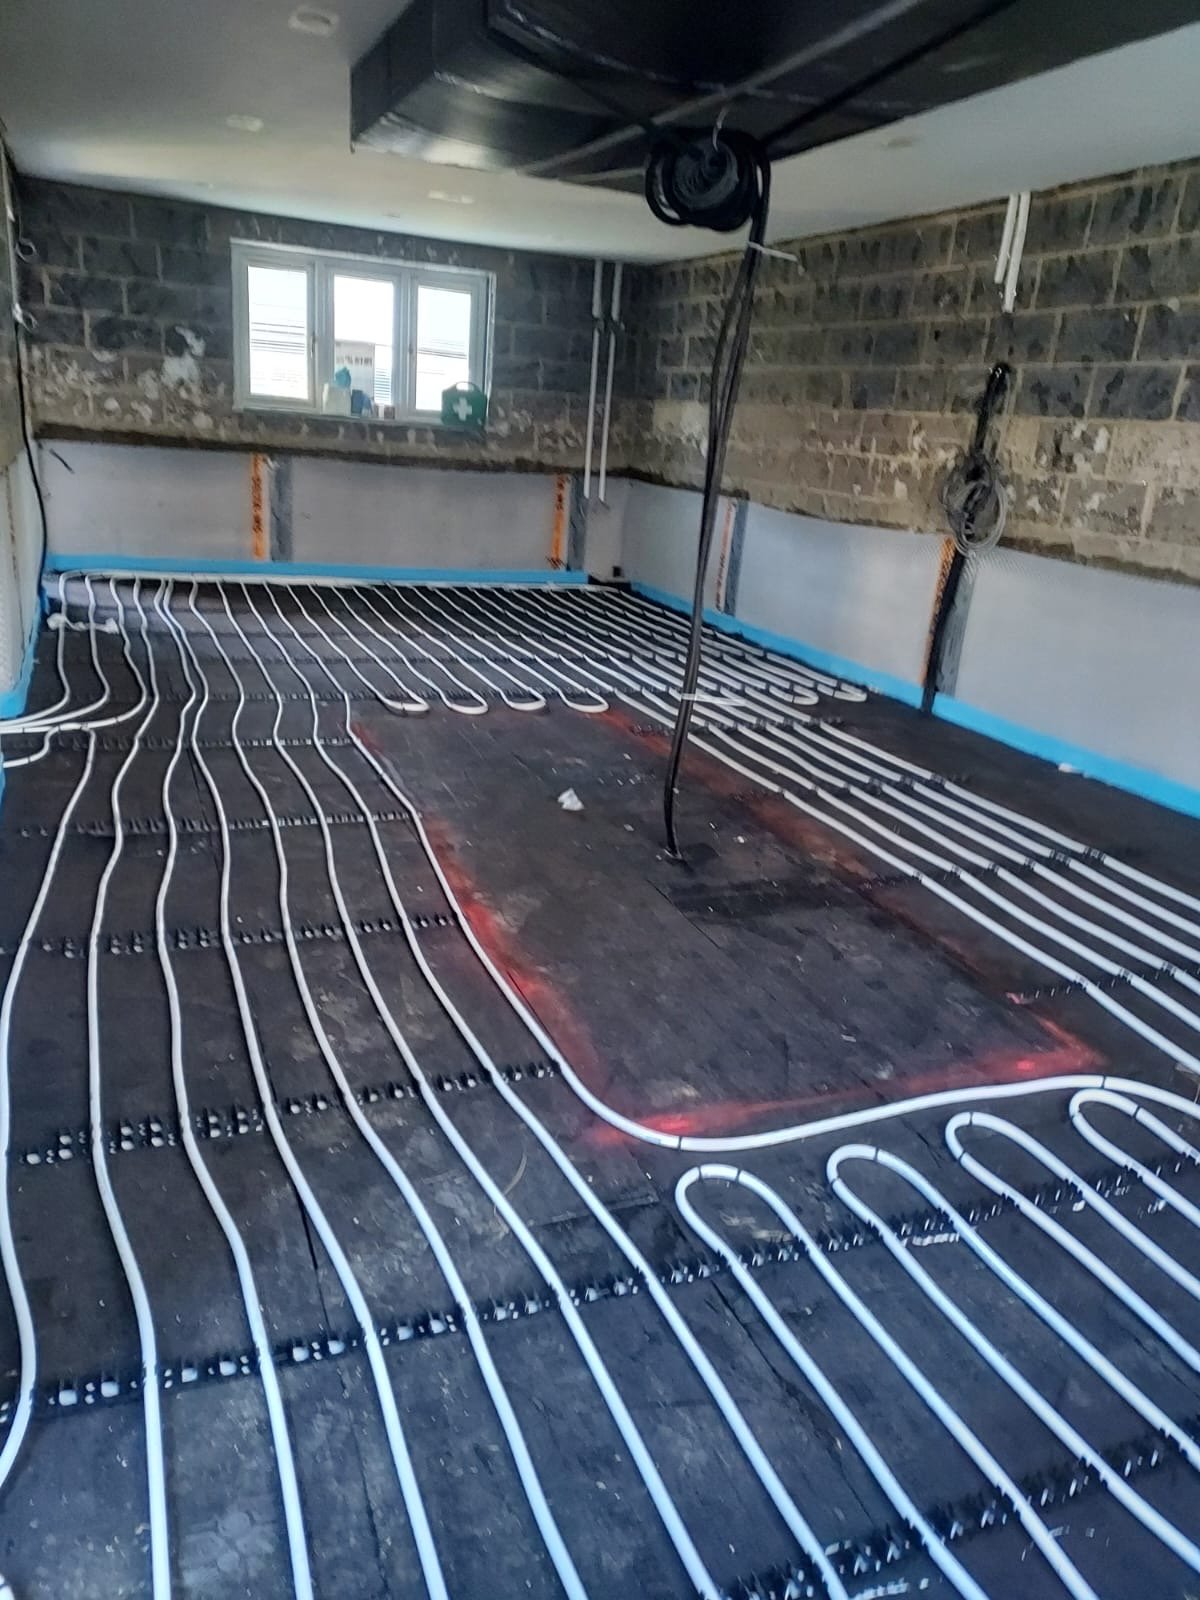
Kitchen floor — underfloor heating pipes laid and ready for screed, prior to the walls being battened out
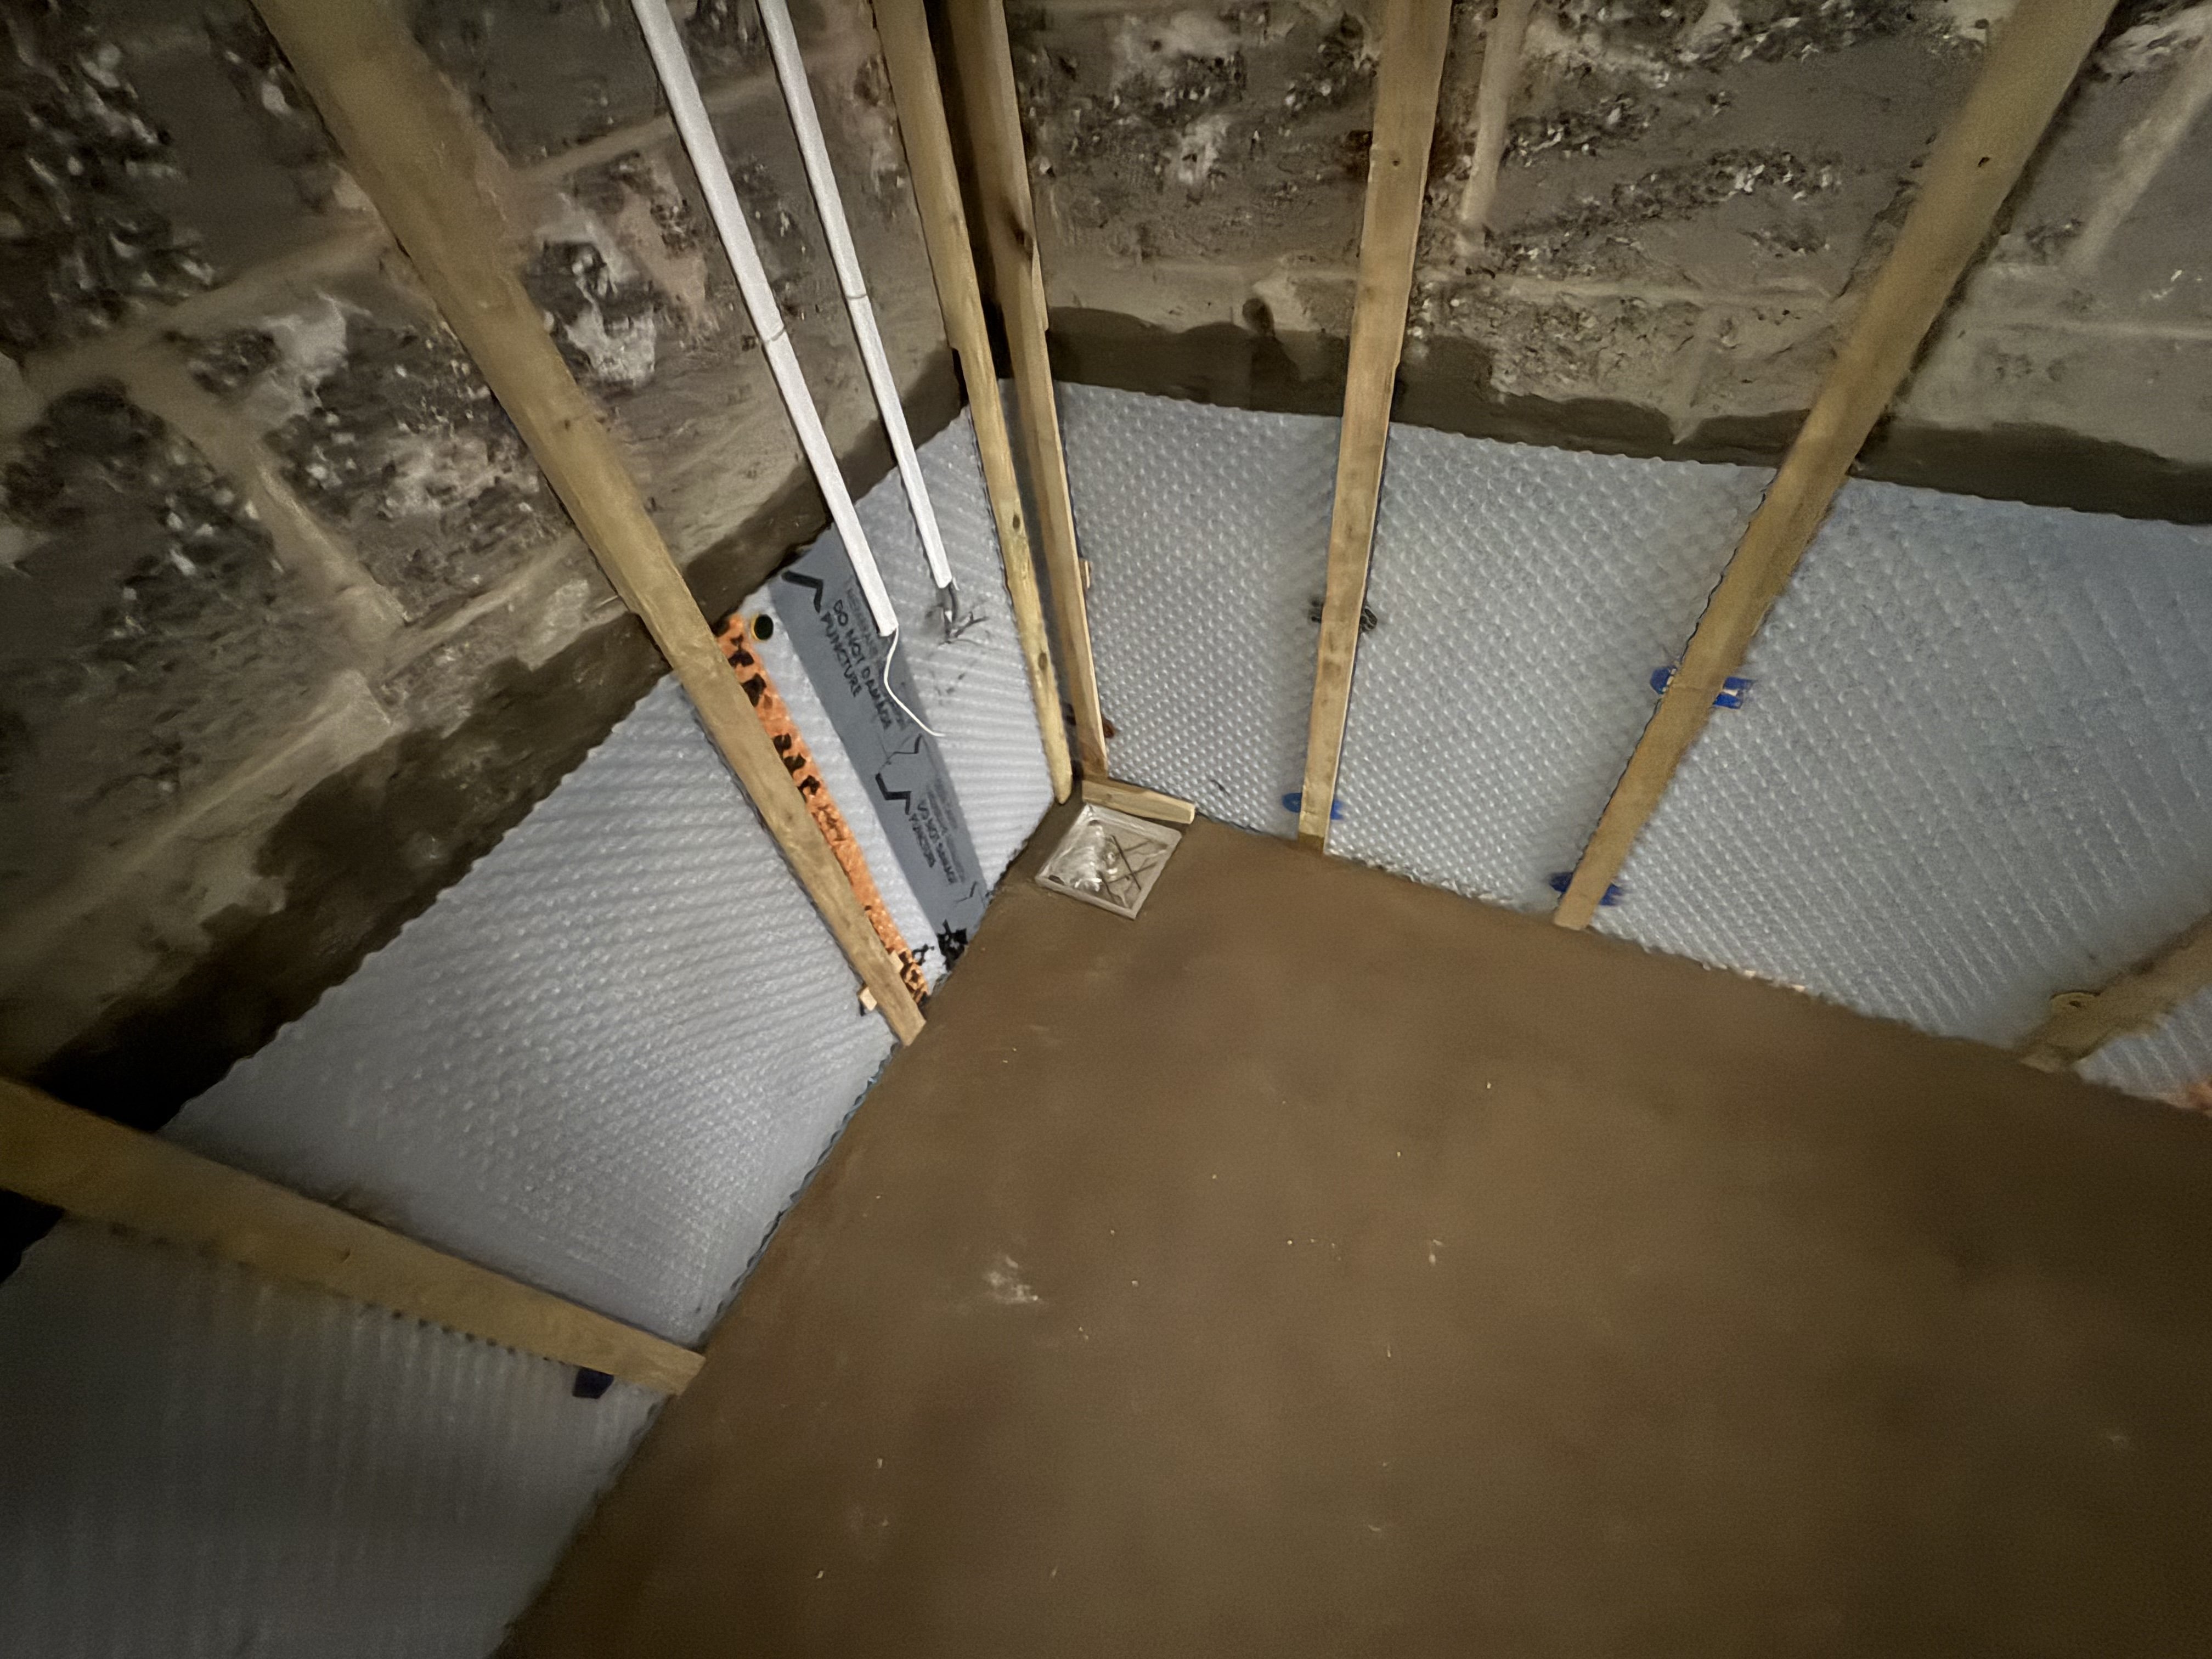
Sump drain access hatch and Delta-MS cavity membrane fixed to battened walls — all tanking complete and ready for plasterboard and Ditra
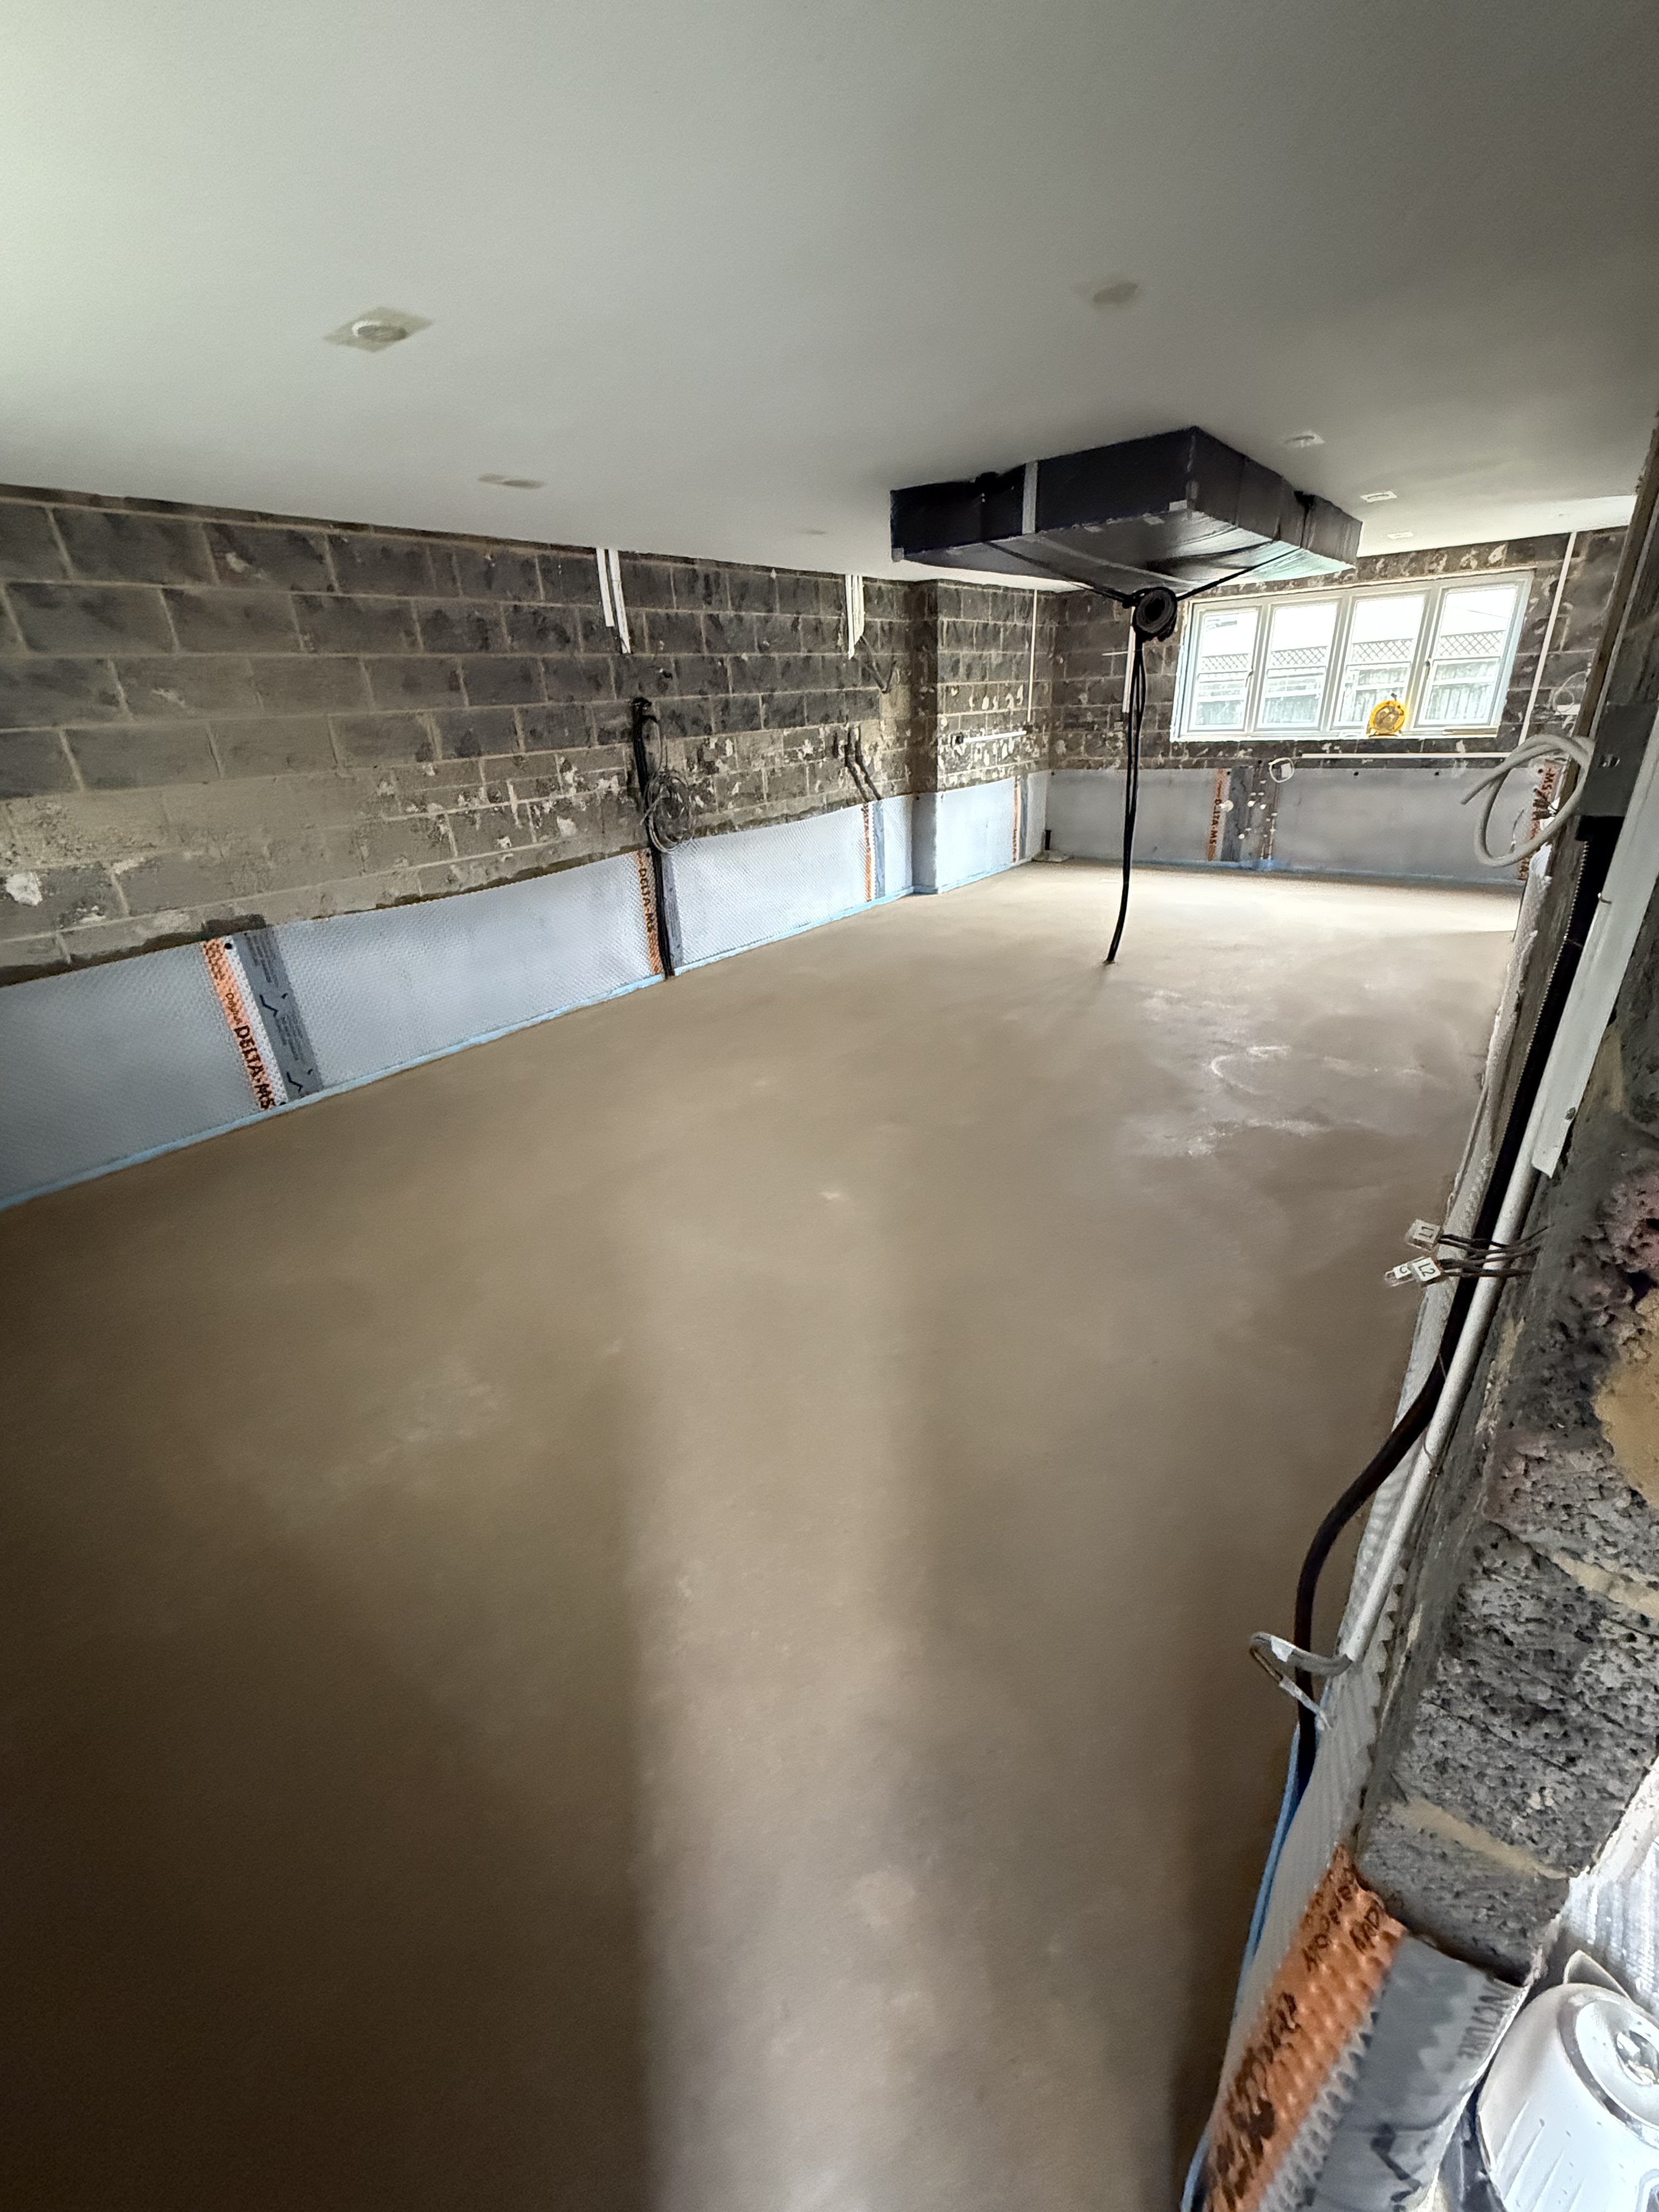
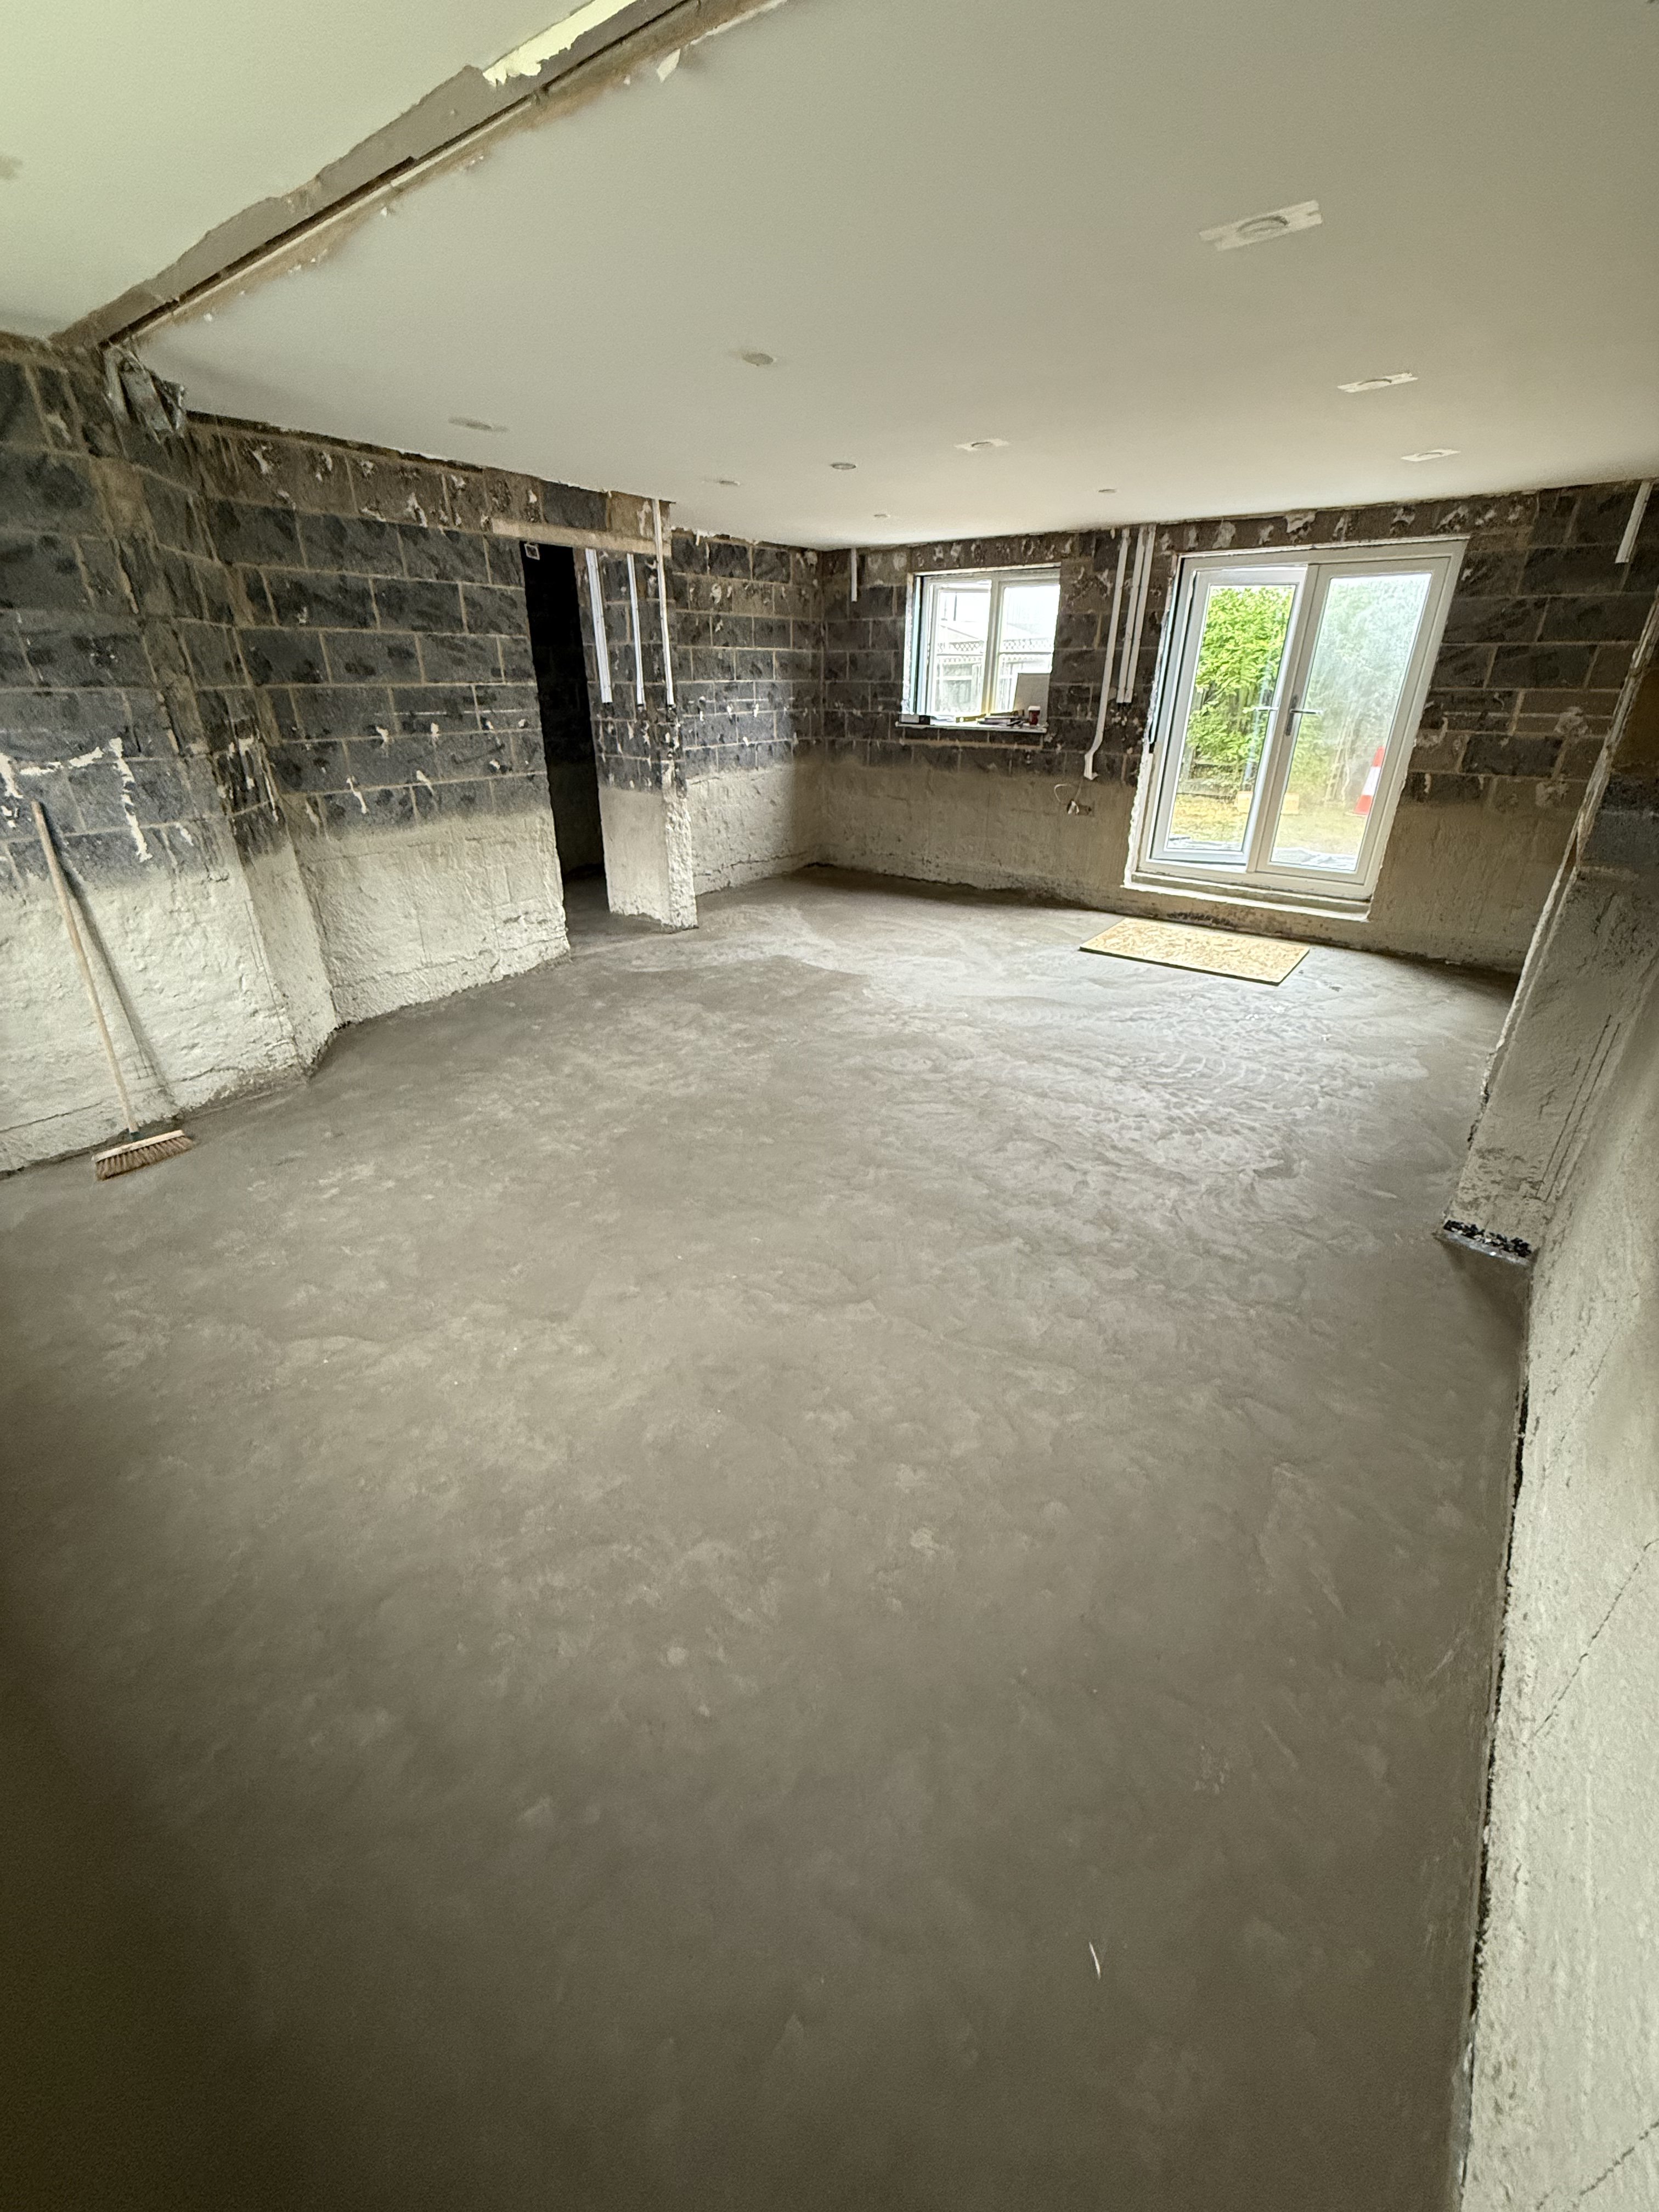
Kitchen floor — waterproof screed laid
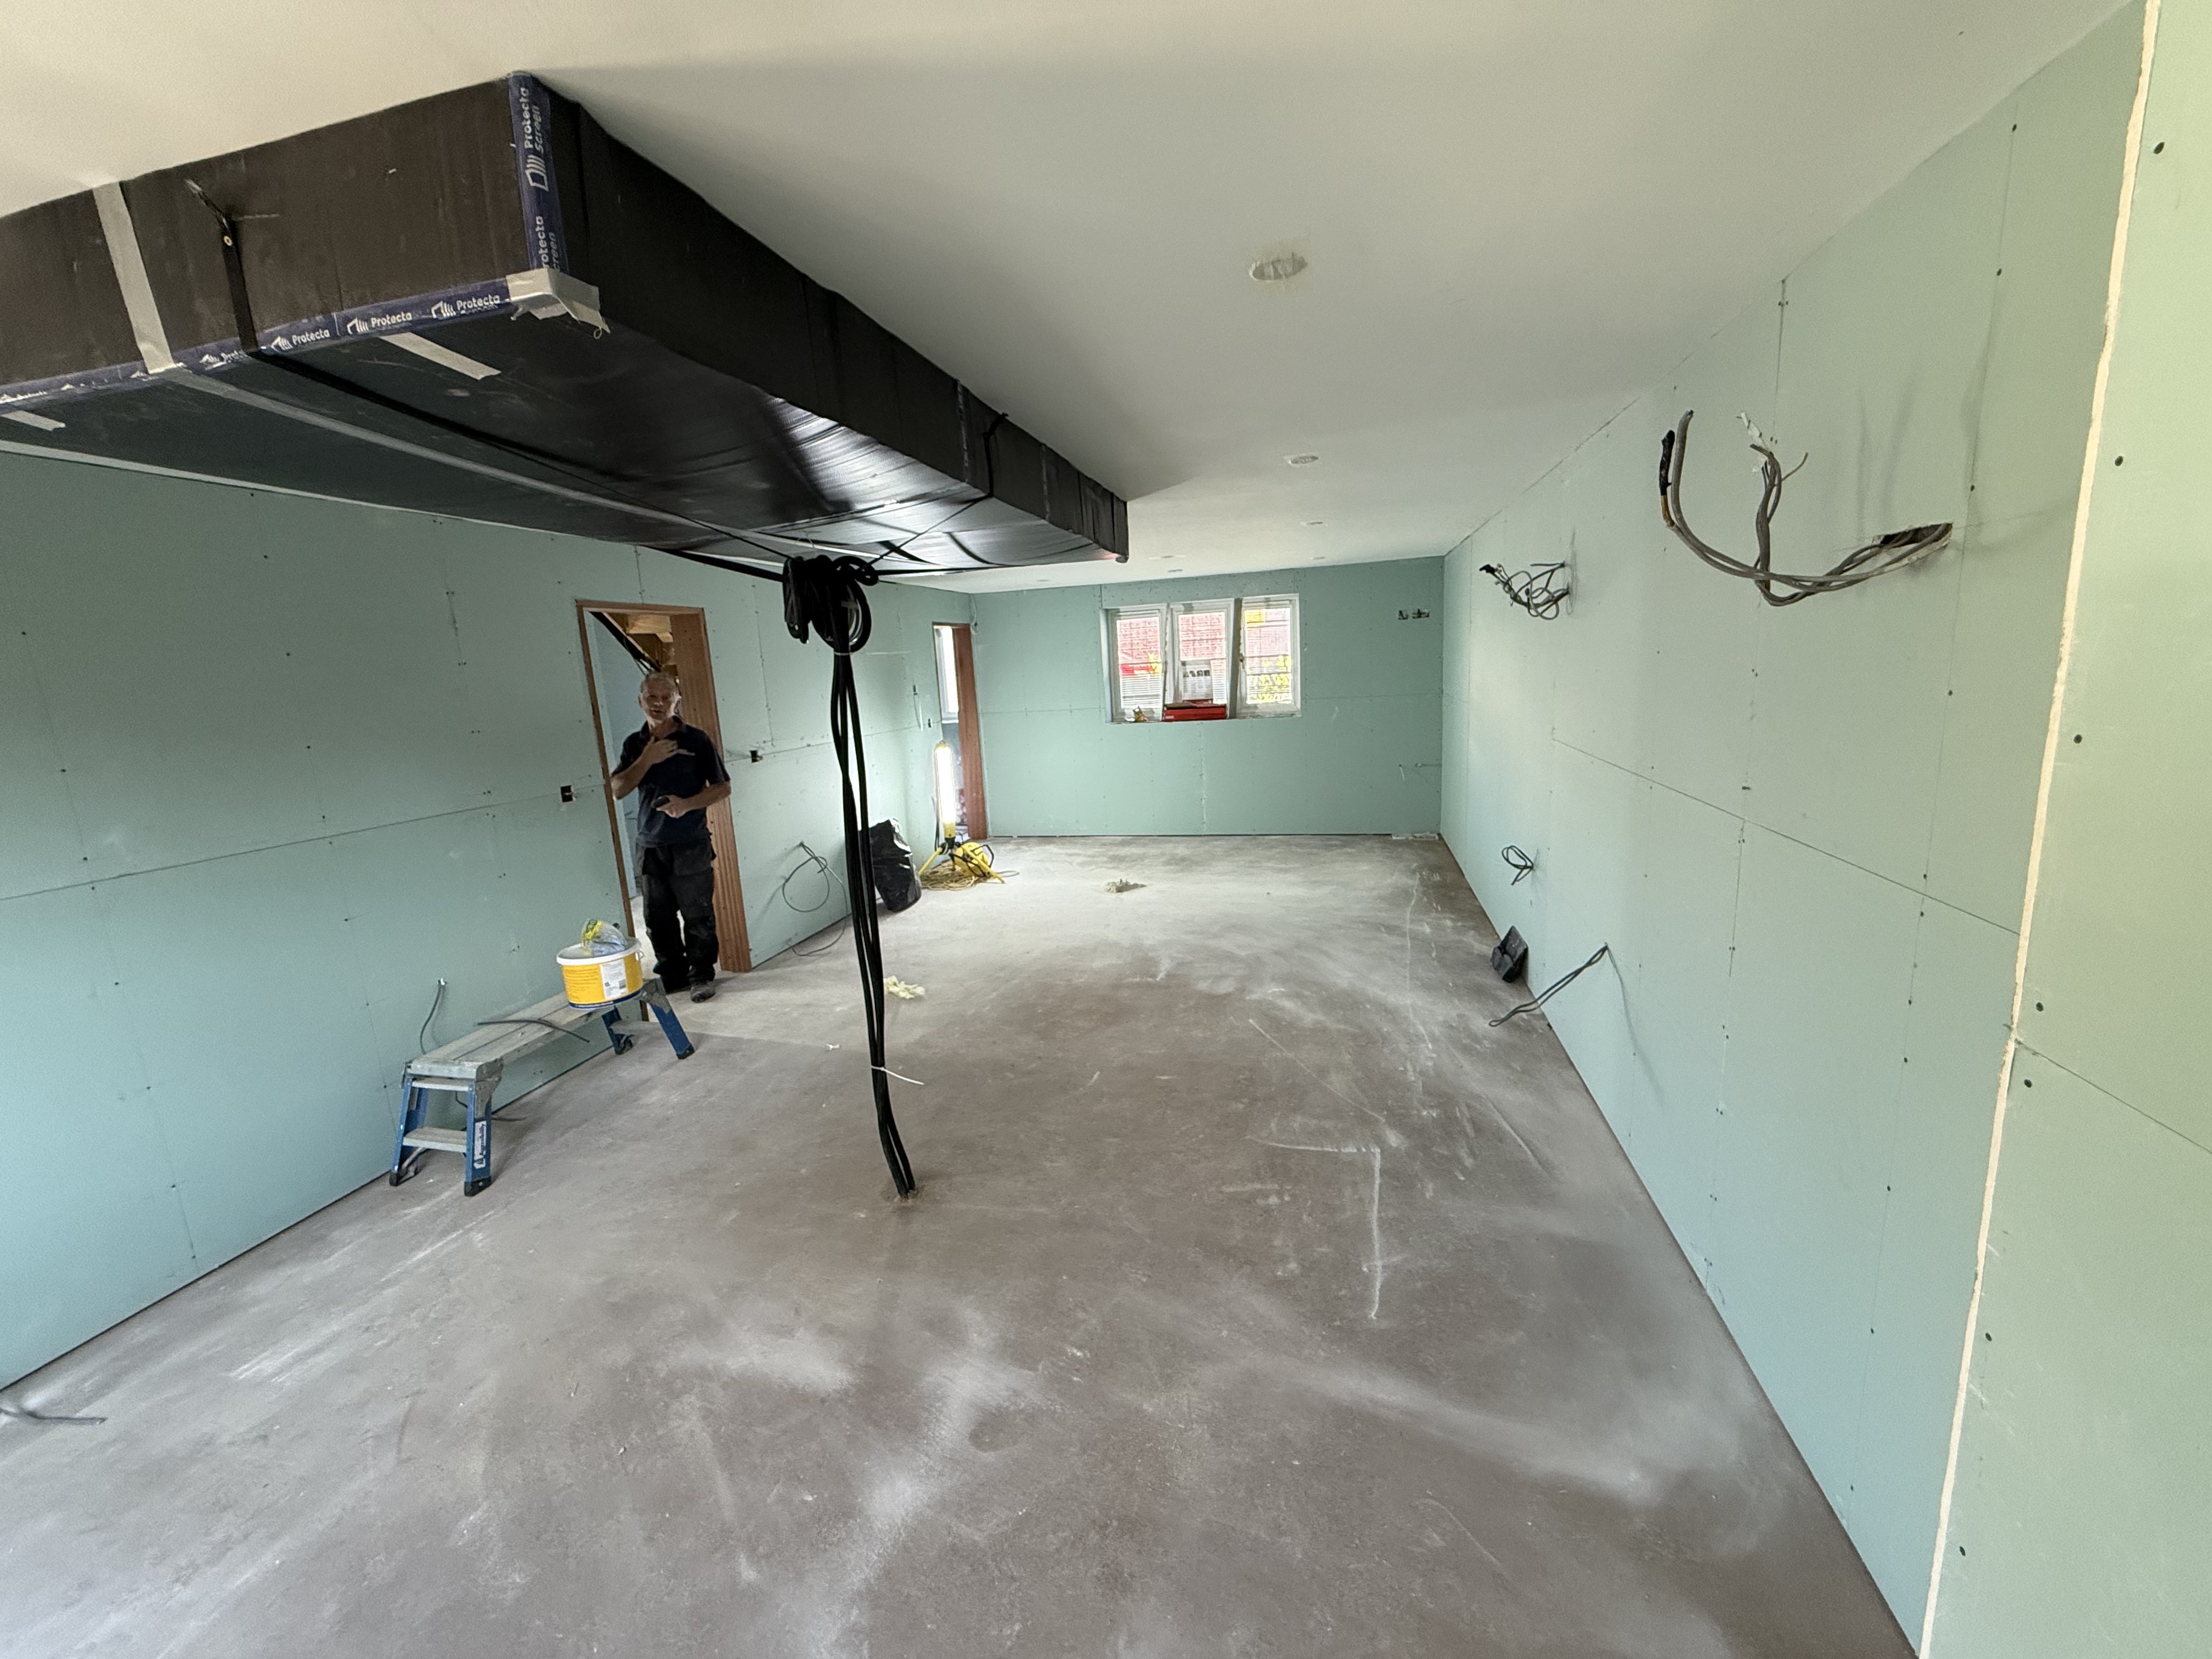
Kitchen — moisture-resistant plasterboard fitted throughout, walls battened out to receive the boards
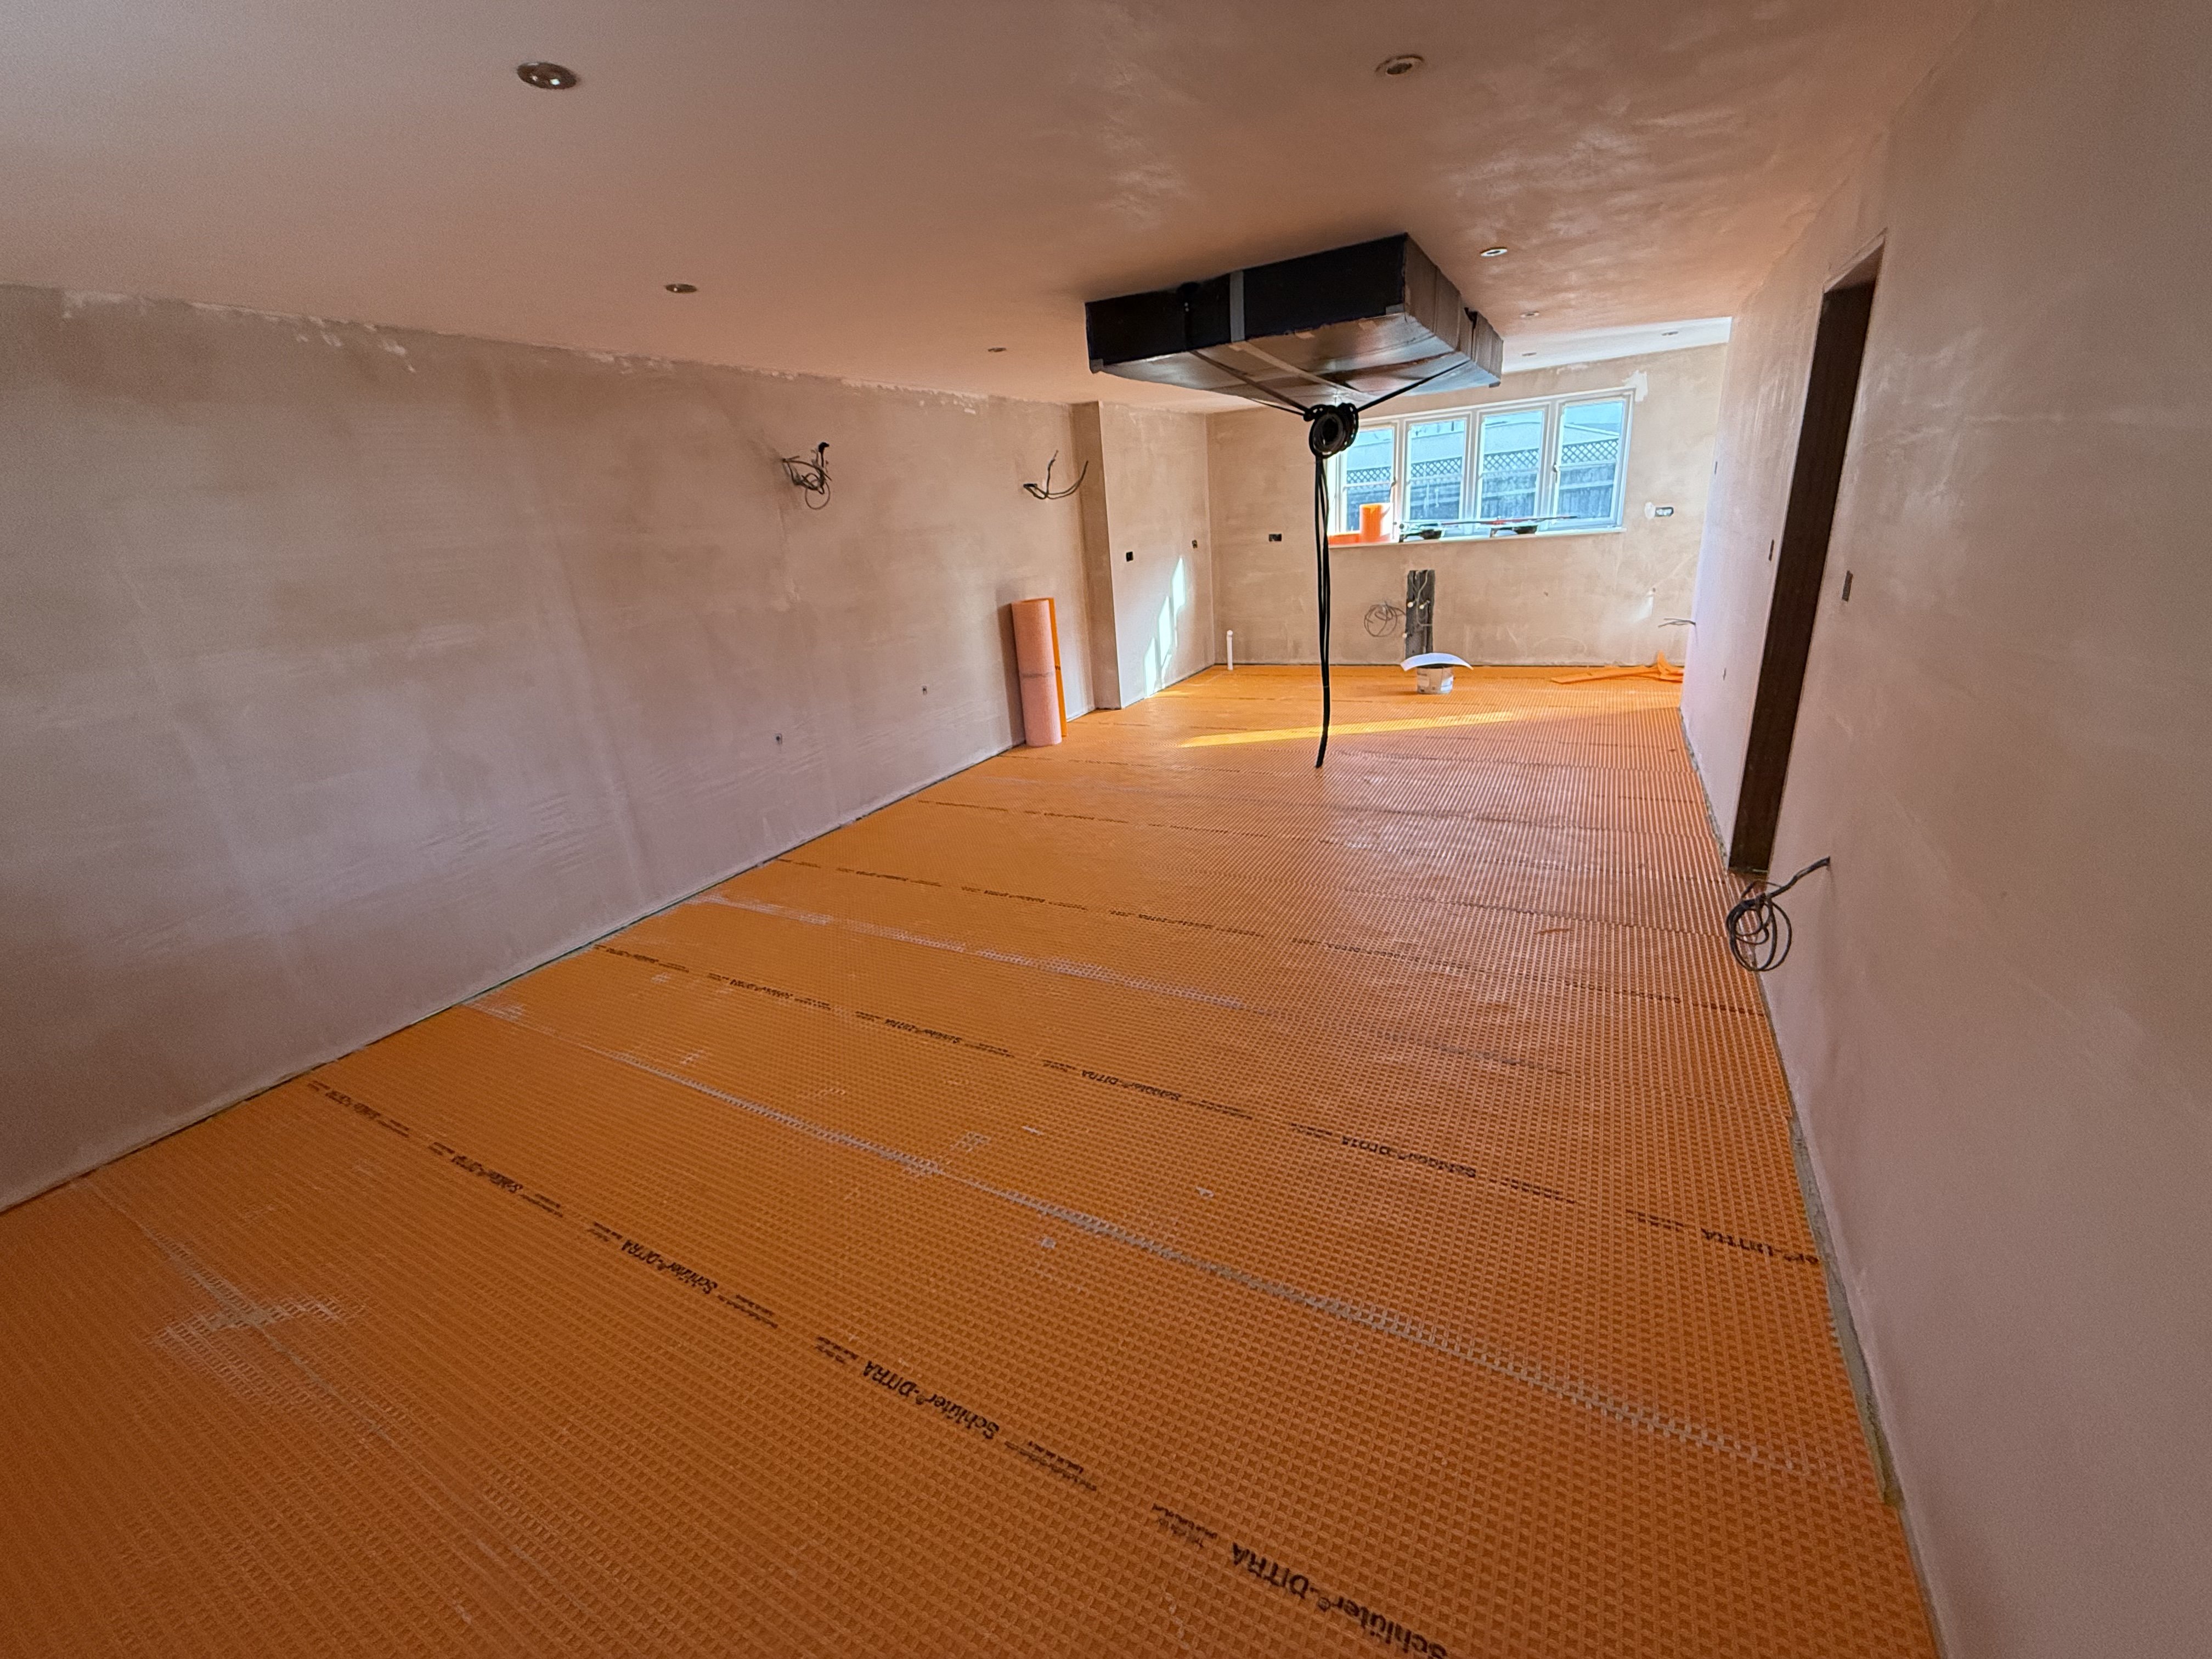
Kitchen plastered throughout — Schlüter Ditra uncoupling membrane applied to the floor ready for tiling
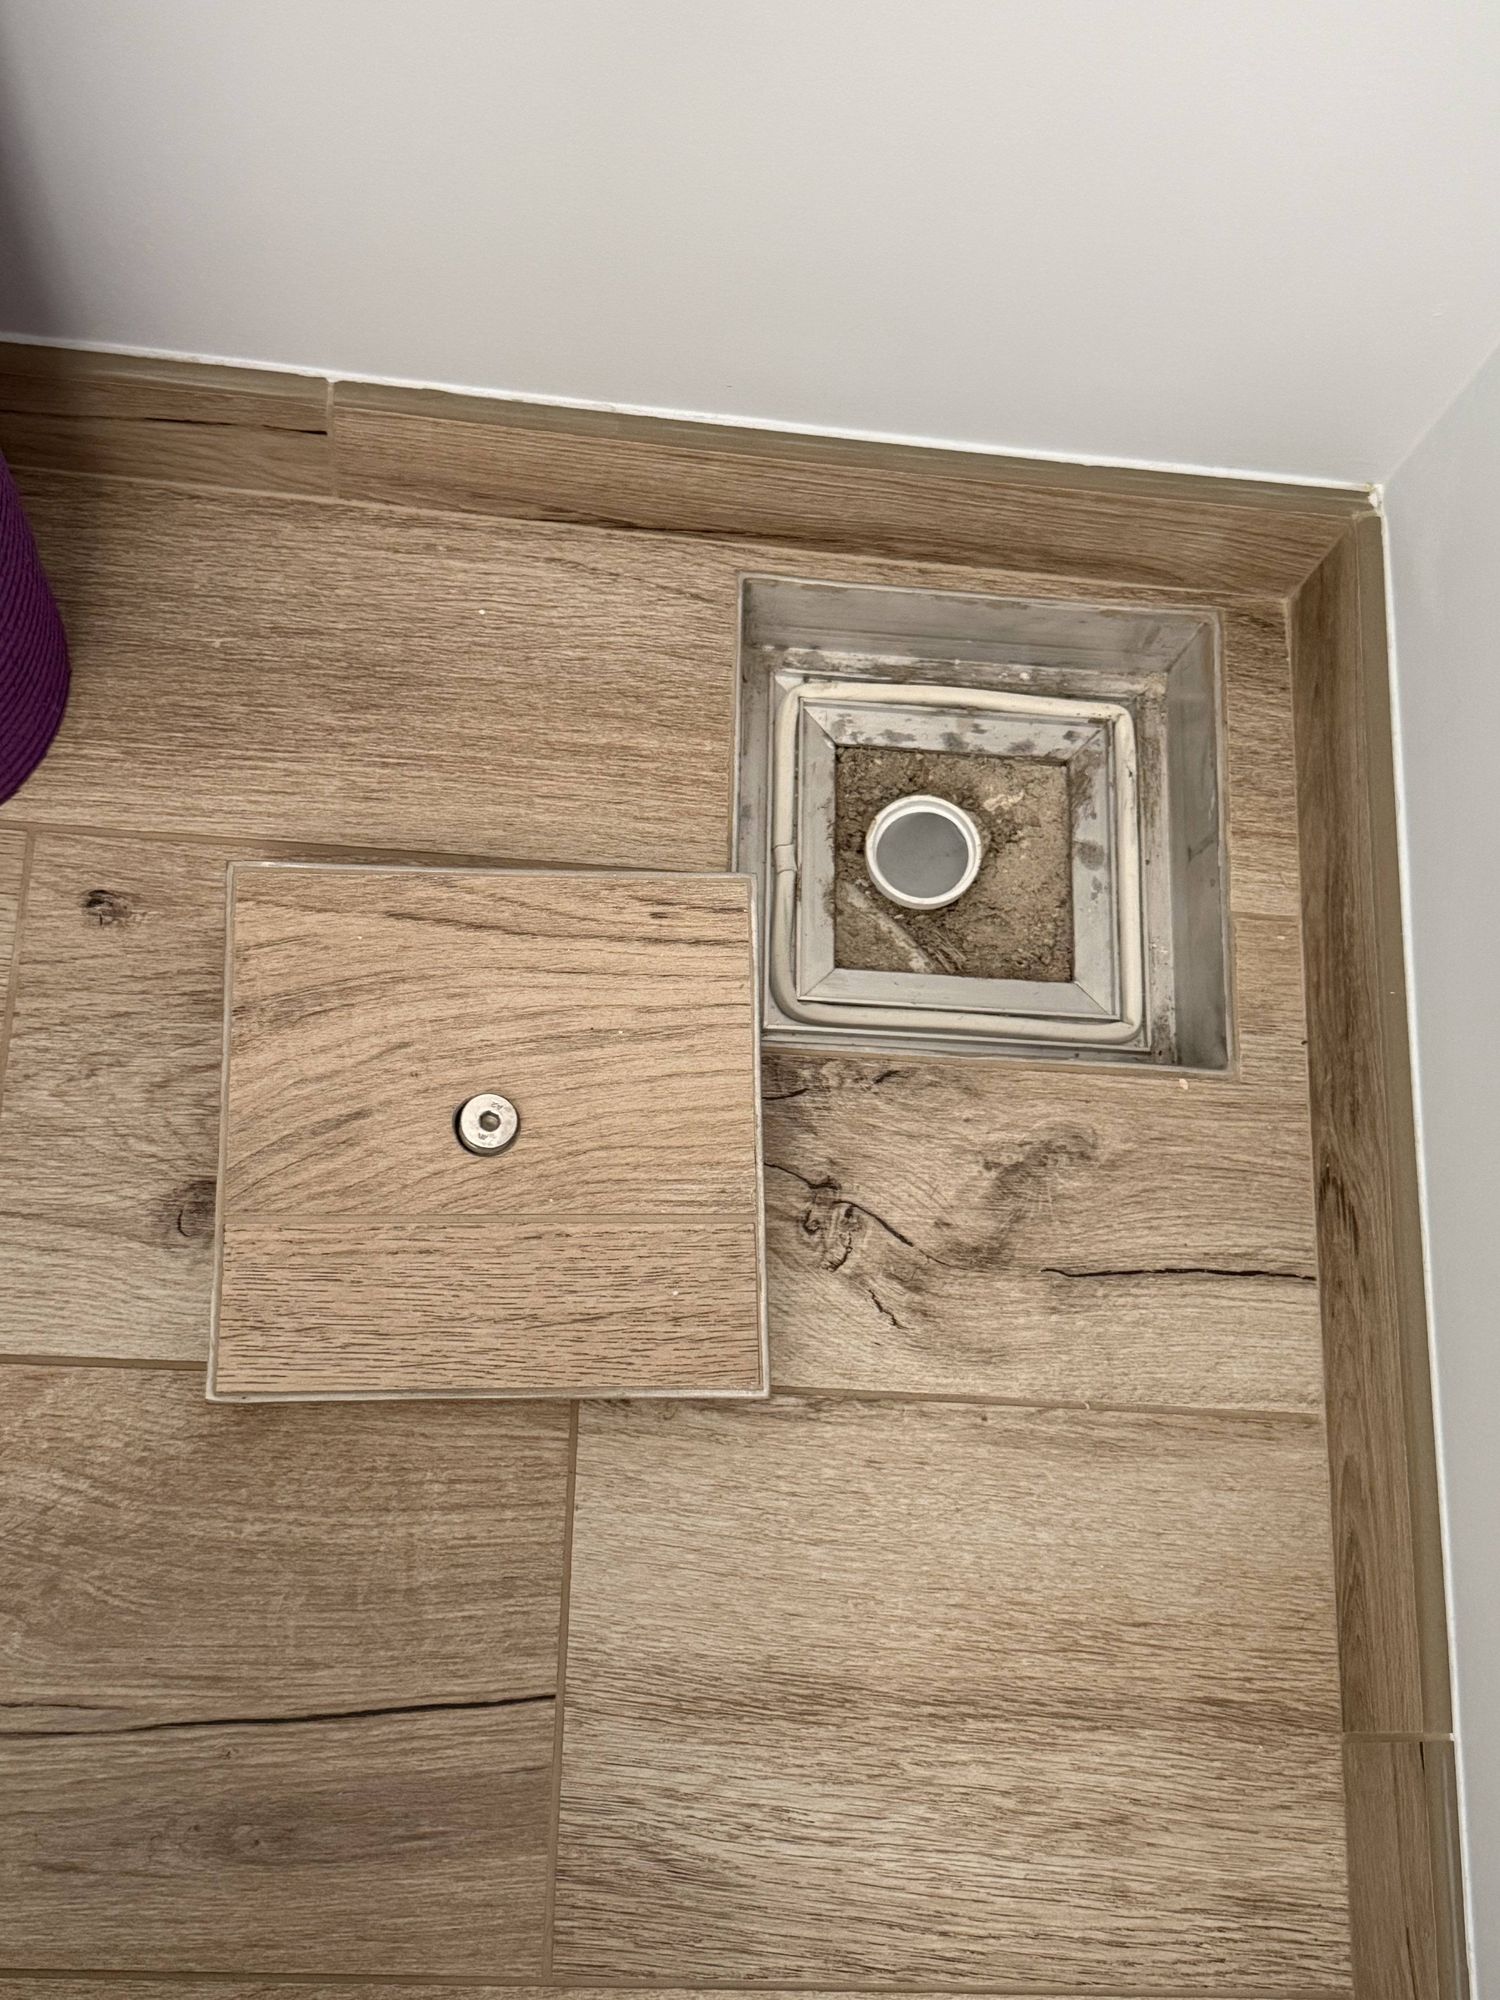
Floor-level concealed service hatch — flush-fitted with matching tiles, open to show access to the sump drain system

The completed kitchen — shaker units, island, quartz worktop and LVT flooring. Built to last.
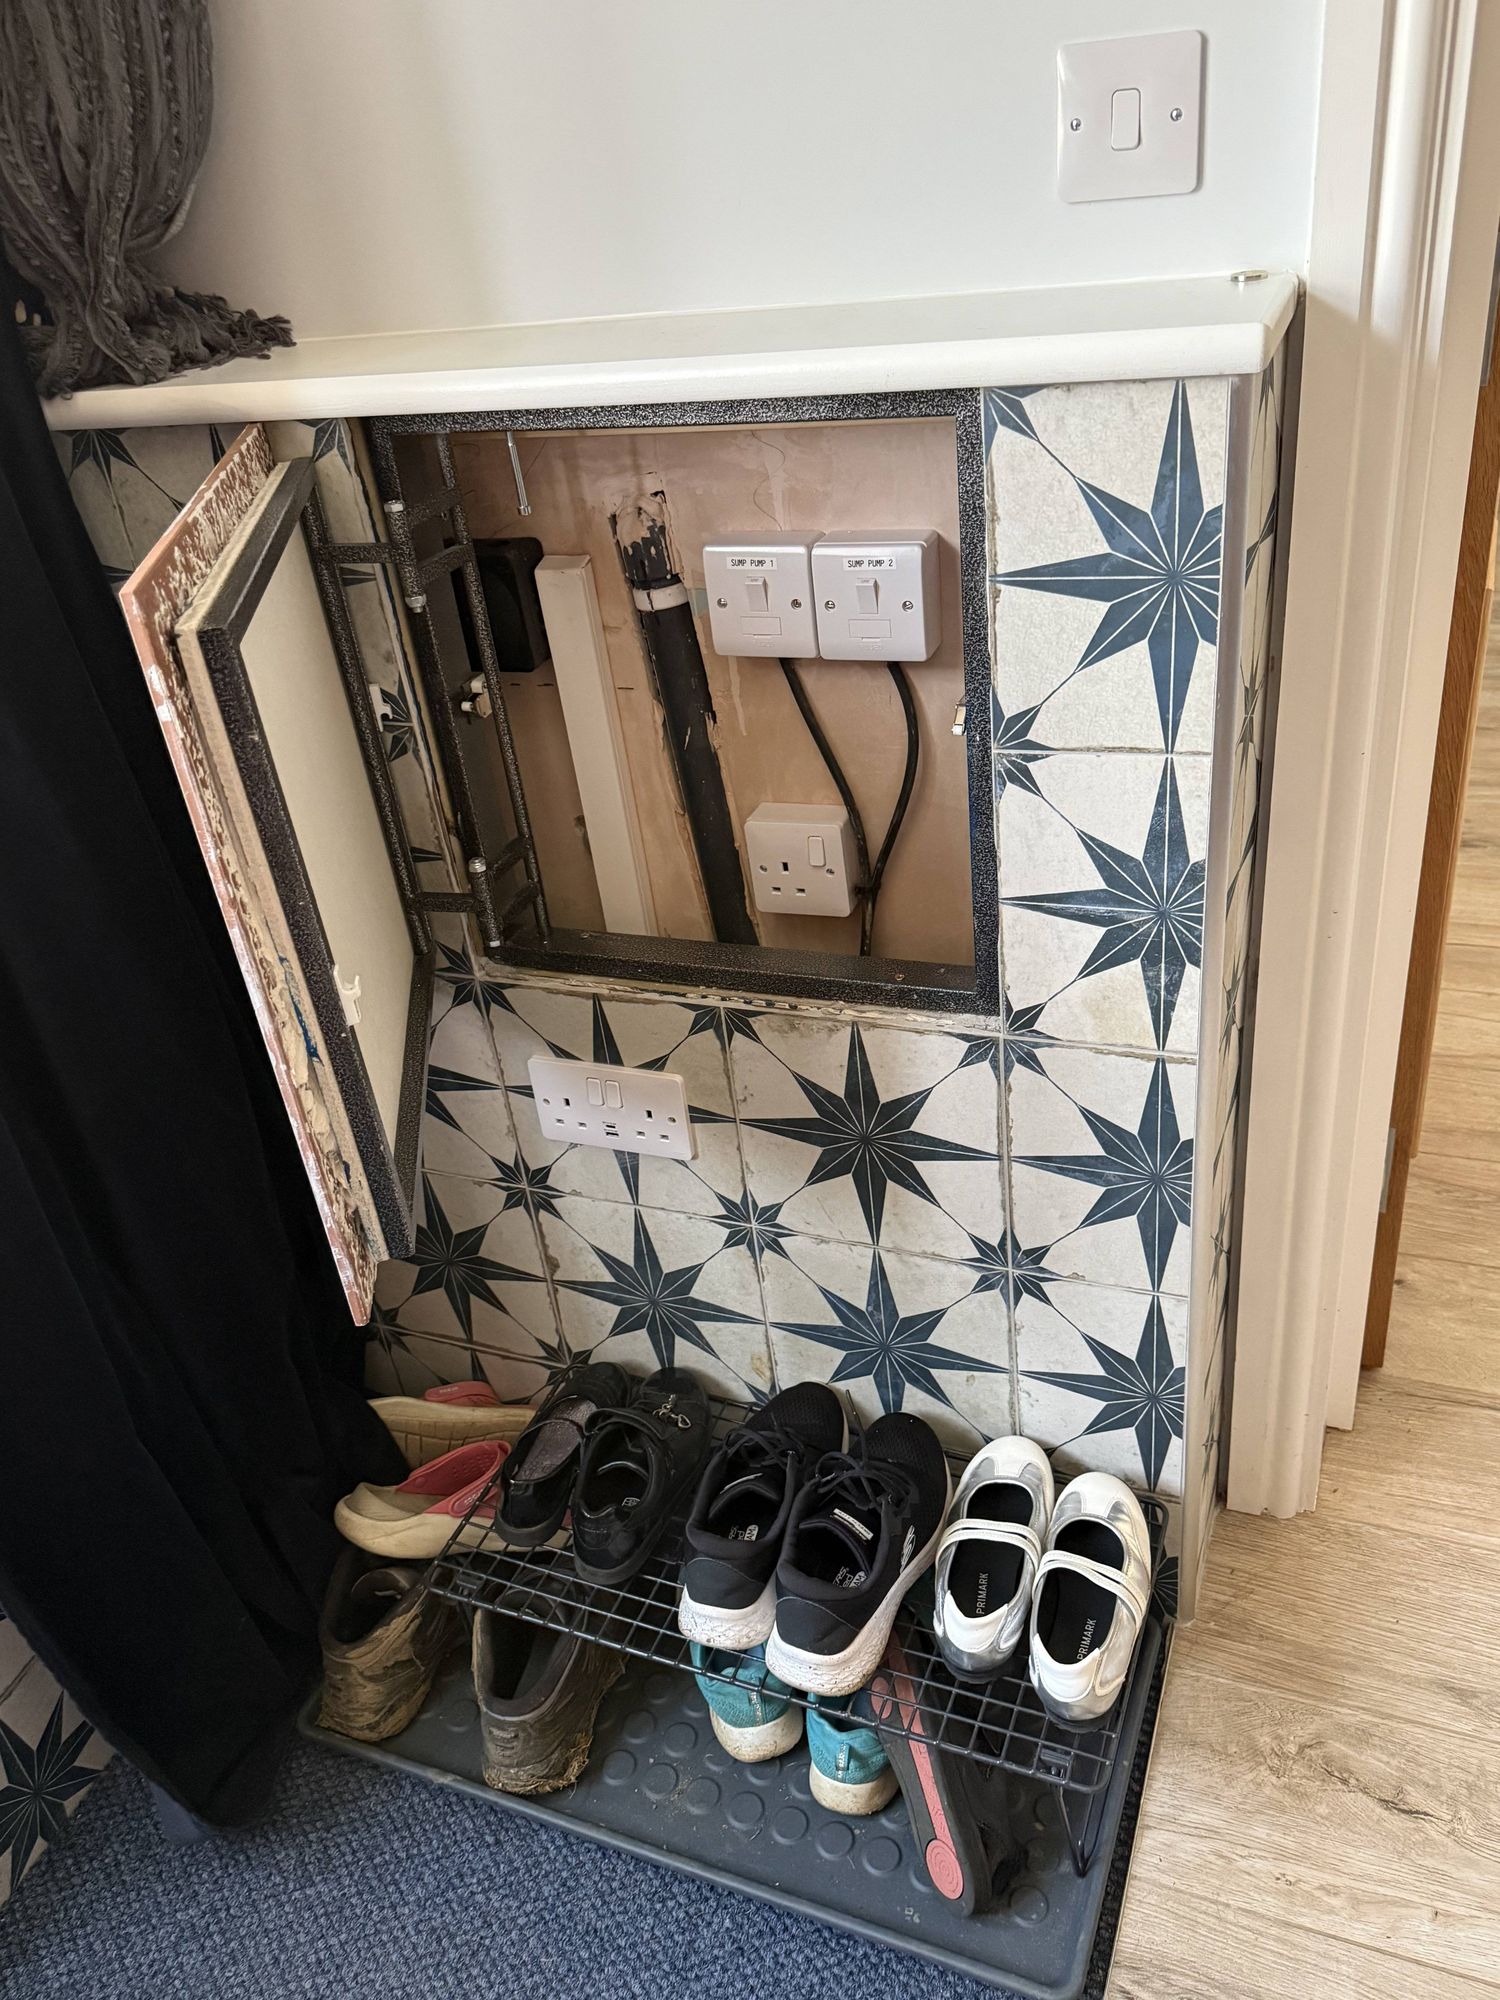
Sump pump service cabinet — electrical controls for pump one and two concealed behind a tile-matched hatch